
I am so excited to share my recipe for Spicy Buffalo Chicken Parmesan that I created for a recipe contest using Miller’s Banana Pepper Sauce. Miller’s began as a home kitchen experiment, cooking up homemade hot sauces for family and friends. Twenty years later, their unique award-winning banana pepper sauces are still crafted with care and attention to detail.
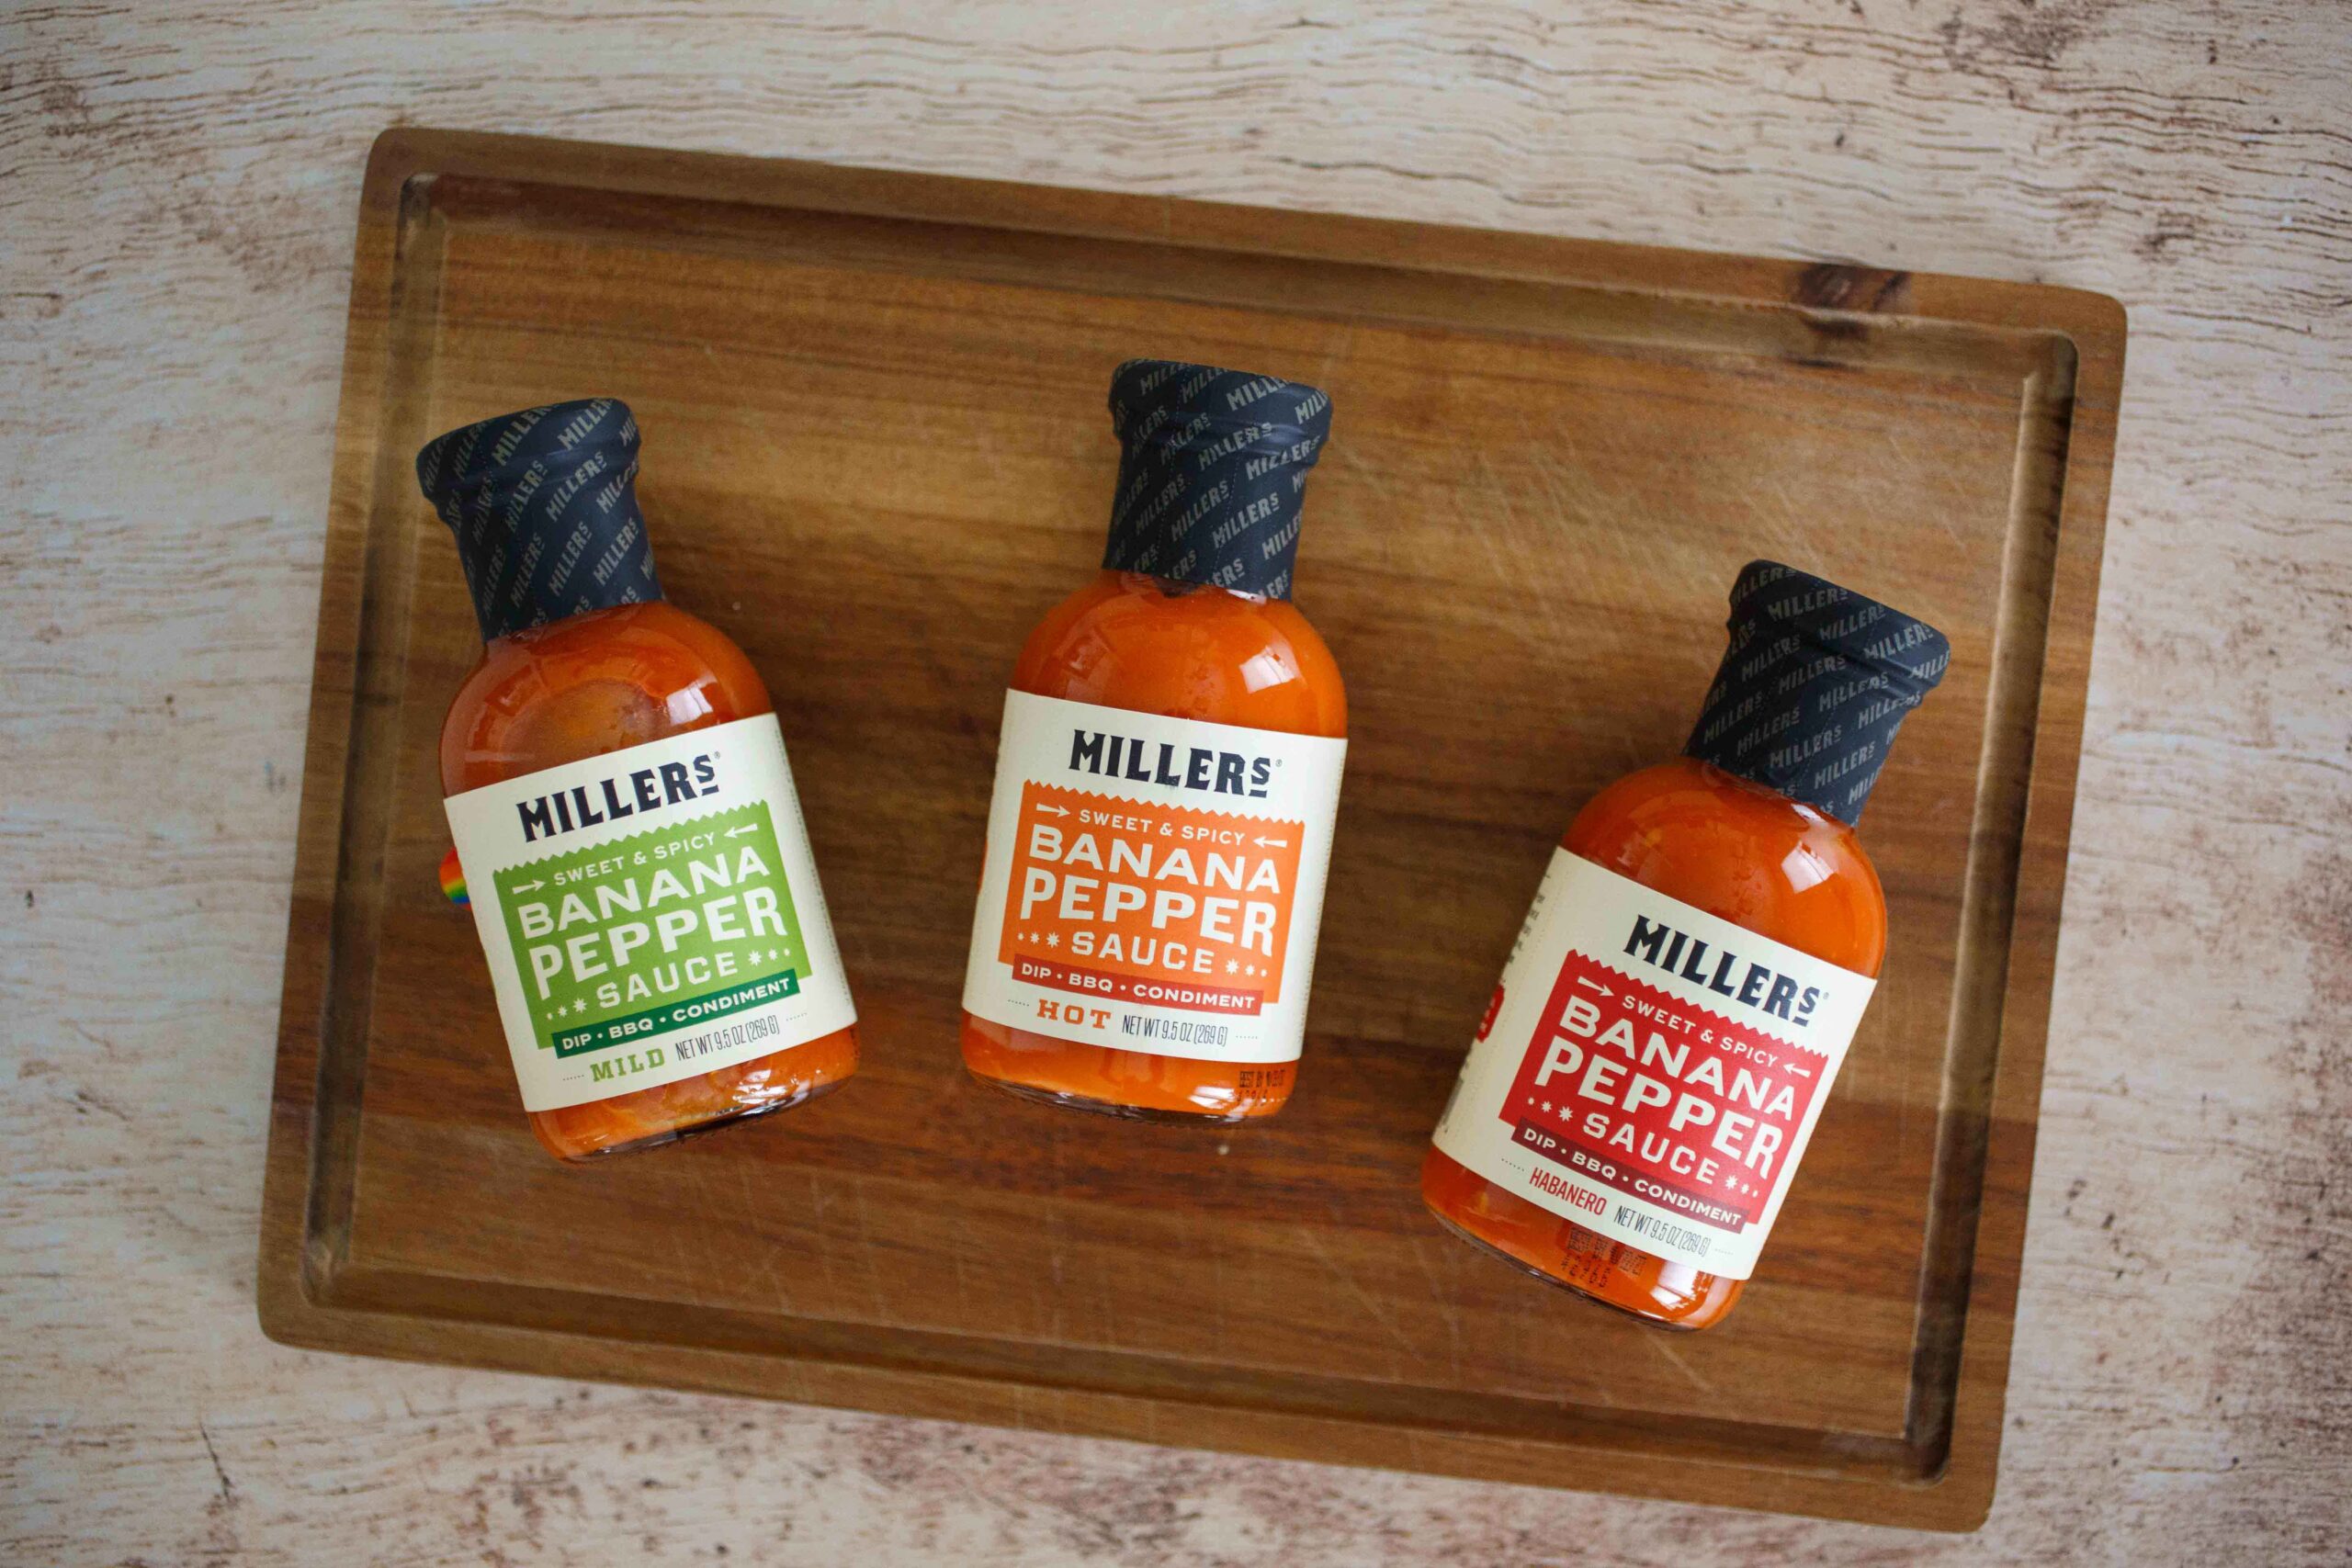
They use only fresh, vine-ripened banana and habanero peppers picked at the peak of freshness. They are then mixed with a special blend of spices (paprika, turmeric) raw sugar, distilled vinegar and mustard seeds to create a sweet and spicy sauce like no other! They have a mild, hot and habanero version of their sauce and each one is absolutely delicious, and also gluten-free and non-GMO verified.
The bold taste of Miller’s Banana Pepper Sauce is the perfect complement to everything, from cheese and hard pretzels, to burgers, BBQ, chicken and salmon. The possibilties are endless!
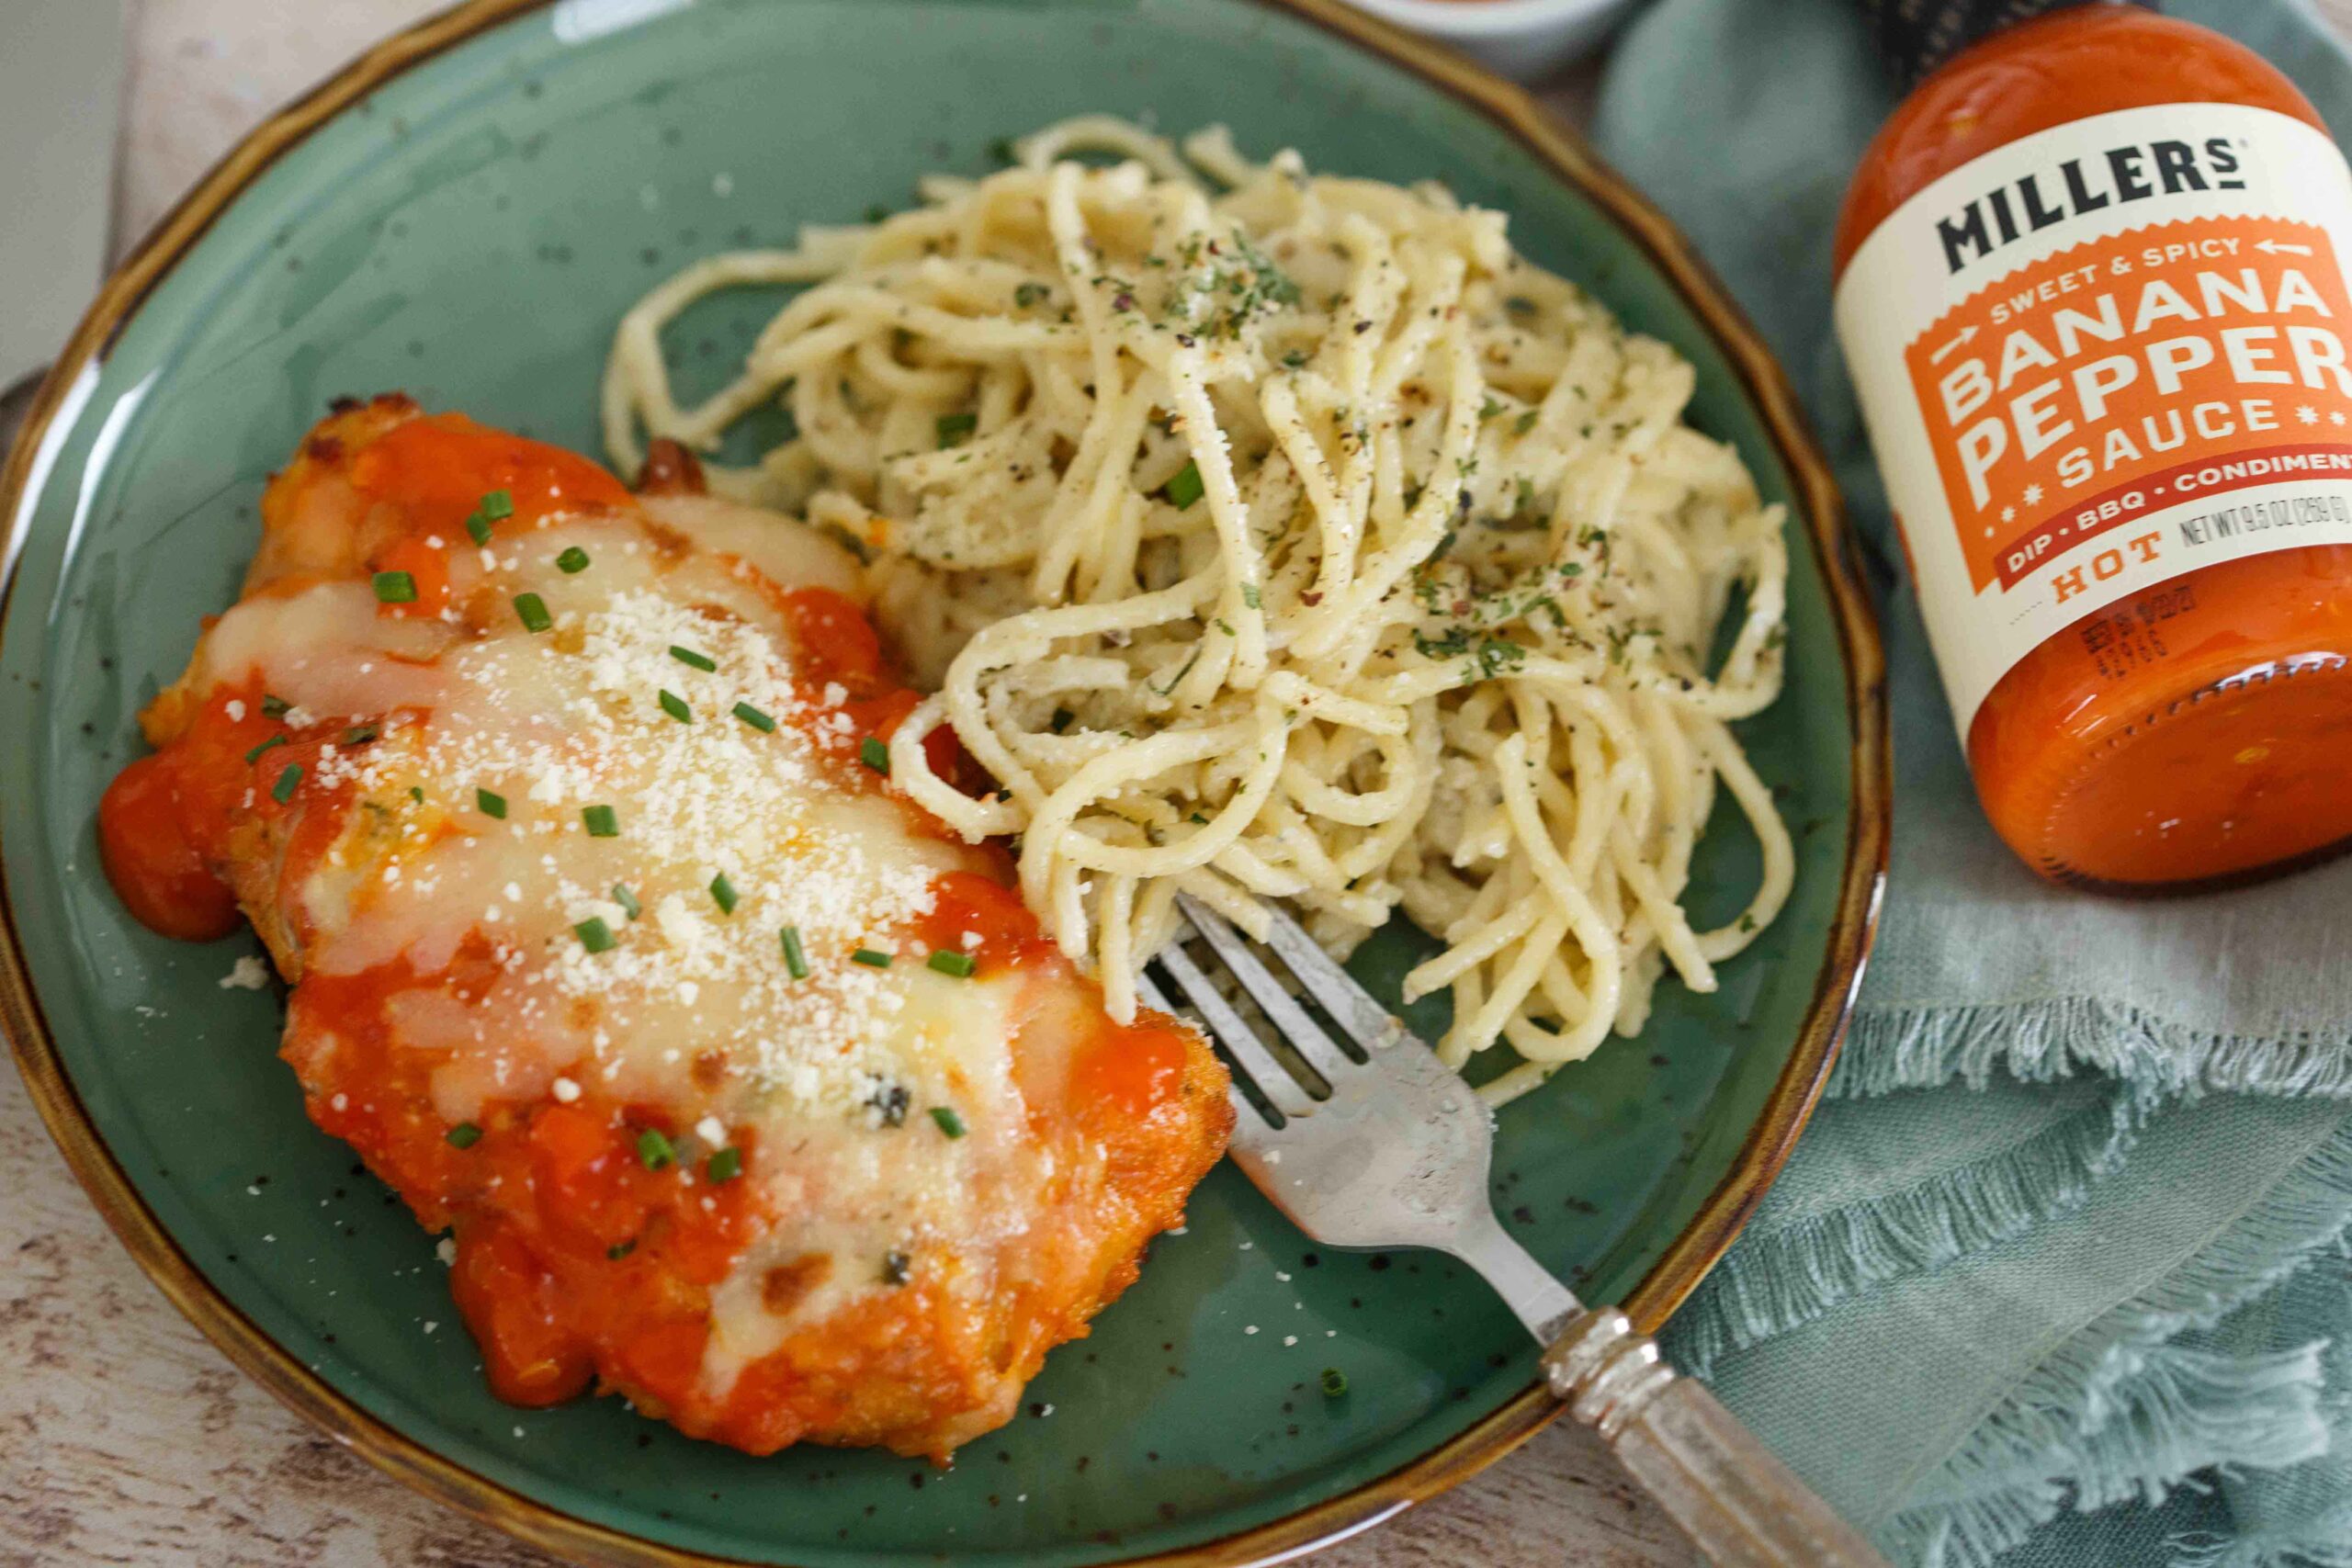
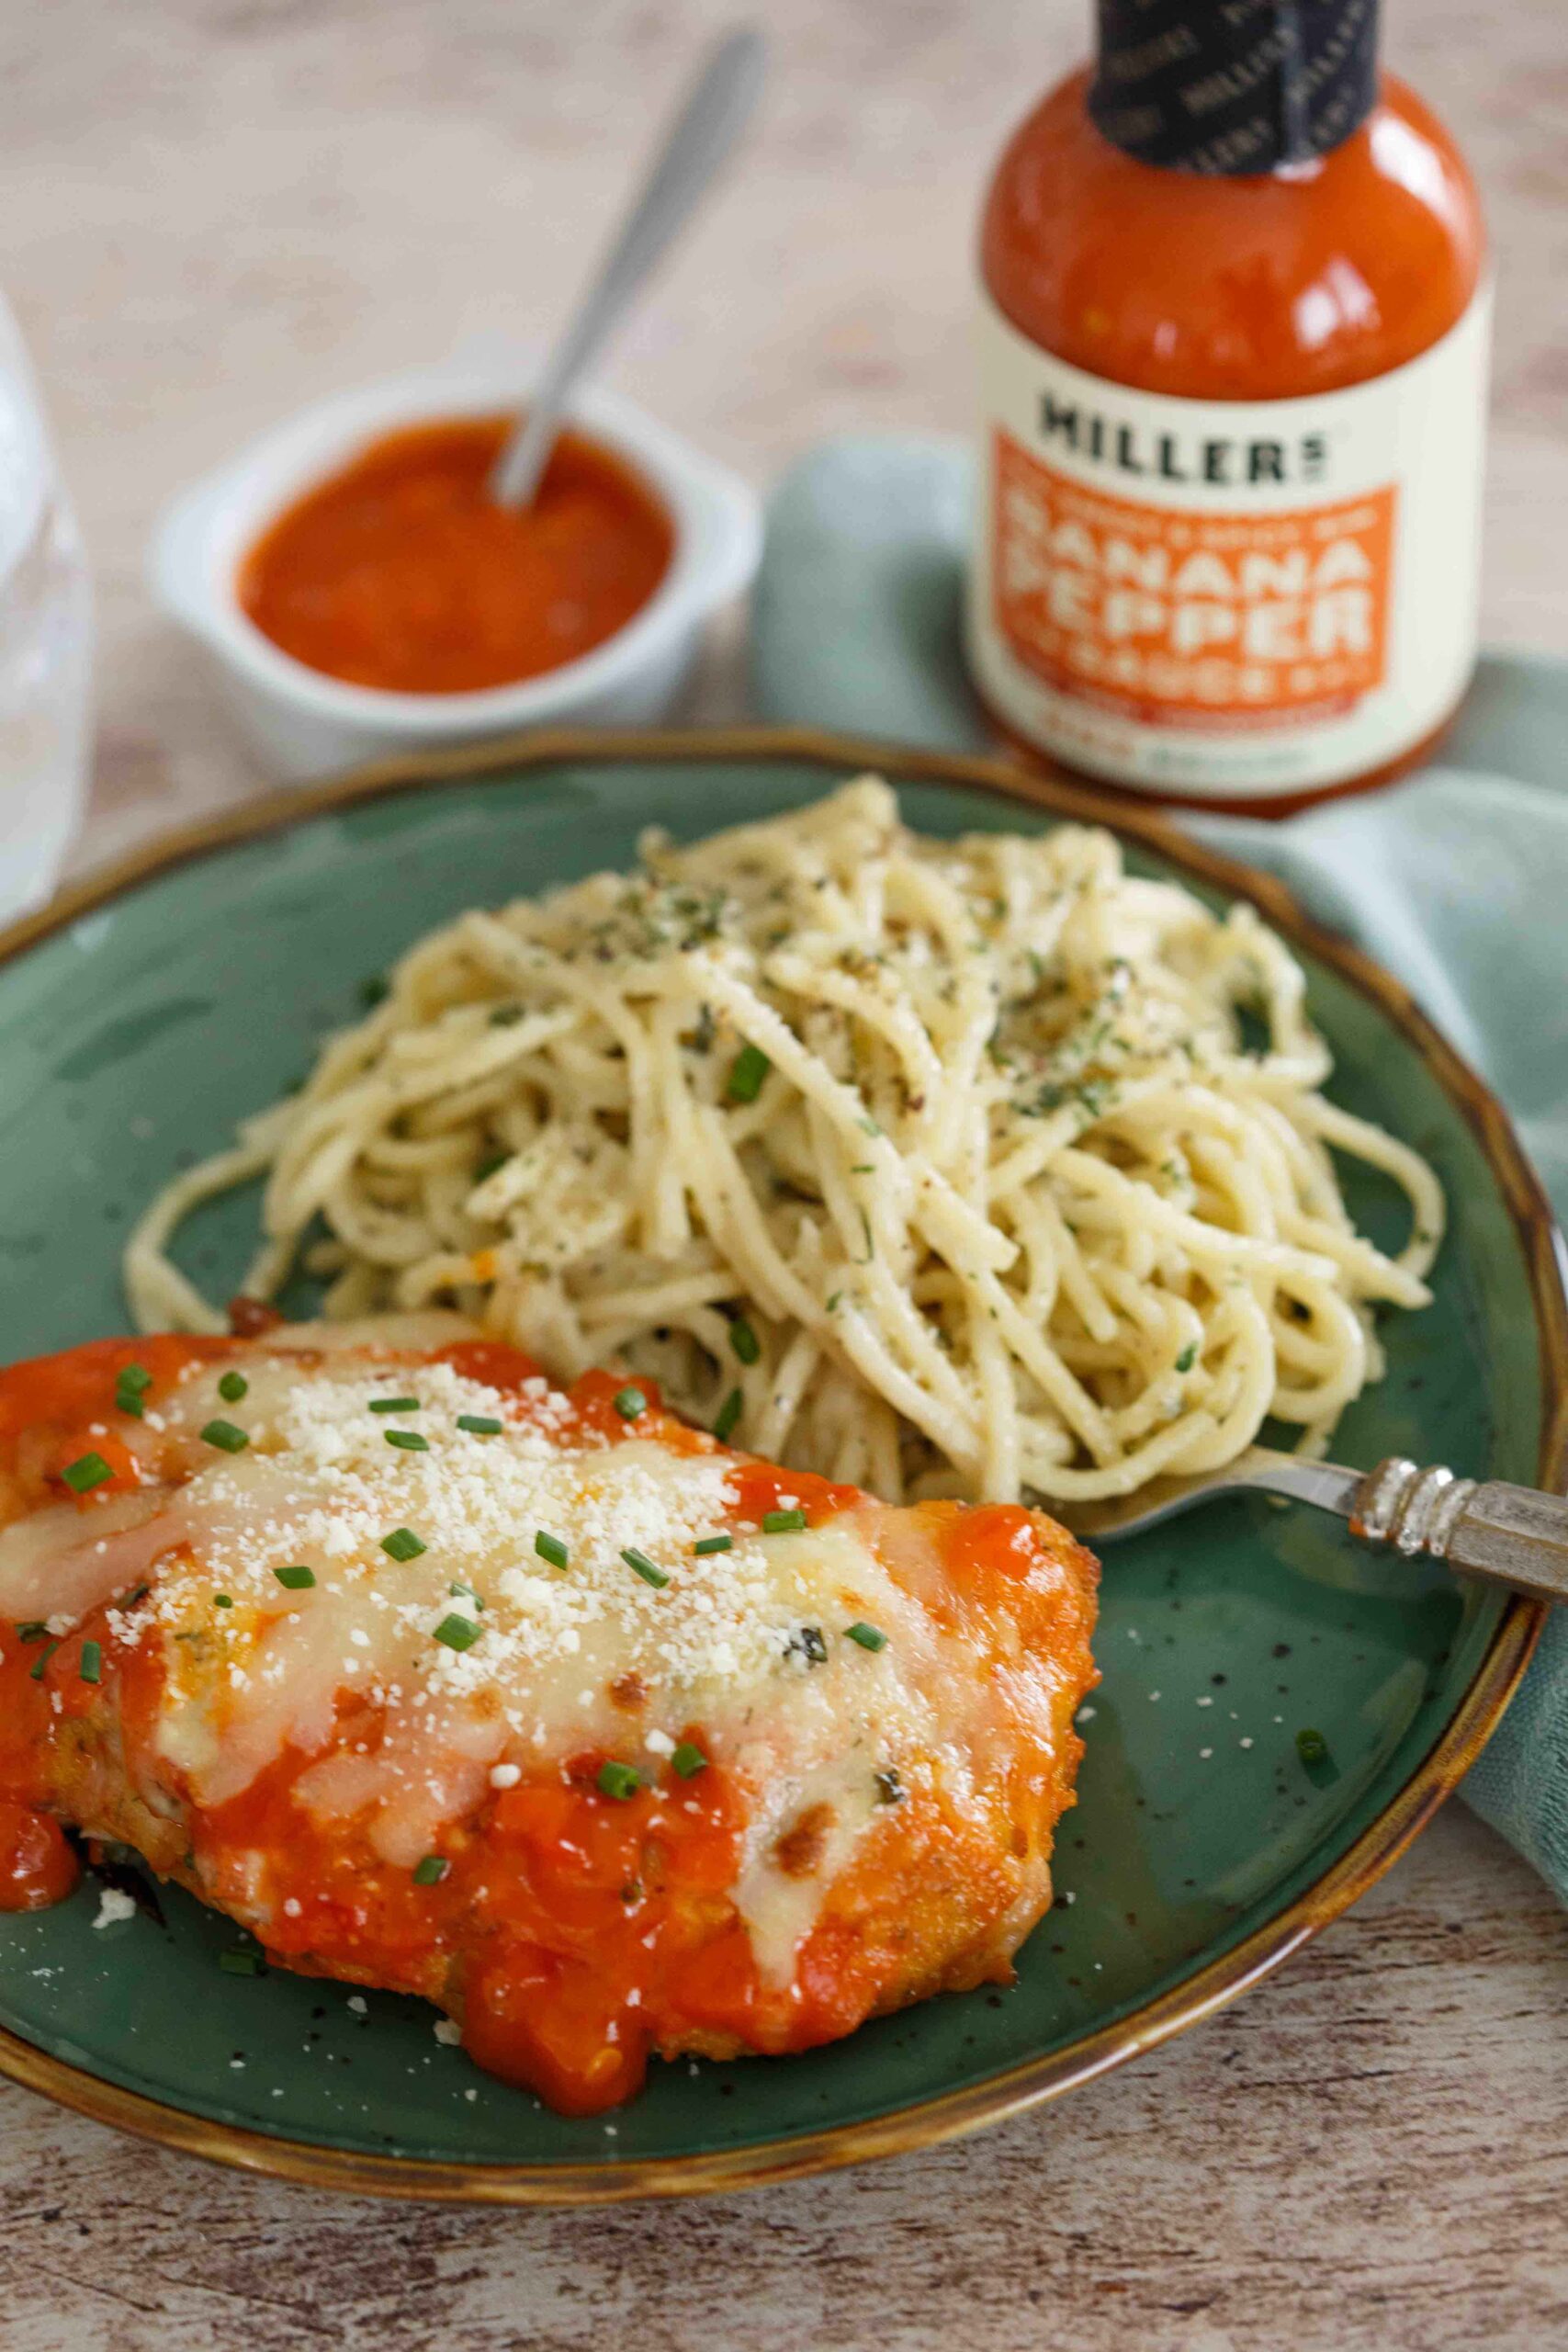
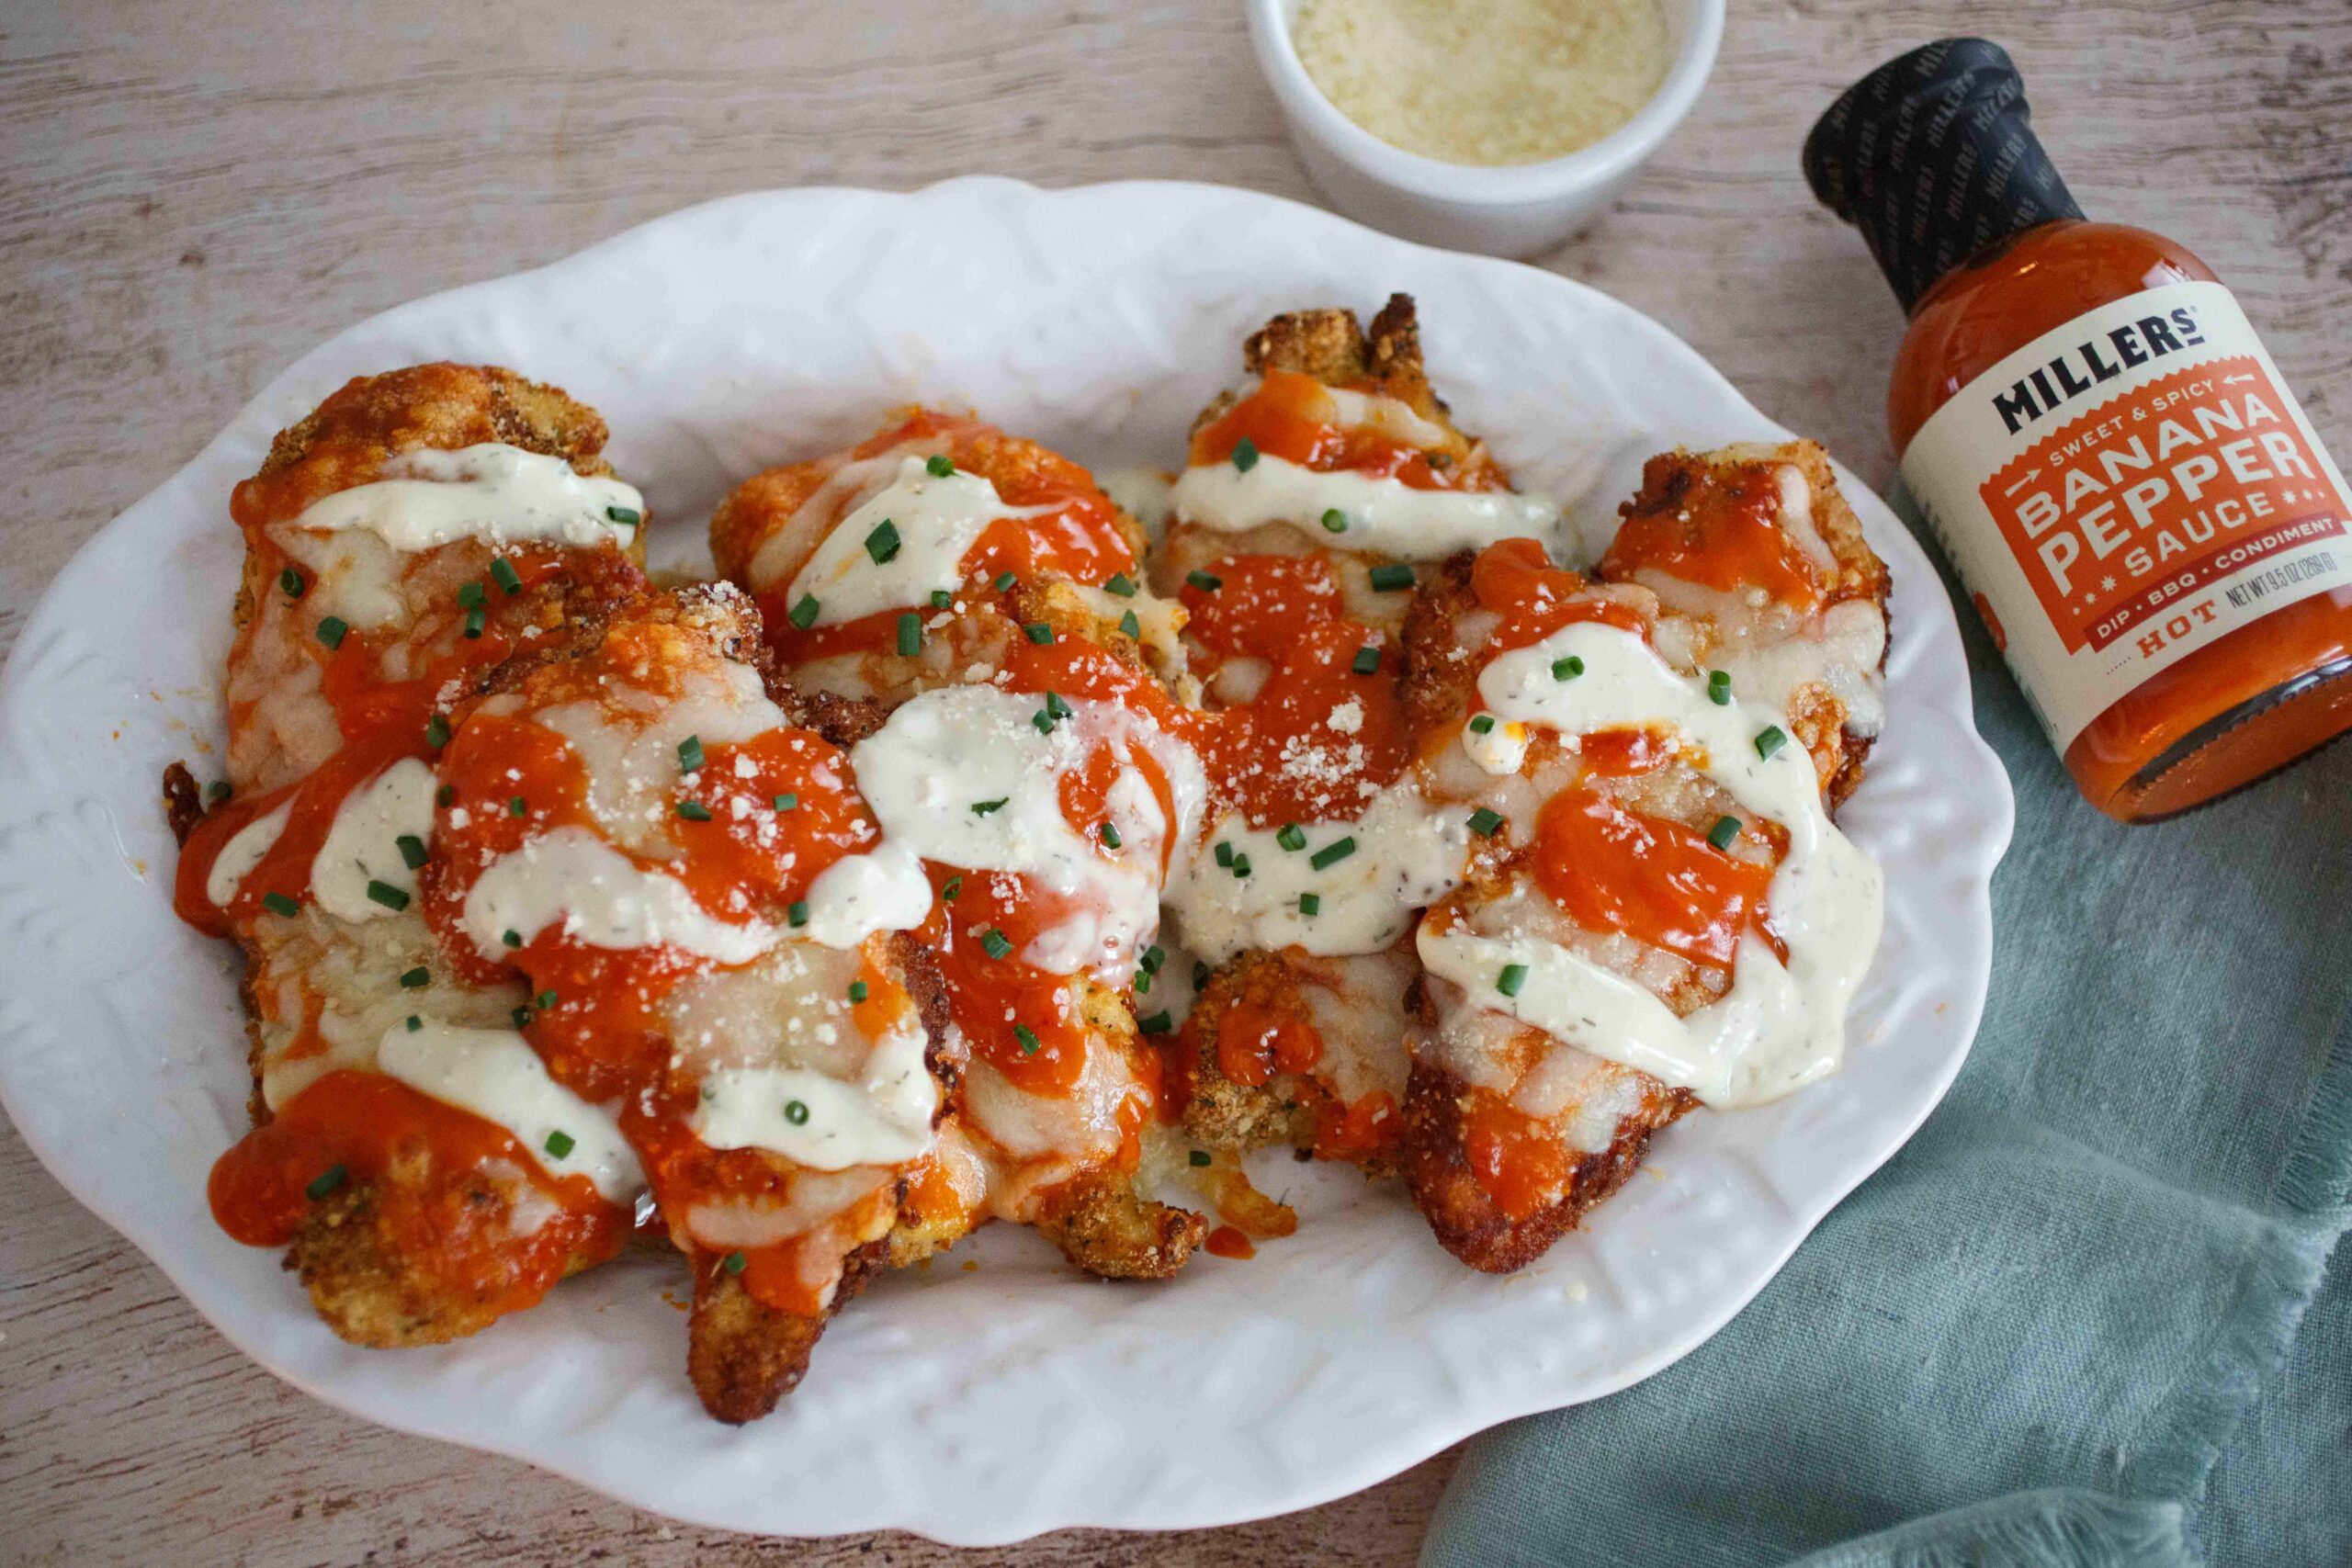
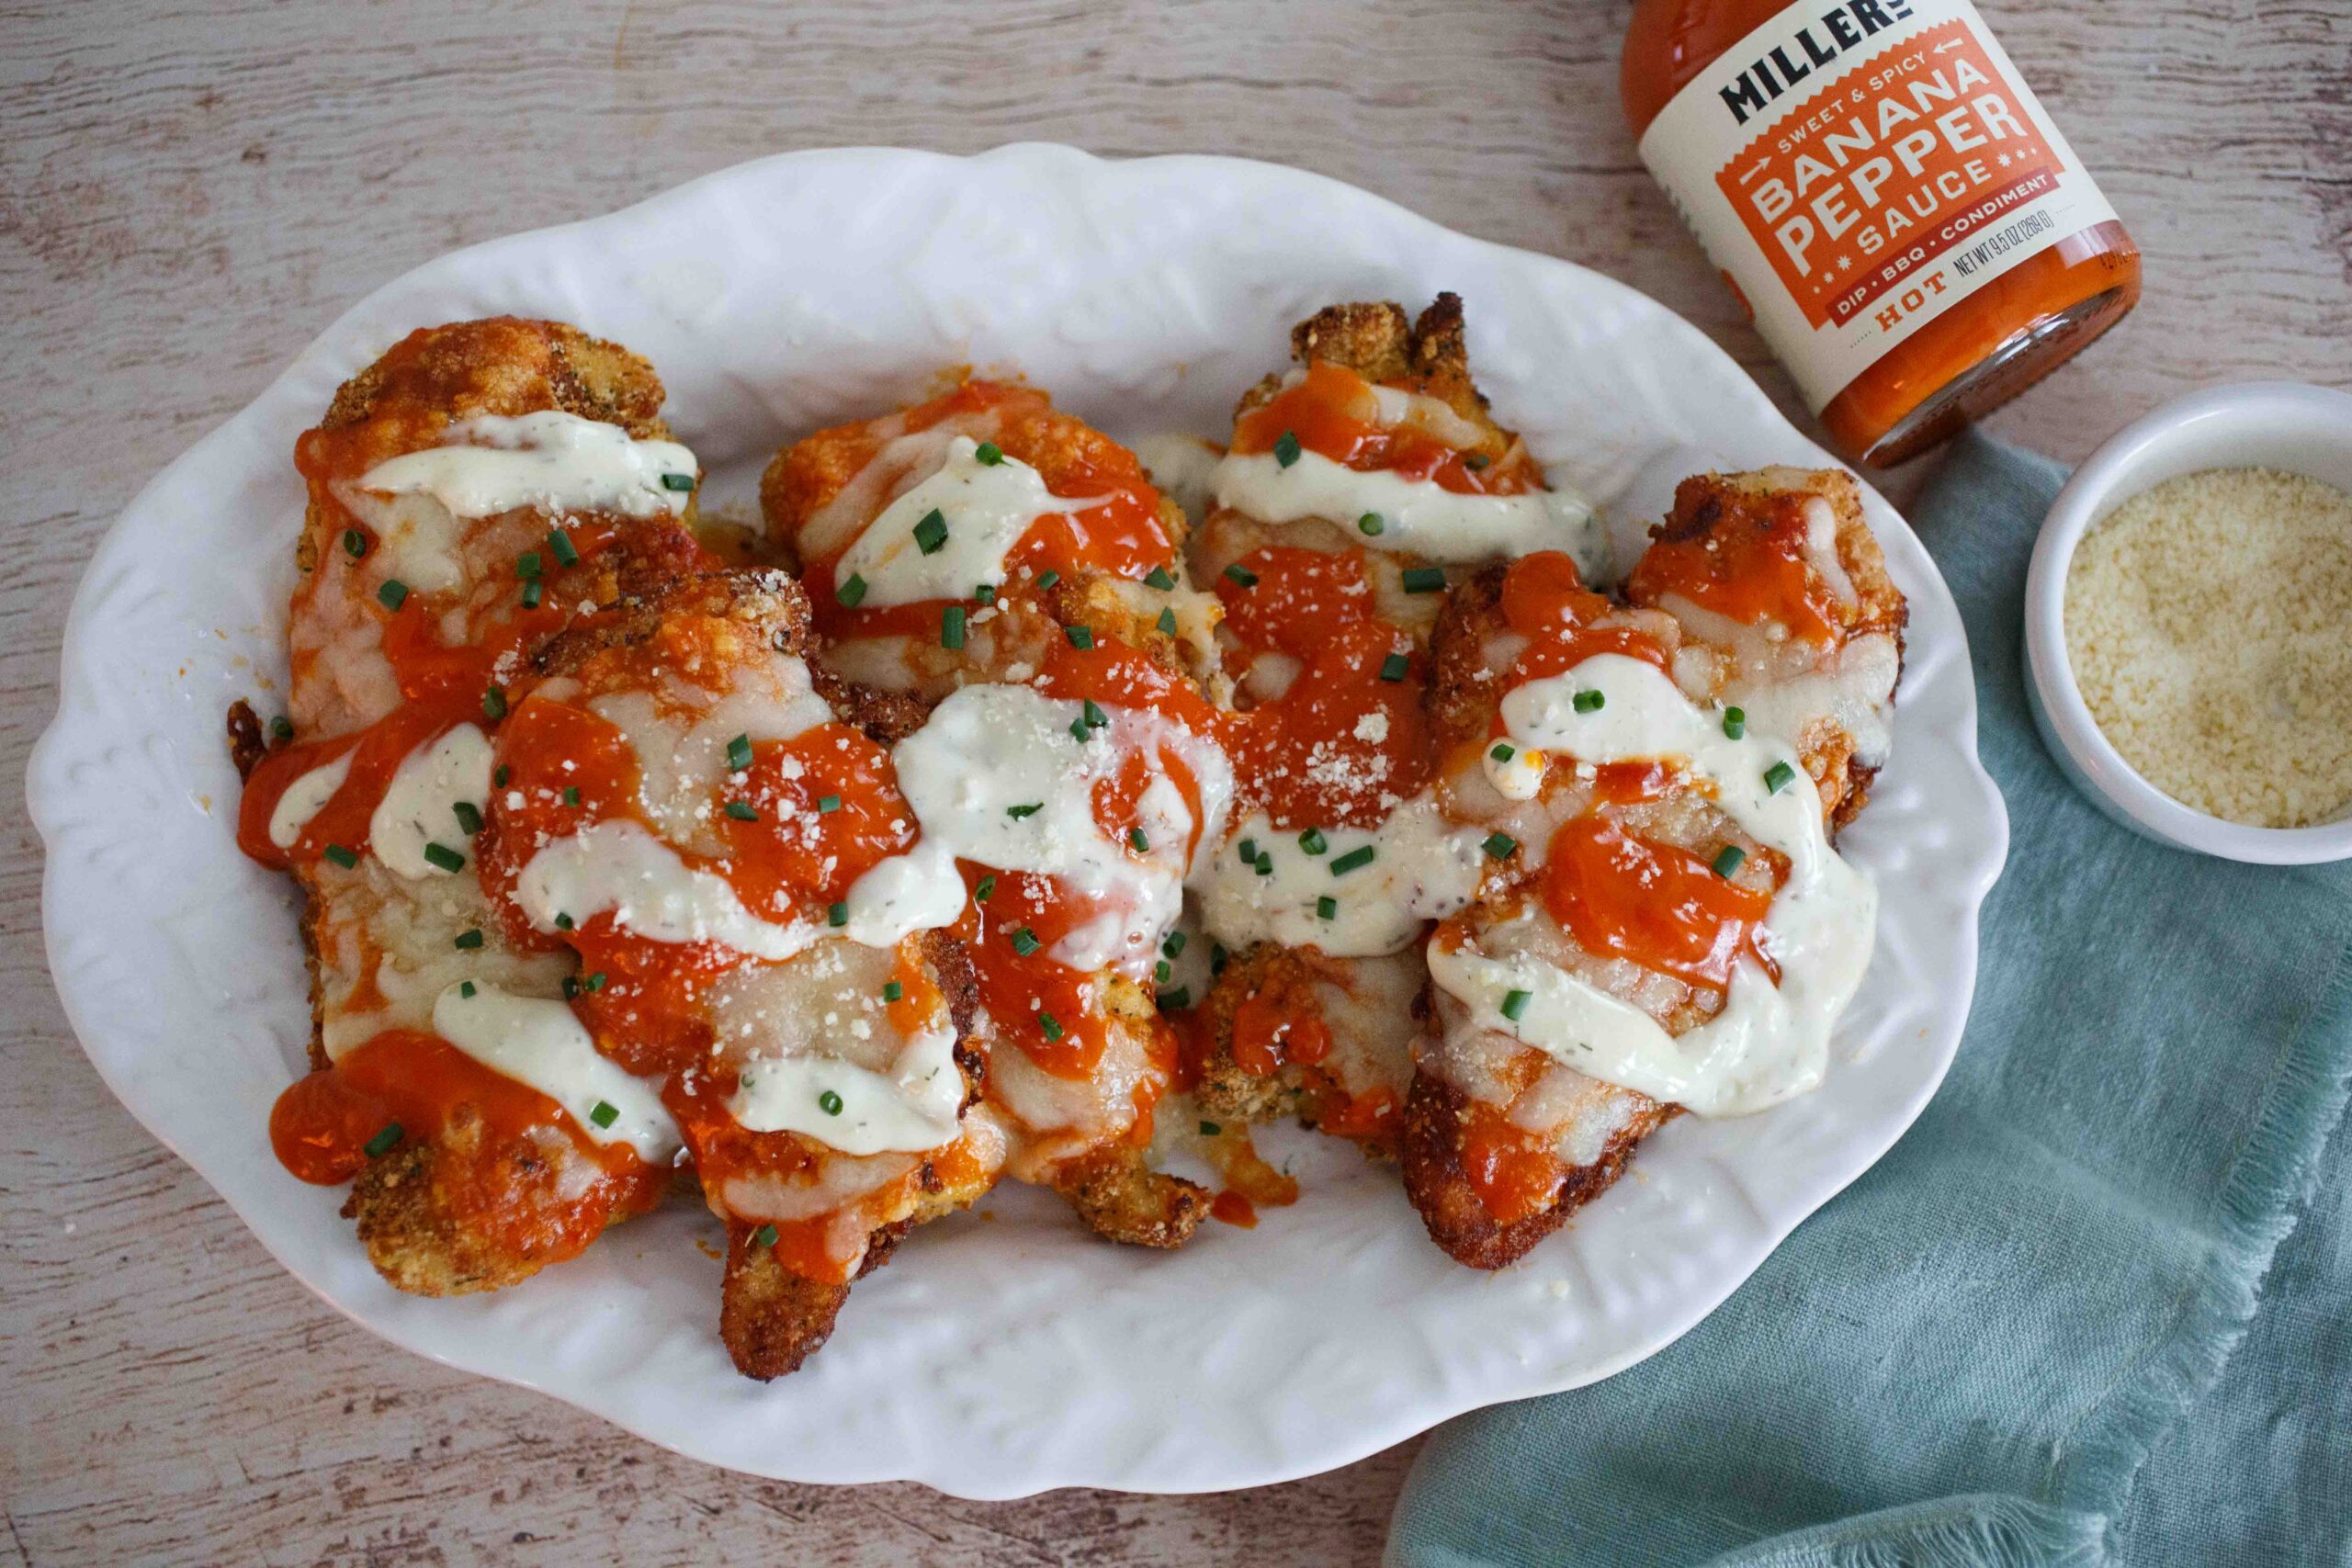
For this recipe contest, I decided to create a spicy twist on traditional Chicken Parmesan by using their Hot Banana Pepper Sauce to create a Buffalo-style Chicken Parmesan topped with this amazing hot sauce and some blue cheese dressing drizzles (or ranch dressing if you prefer!) to cool the heat. I’m originally from Upstate NY (Buffalo + Rochester), so as you can imagine I am absolutely obsessed with hot sauce, hot wings (and blue cheese!).
Miller’s Banana Pepper hot sauce is unique in that it has a spicy heat but also a hint of sweetness that makes the perfect combination for this Buffalo Chicken Parmesan recipe. You can also use the mild or habanero sauce (depending on the heat level you want) for this recipe and it would be just as delicious!
This dish is totally delish on its own, but there are so many fun ideas you can do to switch it up for different occasions like Game Day appetizers, lunch or a simple lovely dinner… Cut the chicken cutlets in half and make Spicy Chicken Sliders on toasted hawaiian slider buns, or cut the chicken into strips and make some Spicy Buffalo Chicken Fingers served with crispy fries, carrots and celery with blue cheese or ranch dressing and extra Miller’s Hot Banana Pepper sauce for dipping, of course!
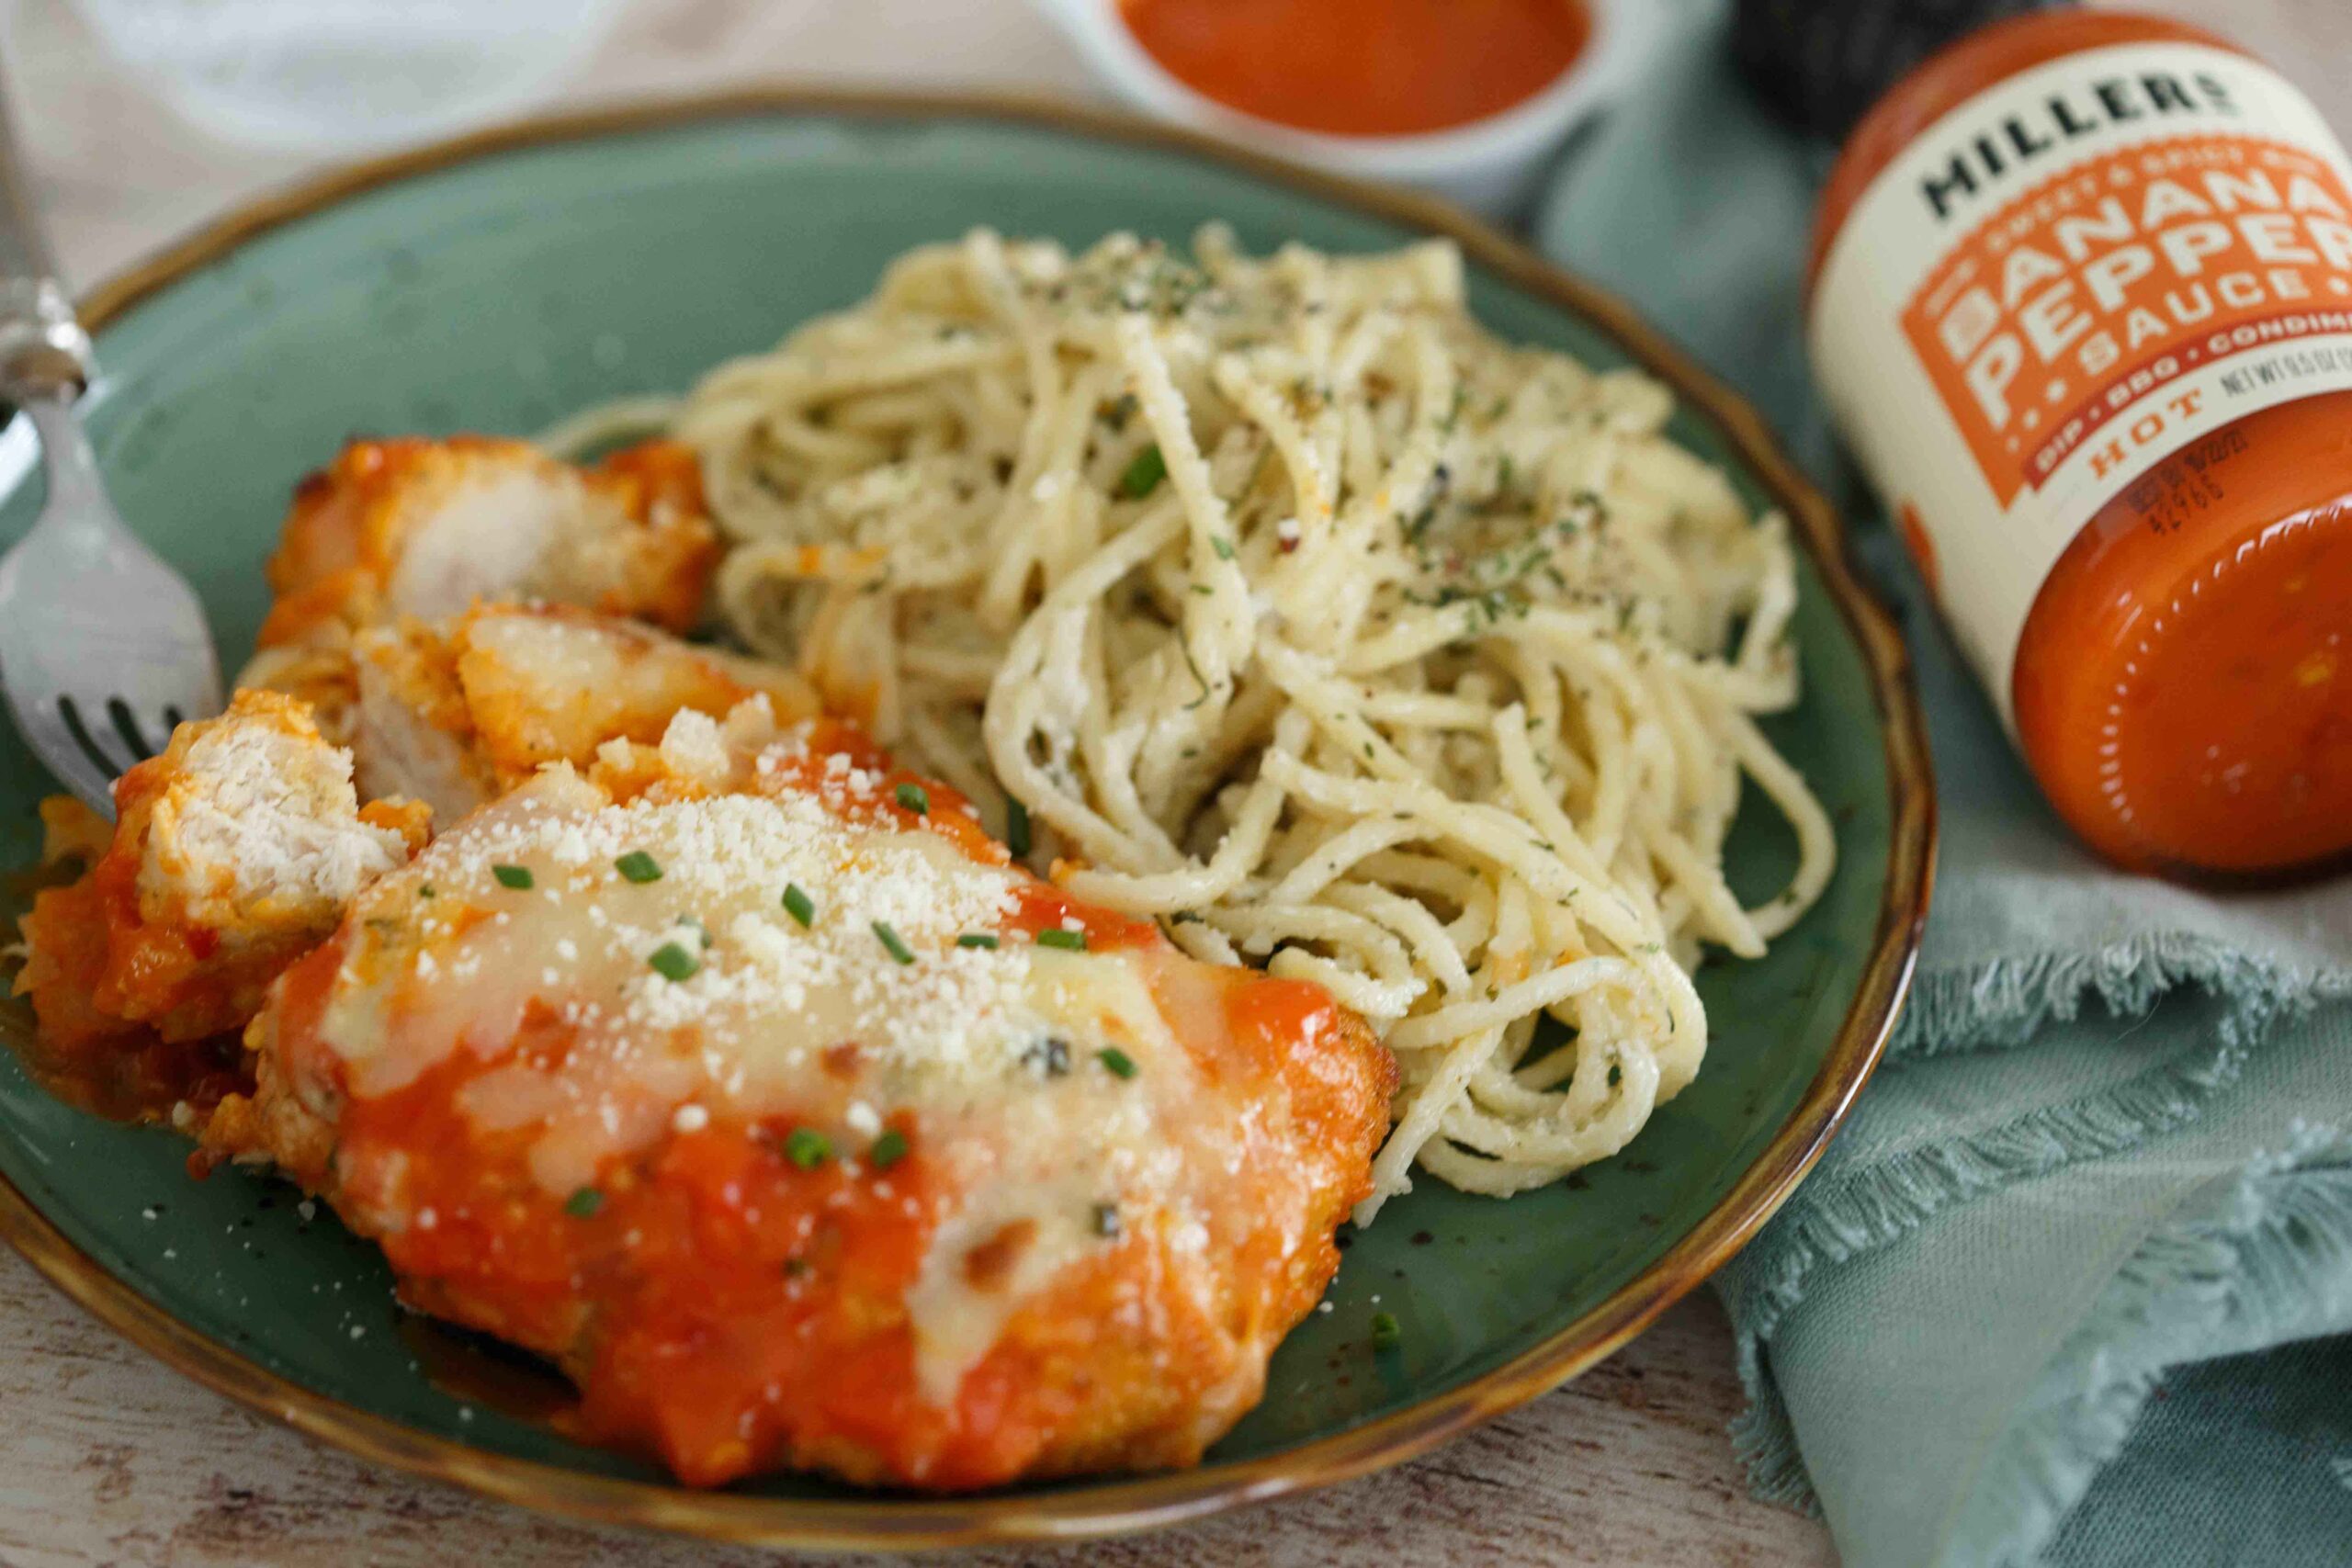
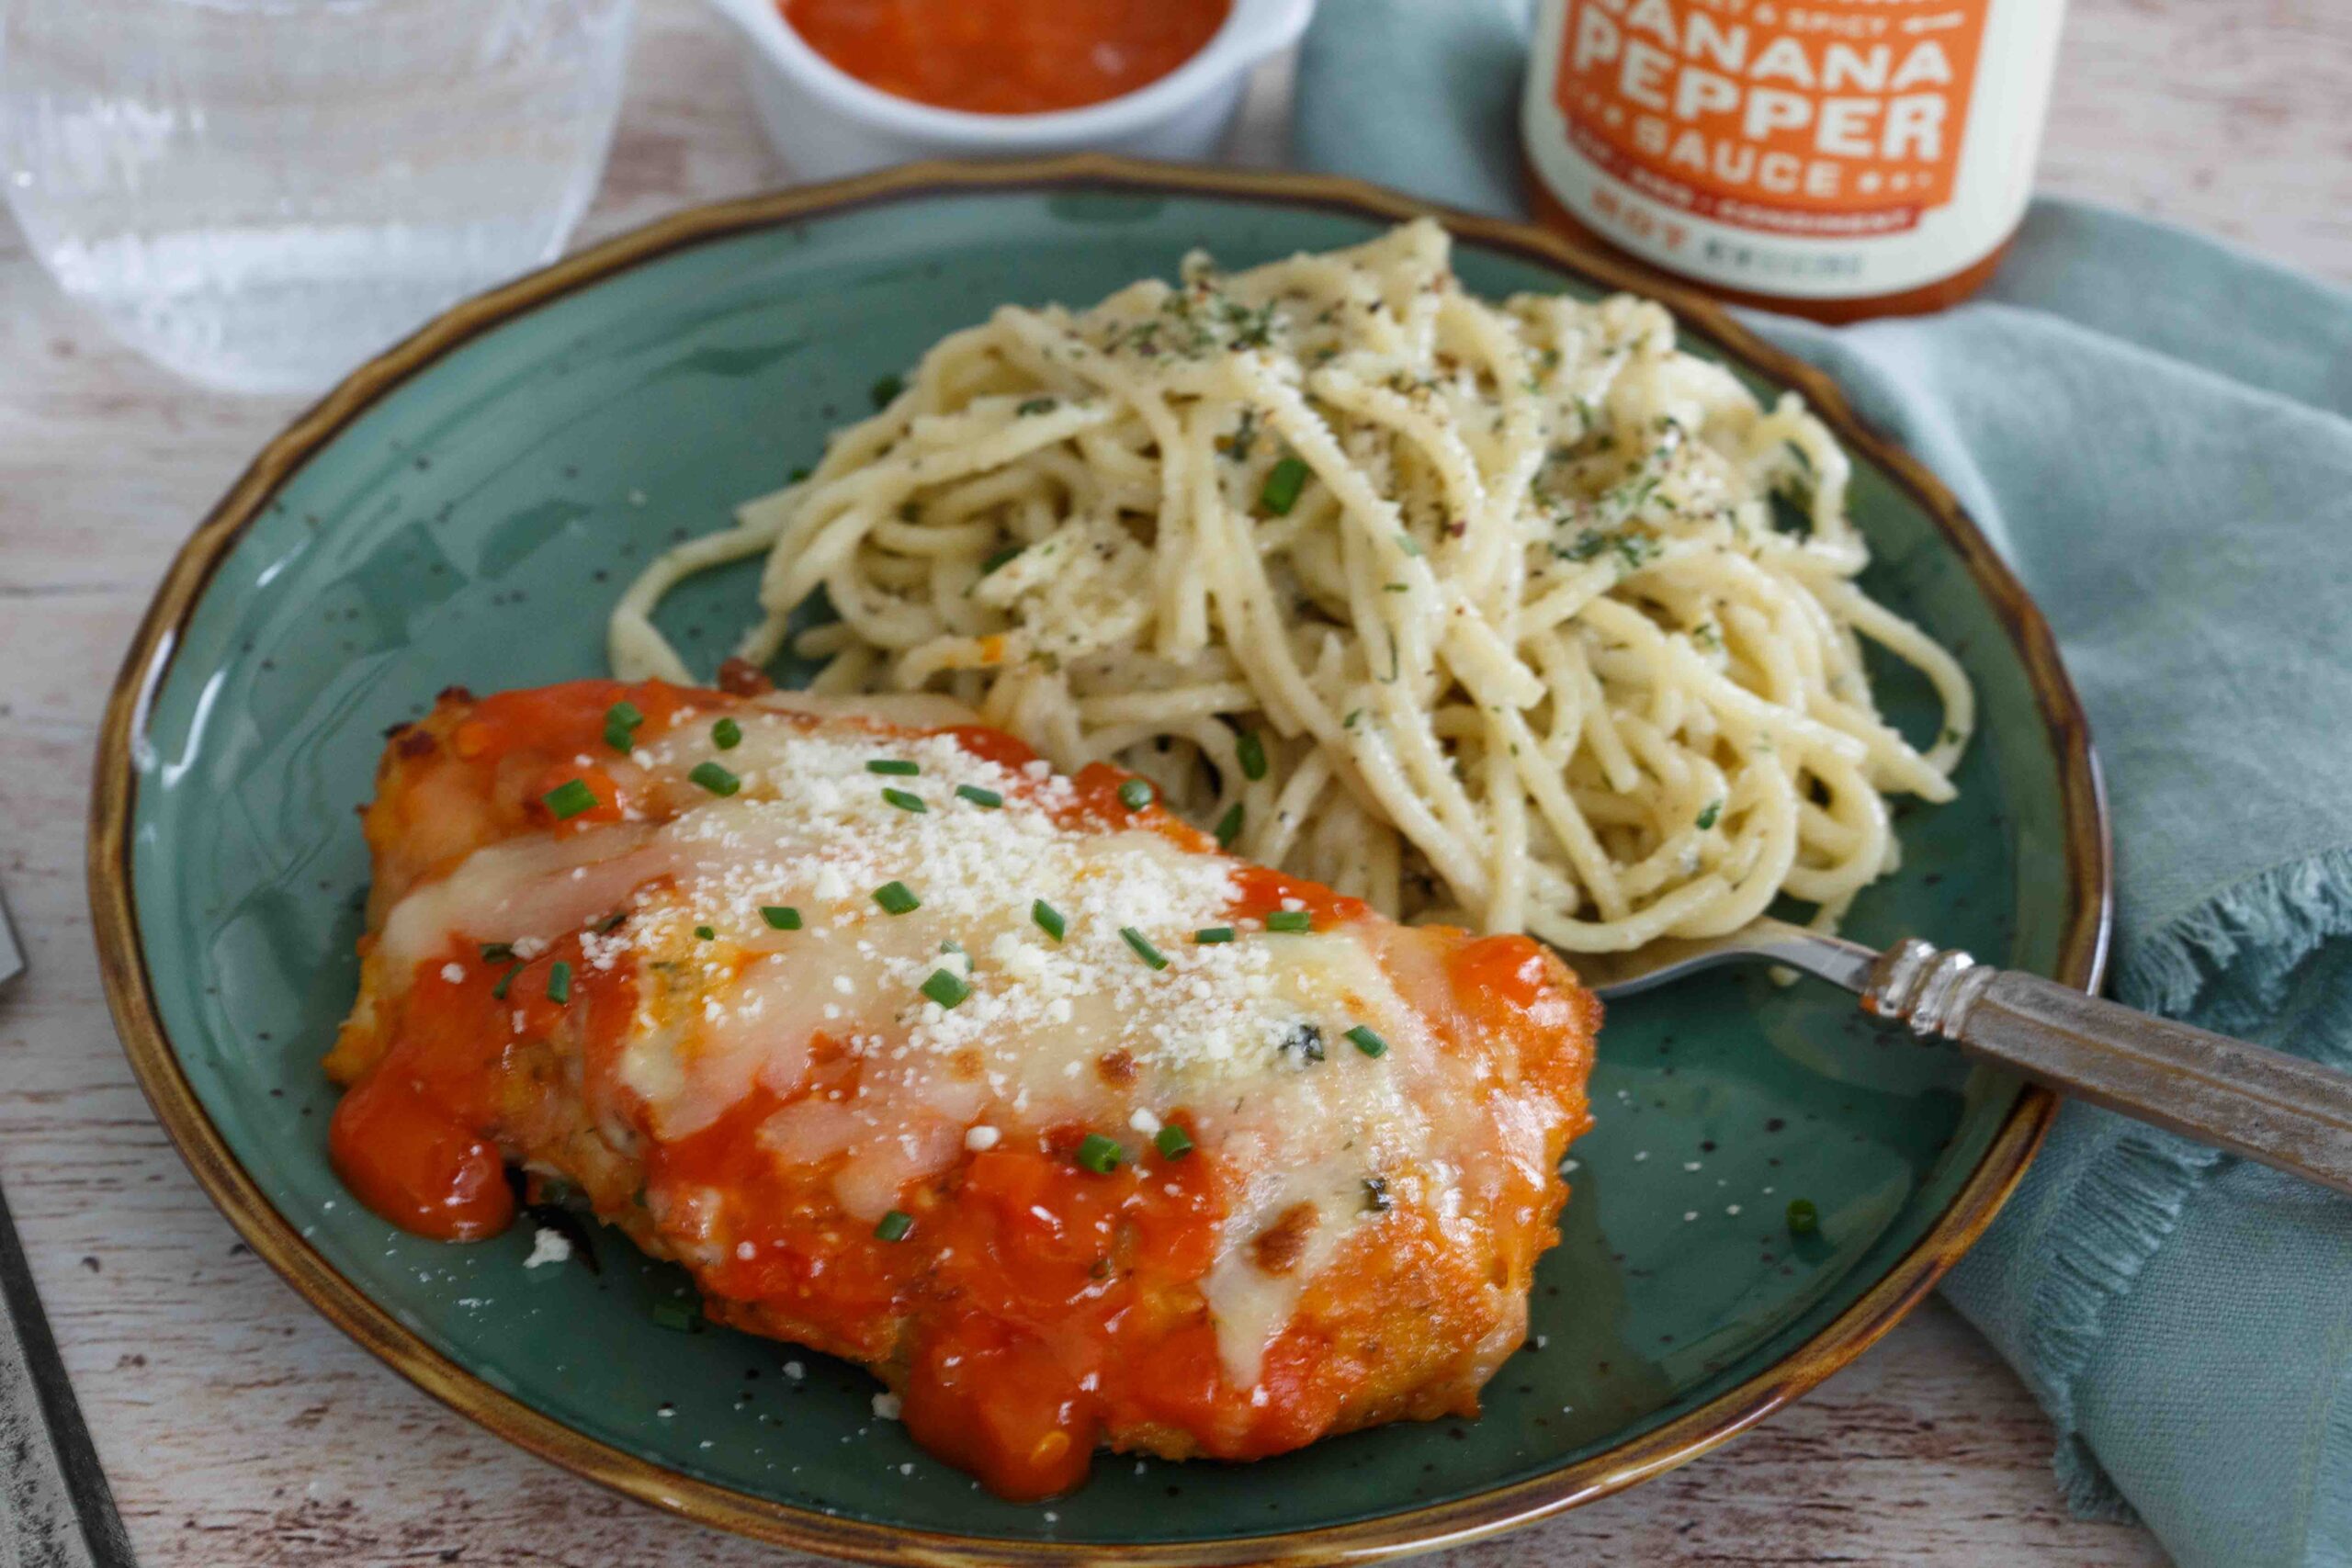
For a healthy lunch or dinner idea, slice up the spicy chicken parmesan cutlets and serve over a garden salad with ranch or blue cheese dressing, or serve it as the main entree with some creamy Gorgonzola pasta (see my recipe below) with some crusty garlic bread.
Anyway you decide to serve it I guarantee you’re going to thank me (and your tastebuds will too!)…so hold on to your hats and get ready for a serious spicy flavor explosion with my recipe for Spicy Buffalo Chicken Parmesan + Gorgonzola Pasta.
Here’s How to Make It
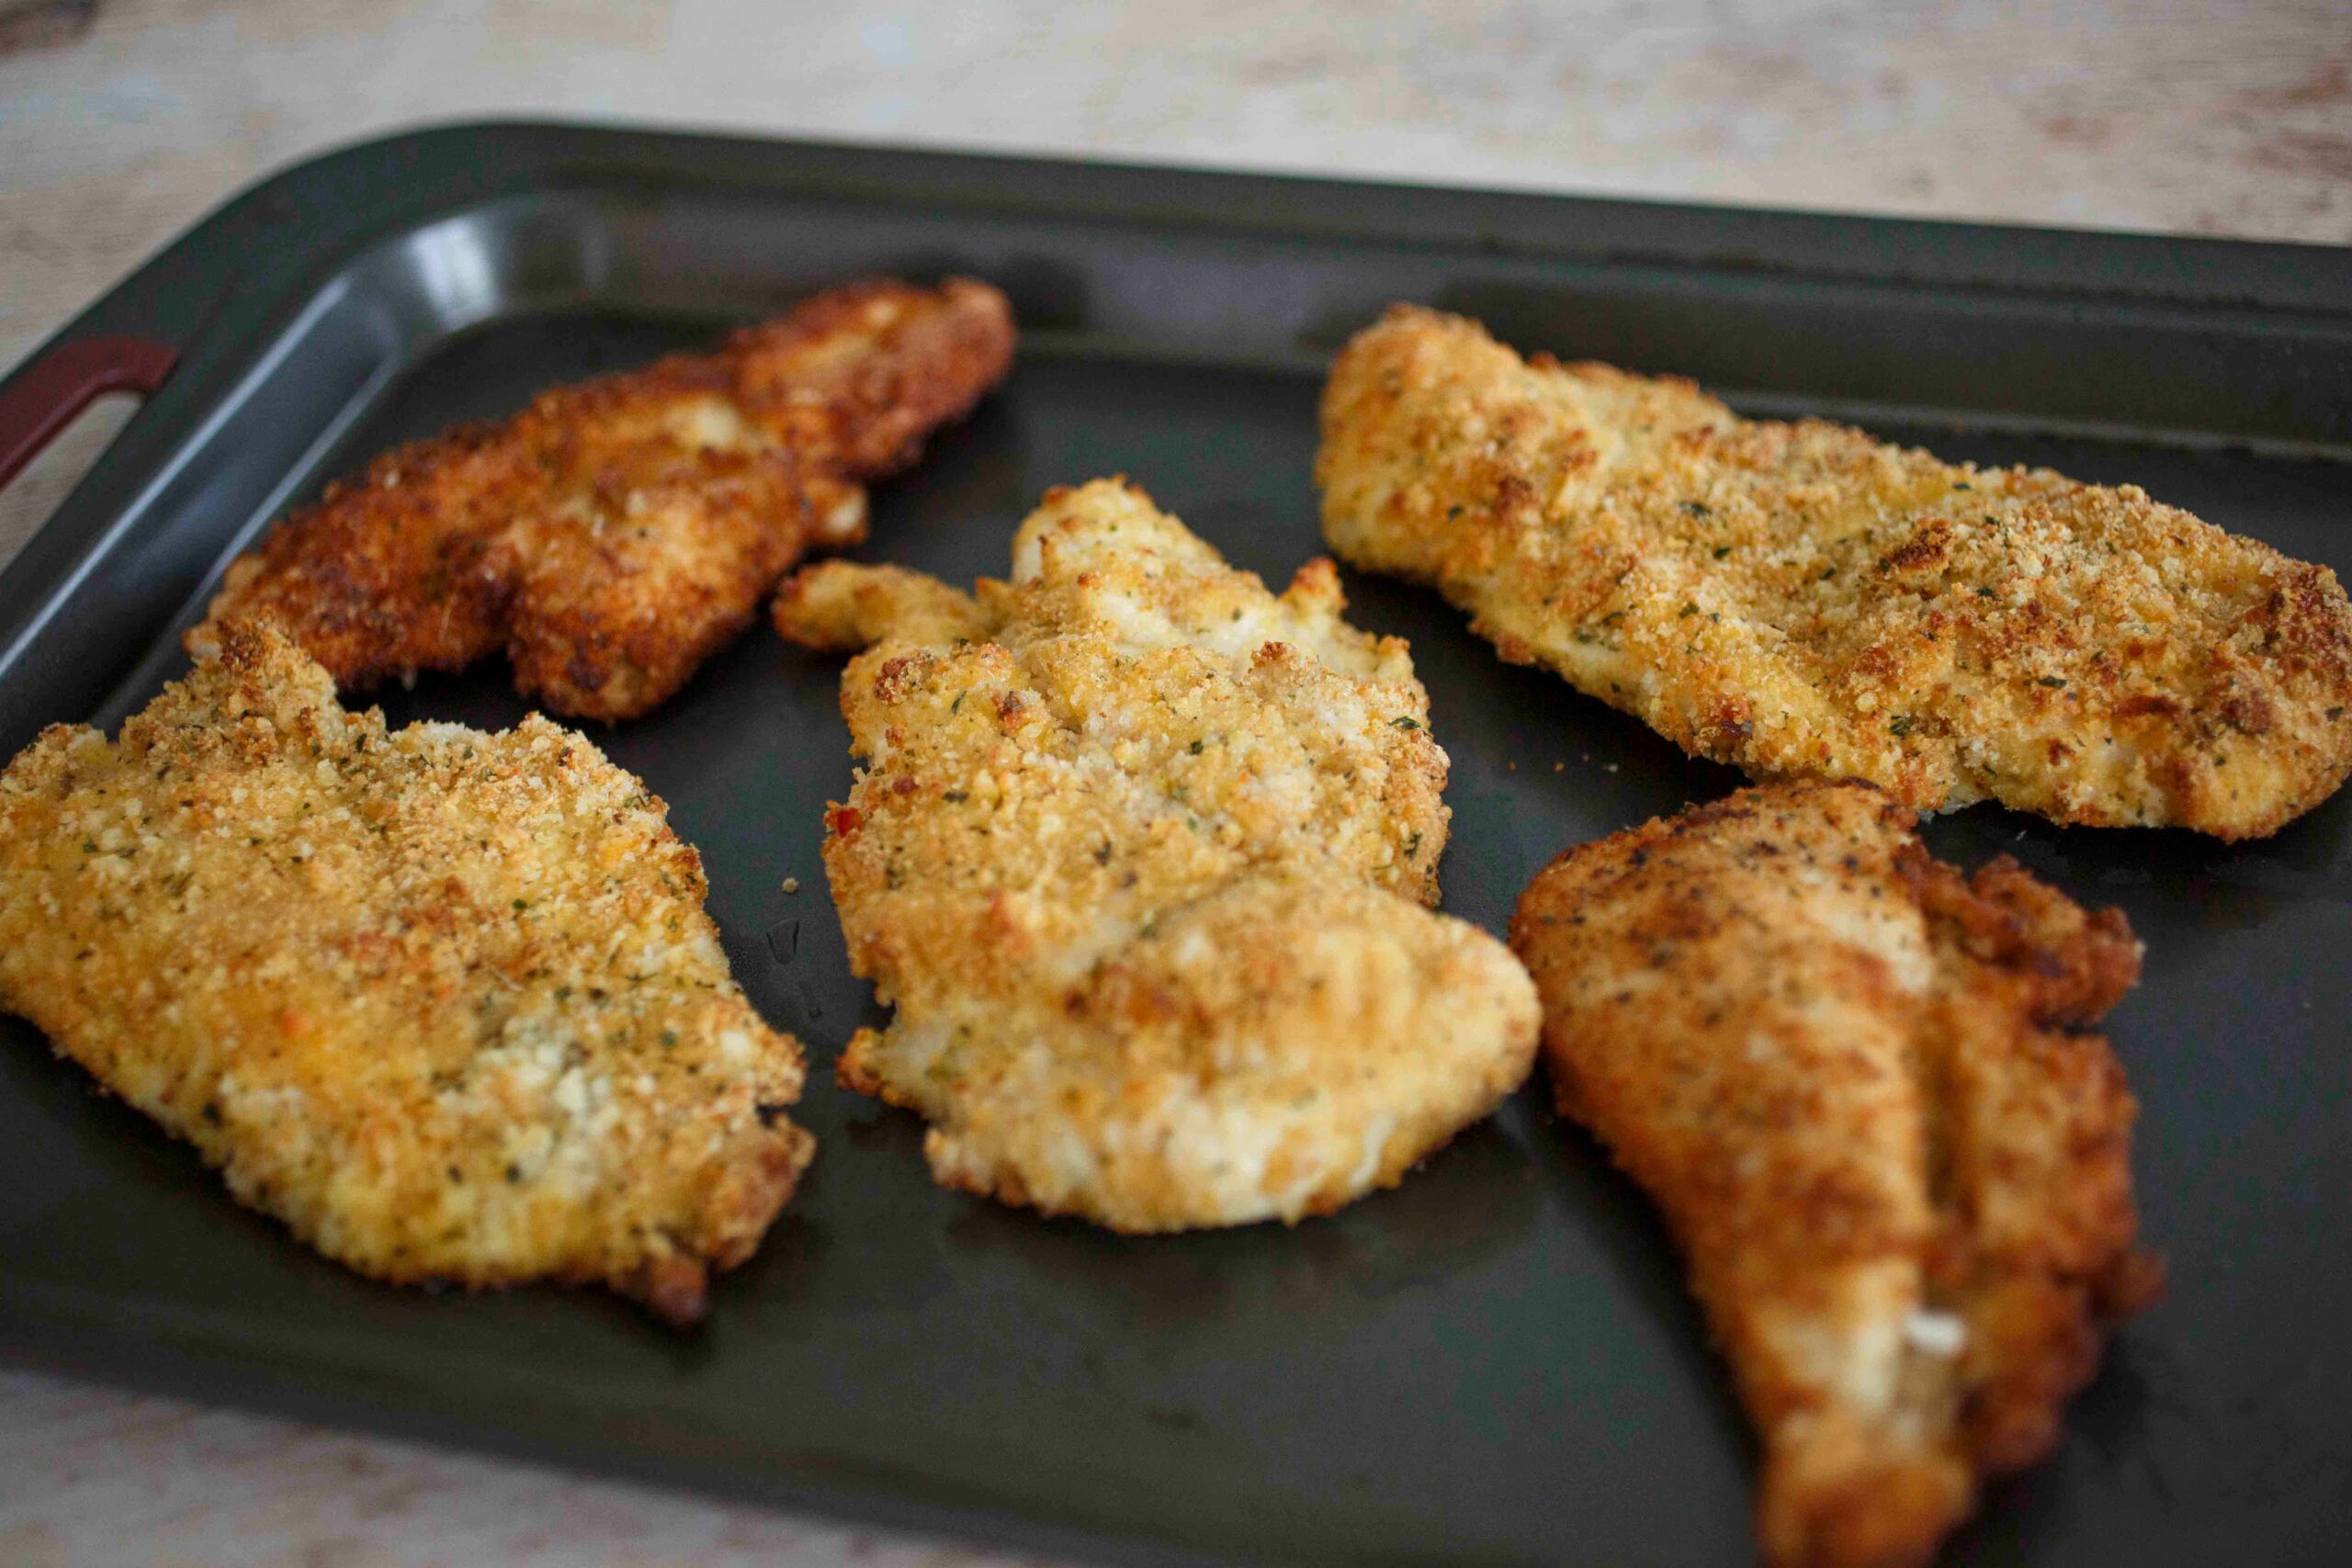
Step 1: Make the Chicken
Panko breadcrumbs are the key ingredient for the coating but, I mix in regular Italian breadcrumbs and grated Parmesan cheese to the mix to give the chicken that perfect crunch along with some paprika, dried oregano, garlic powder and onion powder for a little extra flavor goodness.

Set up your dredging station with three bowls: first bowl use a fine searing flour (like Wondra) or an all-purpose flour to coat the chicken. Second bowl is for your eggs, and the third bowl is for the Panko/breadcrumb/Parmesan cheese mixture. Feel free to double coat the chicken with another layer of egg and breadcrumbs/cheese if you want a thicker crunchier coating on the Chicken Parmesan. Bake for 20-25 minutes until golden brown and cooked through.
Step 2: Make the Buffalo Banana Pepper Sauce
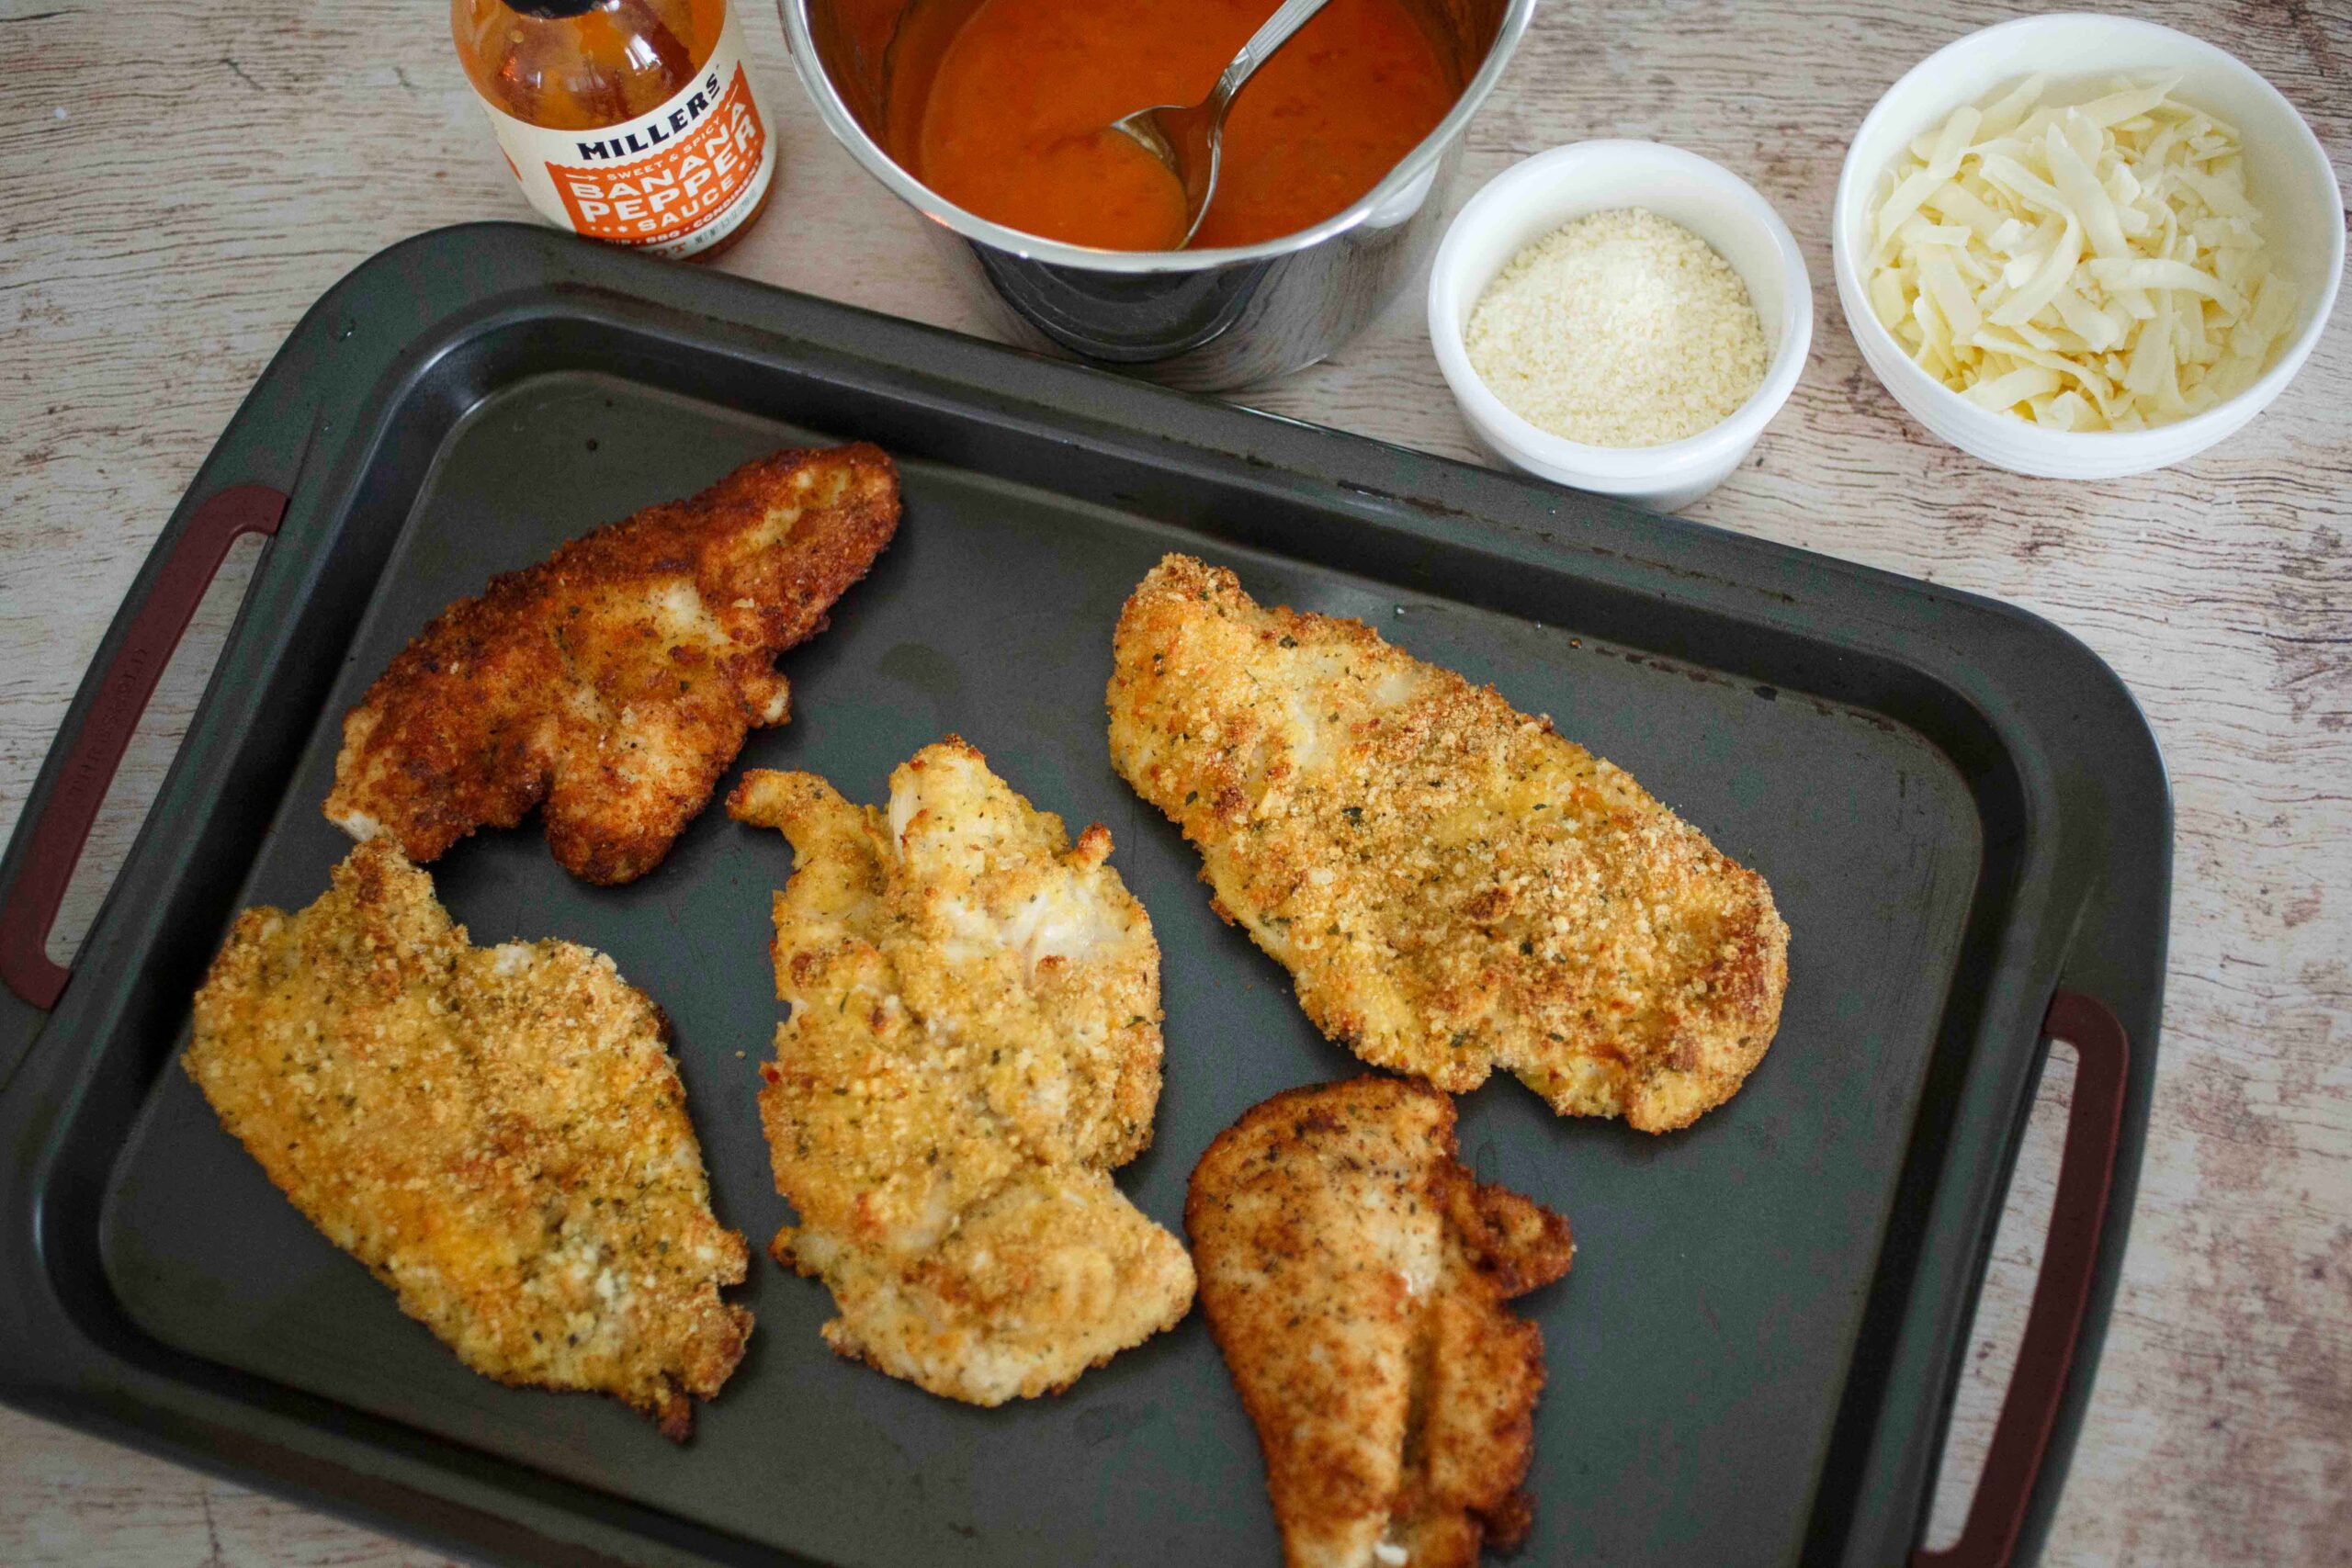
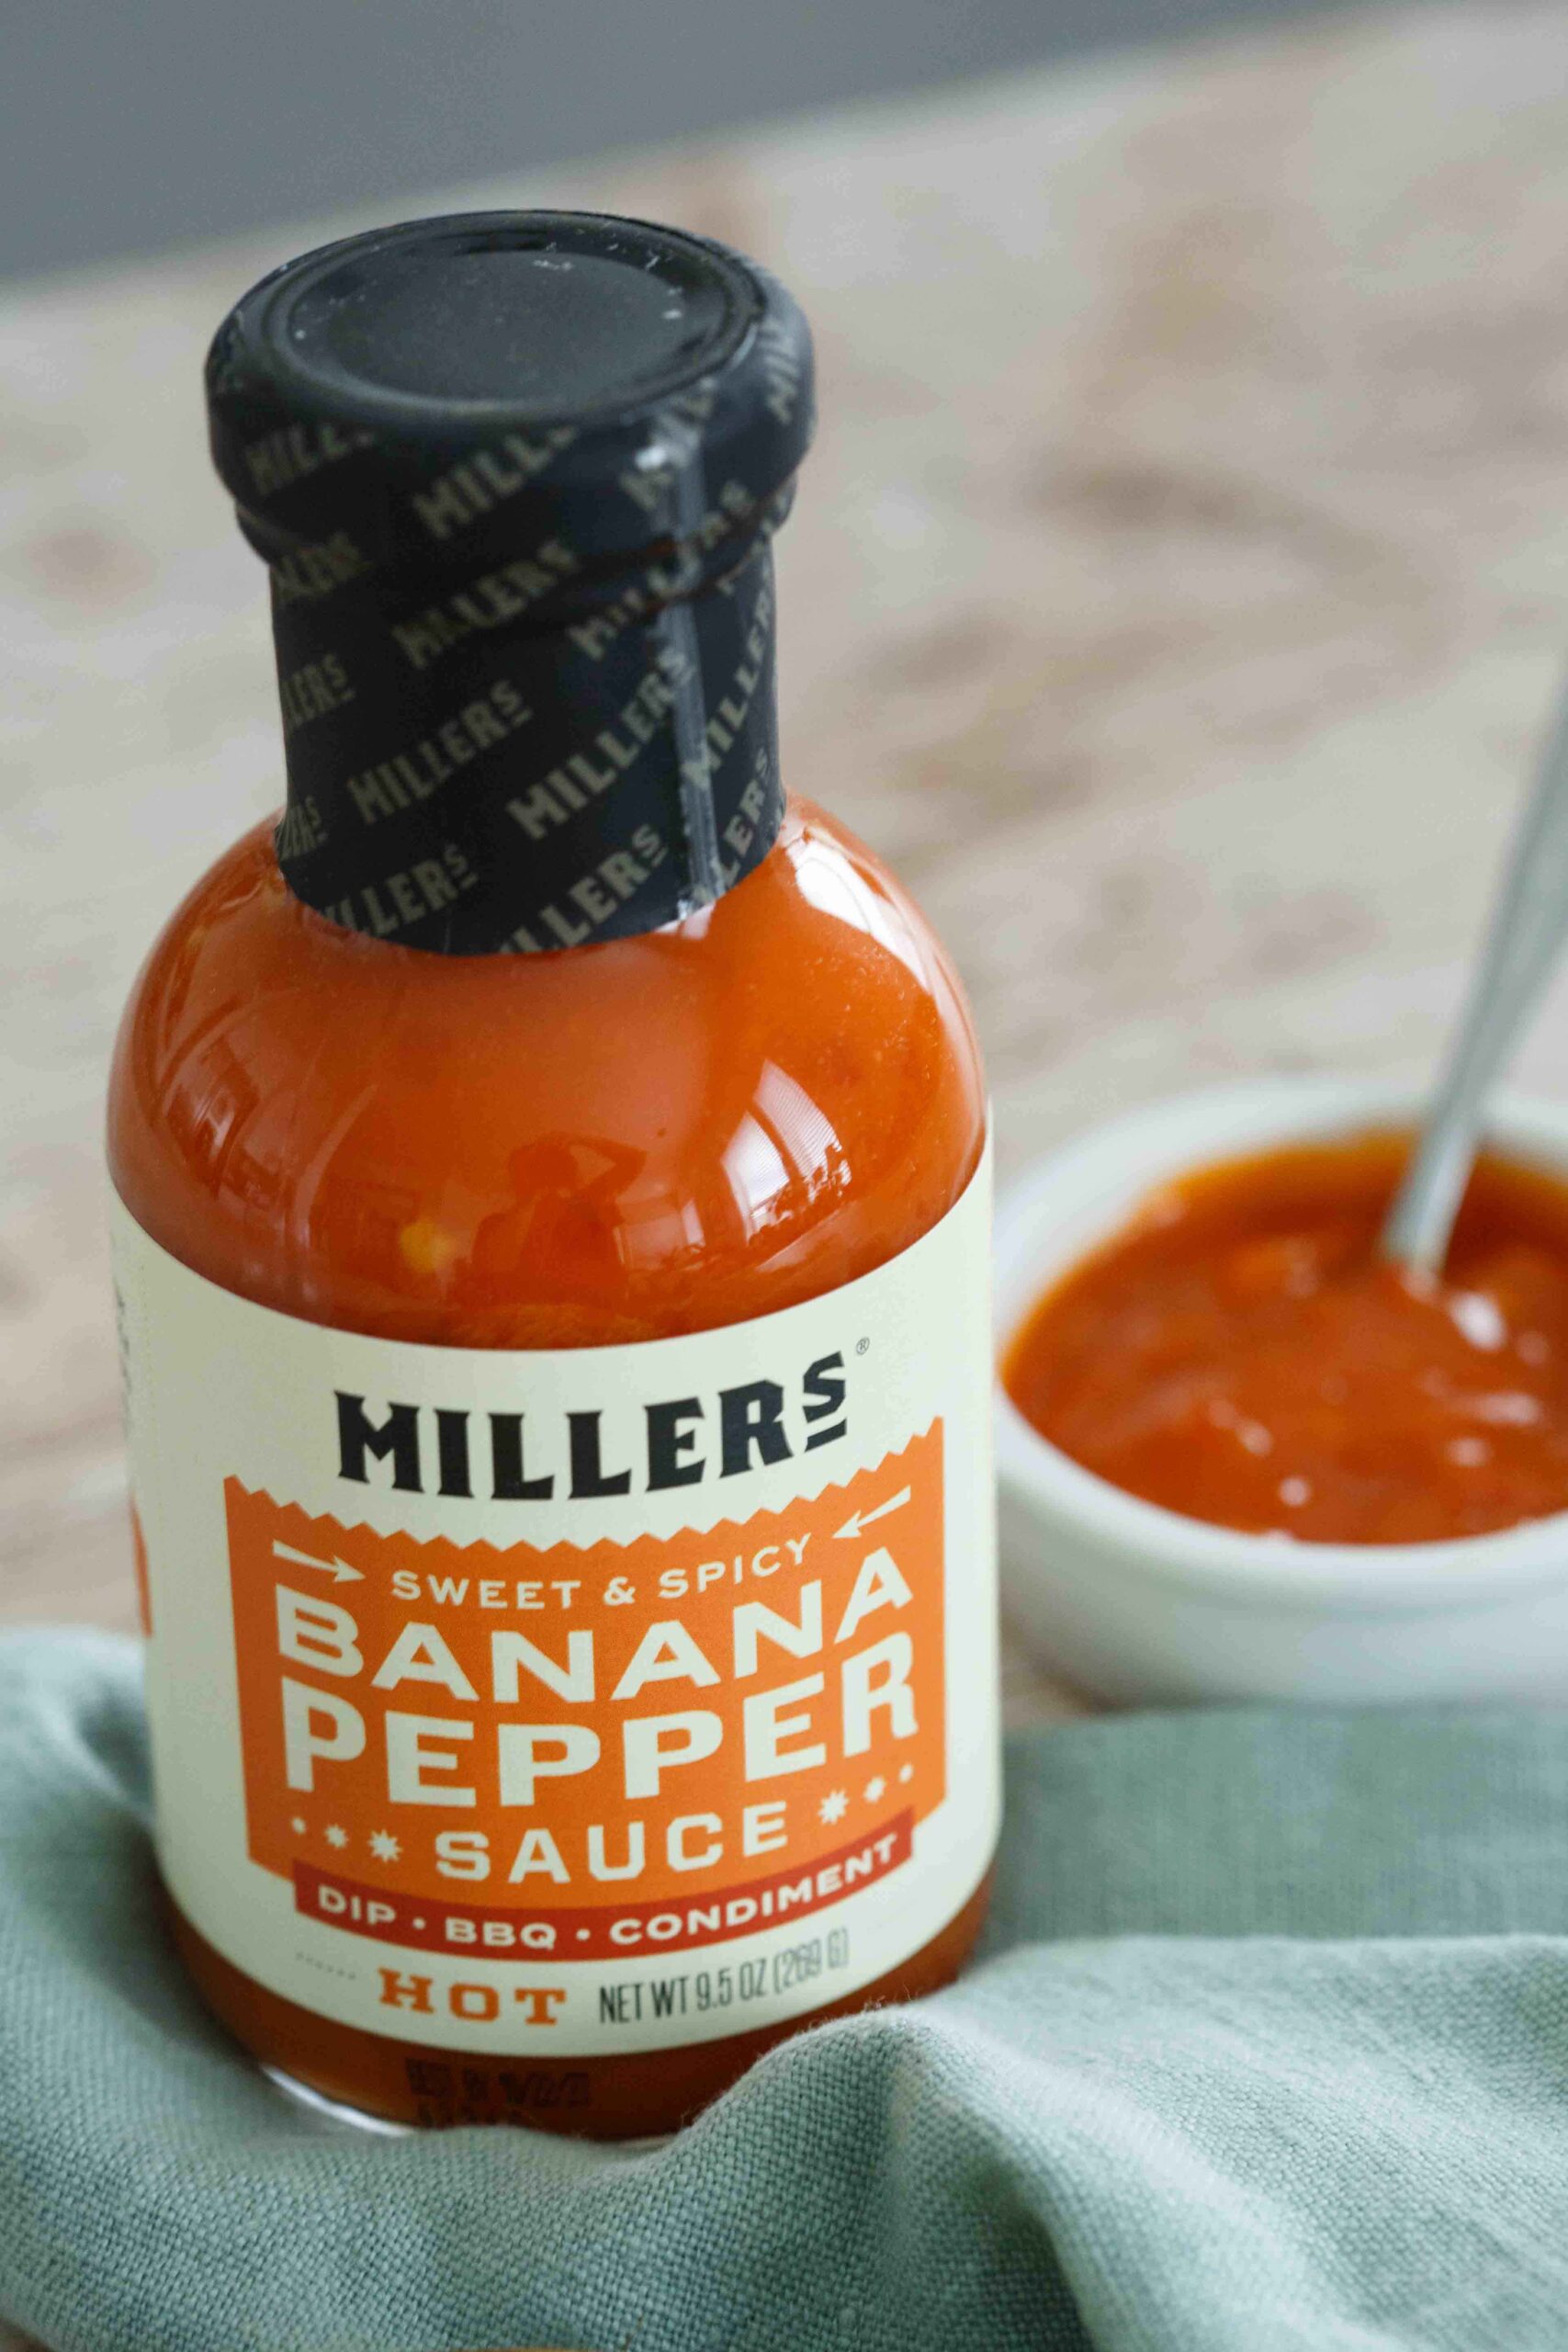
Next make the sauce in a small saucepan on the stove. Add the Miller’s hot Banana Pepper sauce along with some butter. Mix with a spoon and let it melt together into a lovely silky buttery hot sauce.
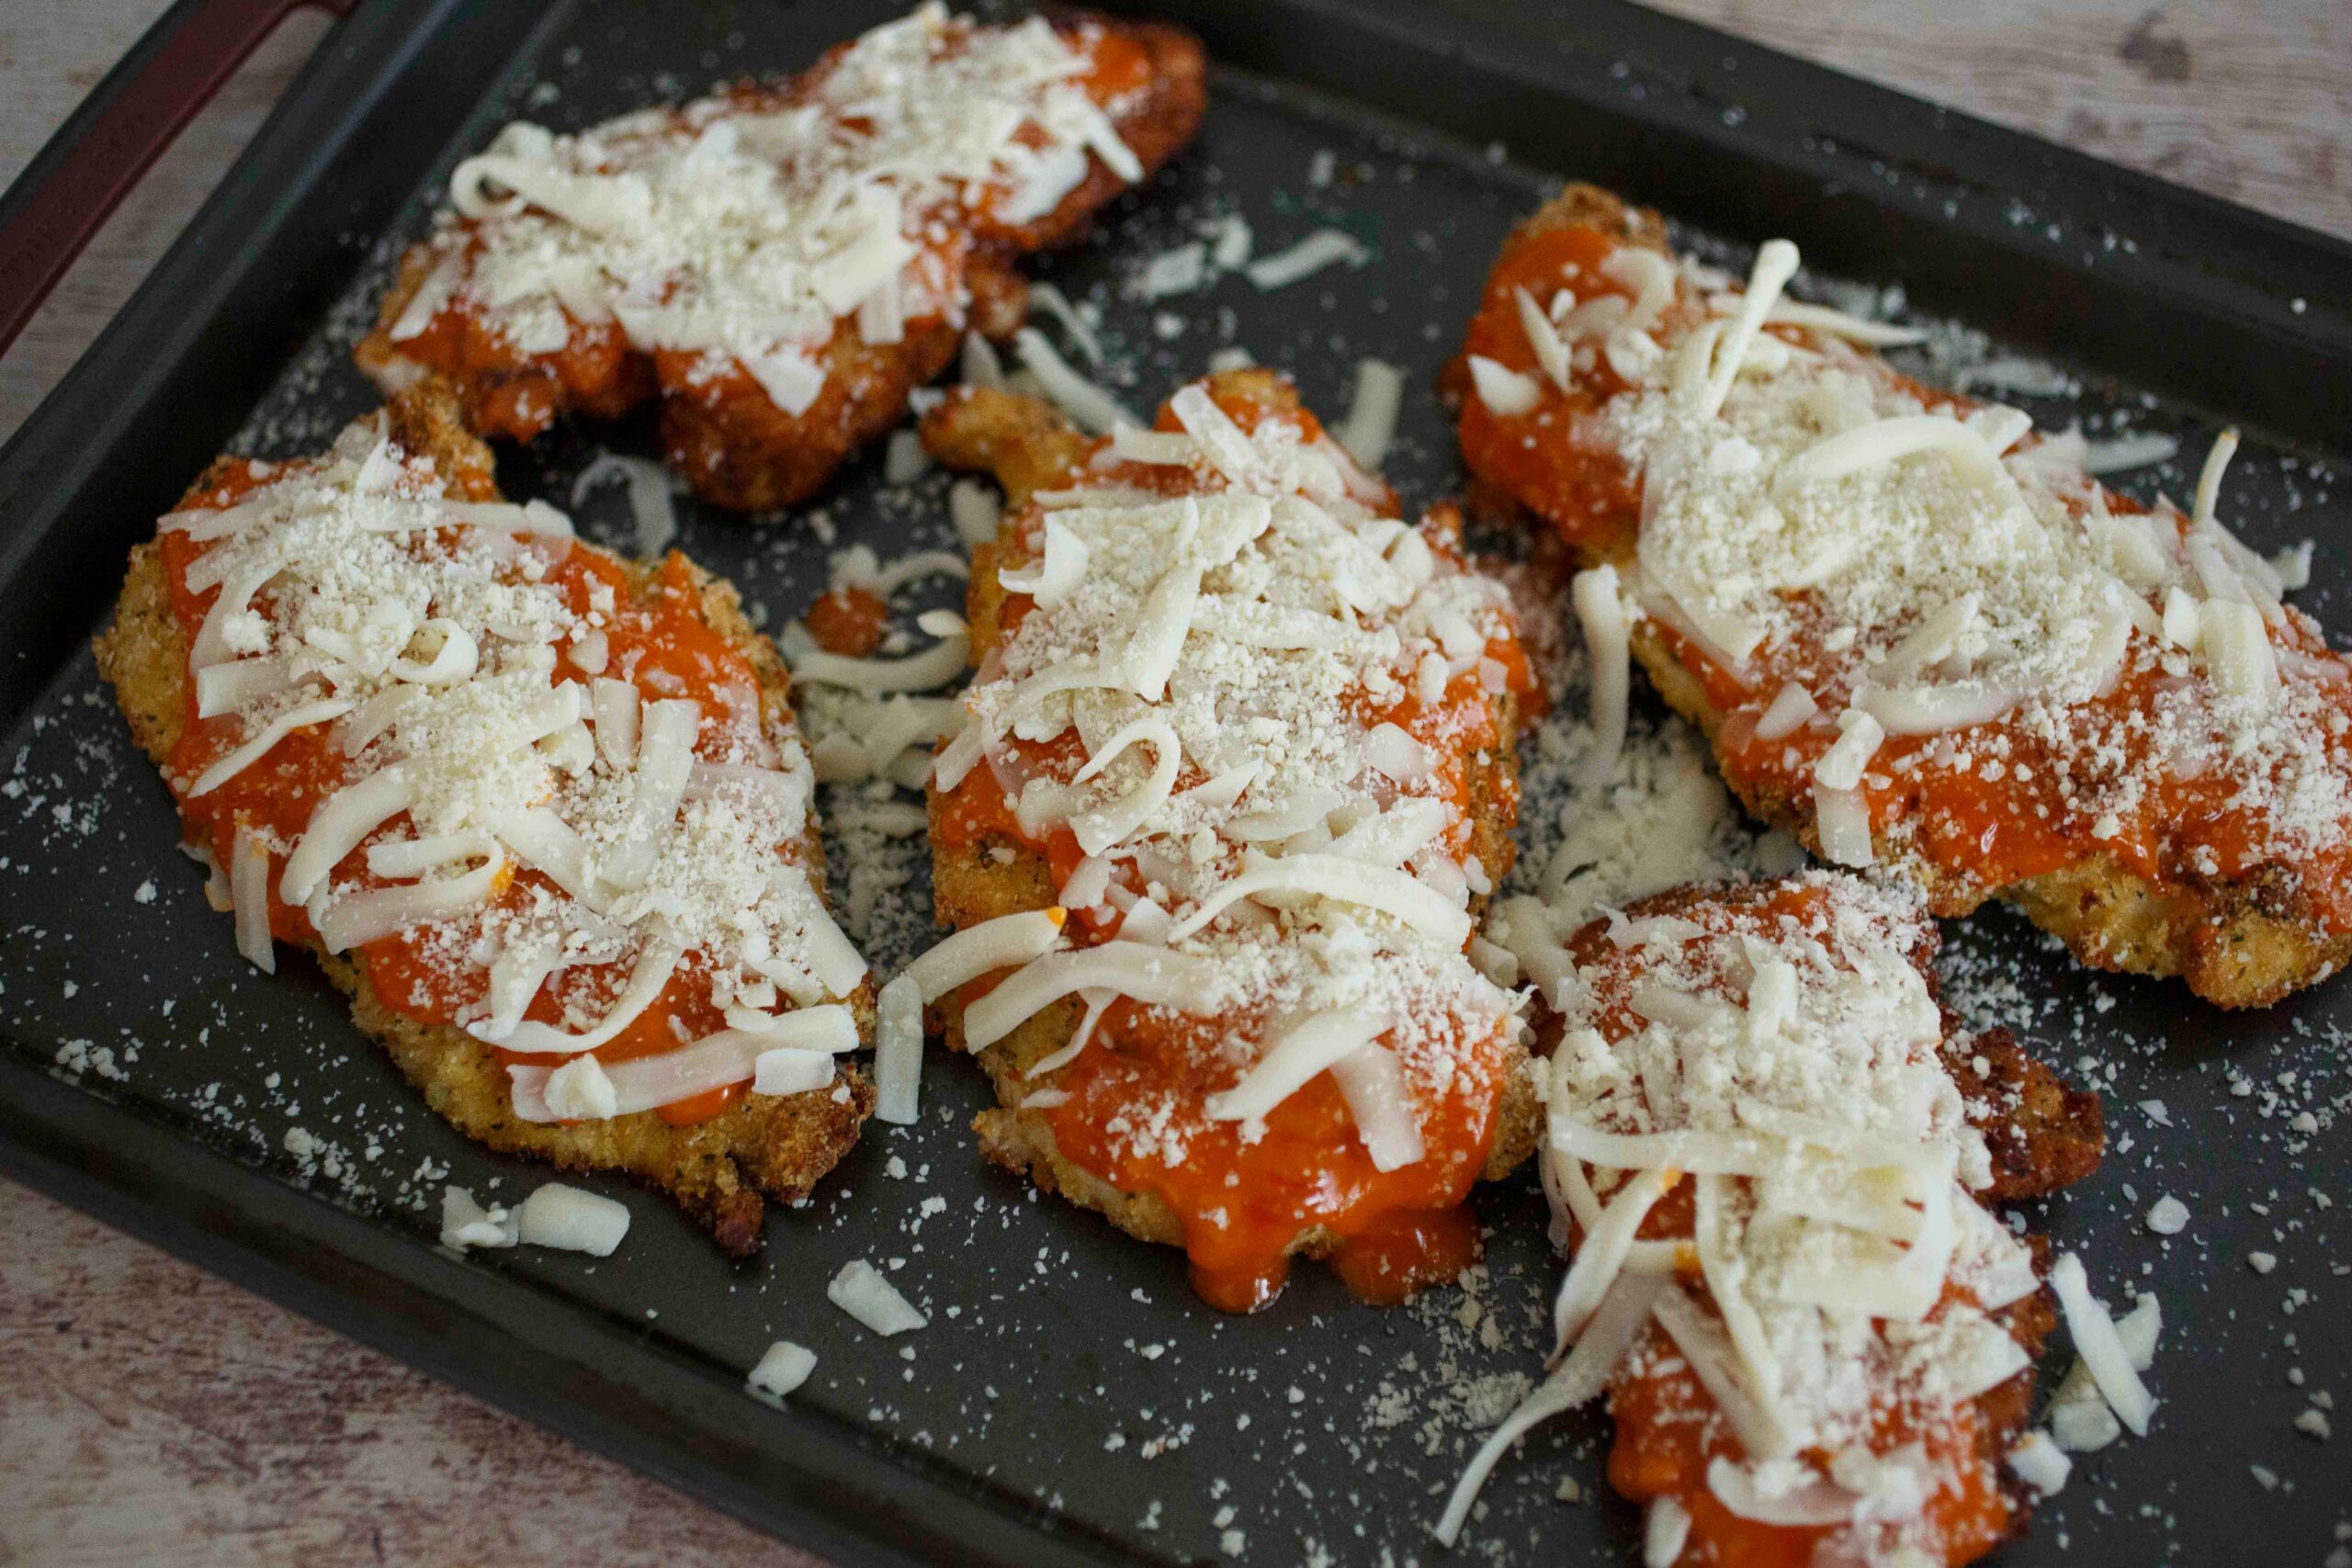
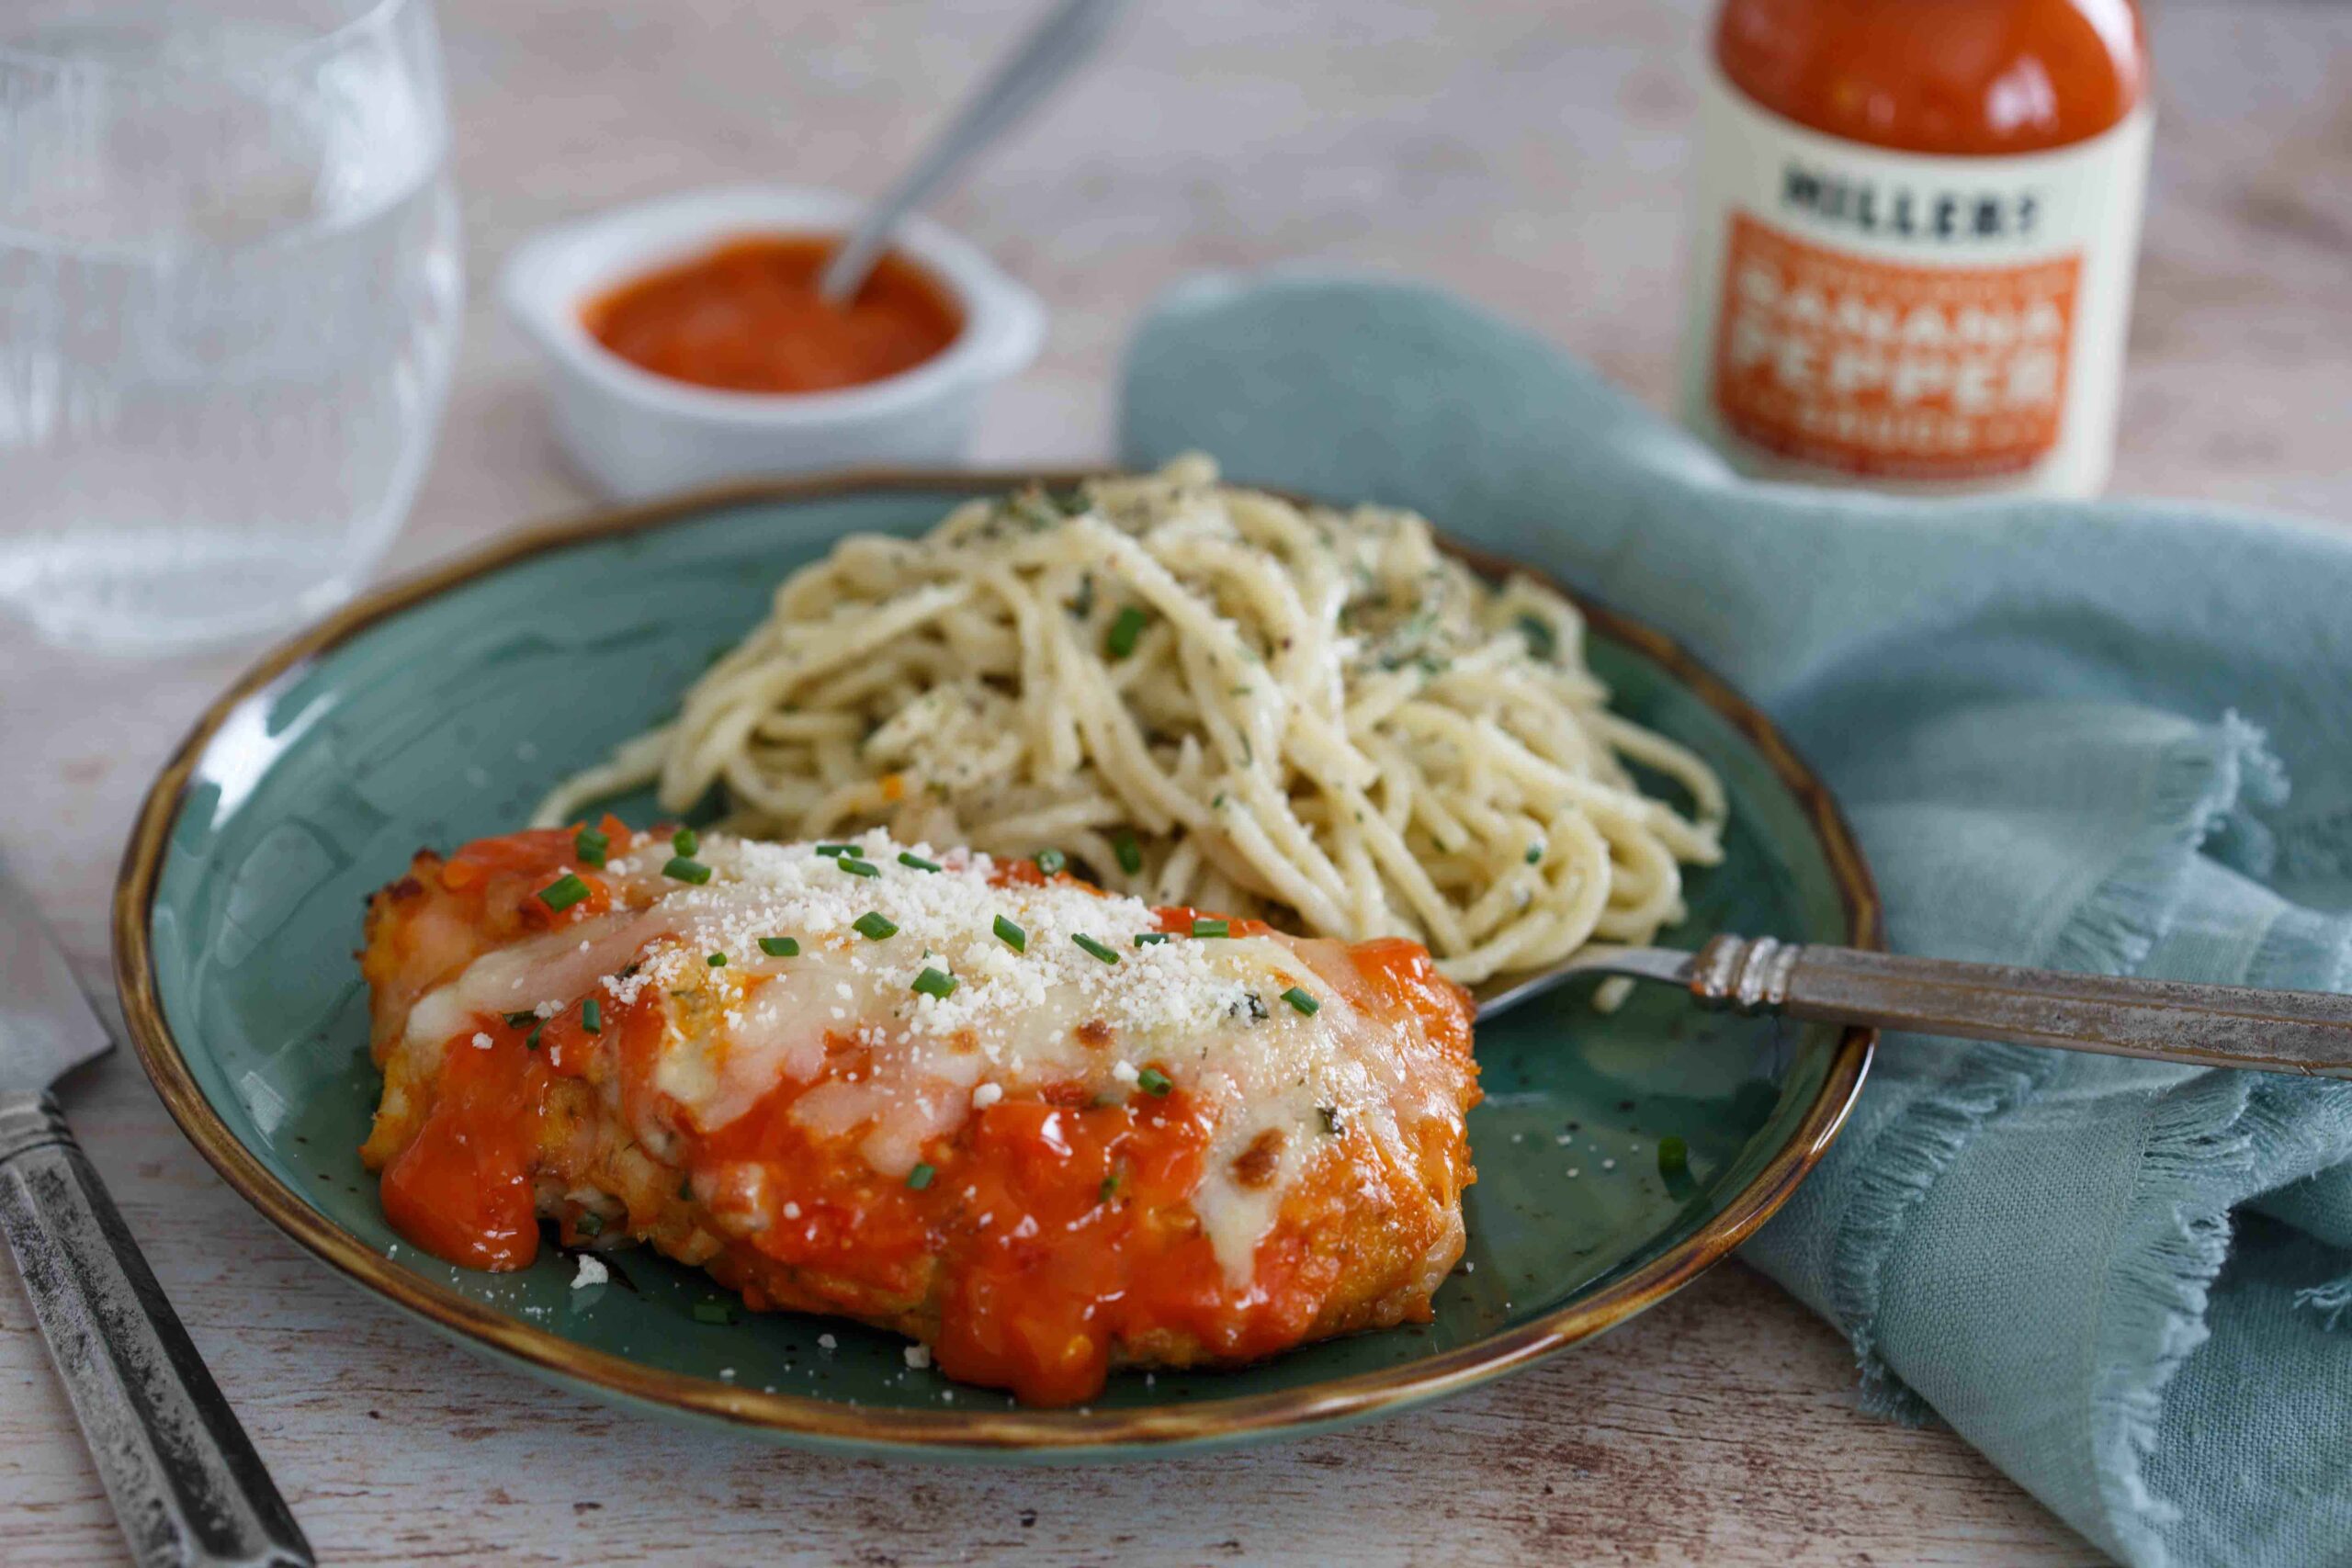
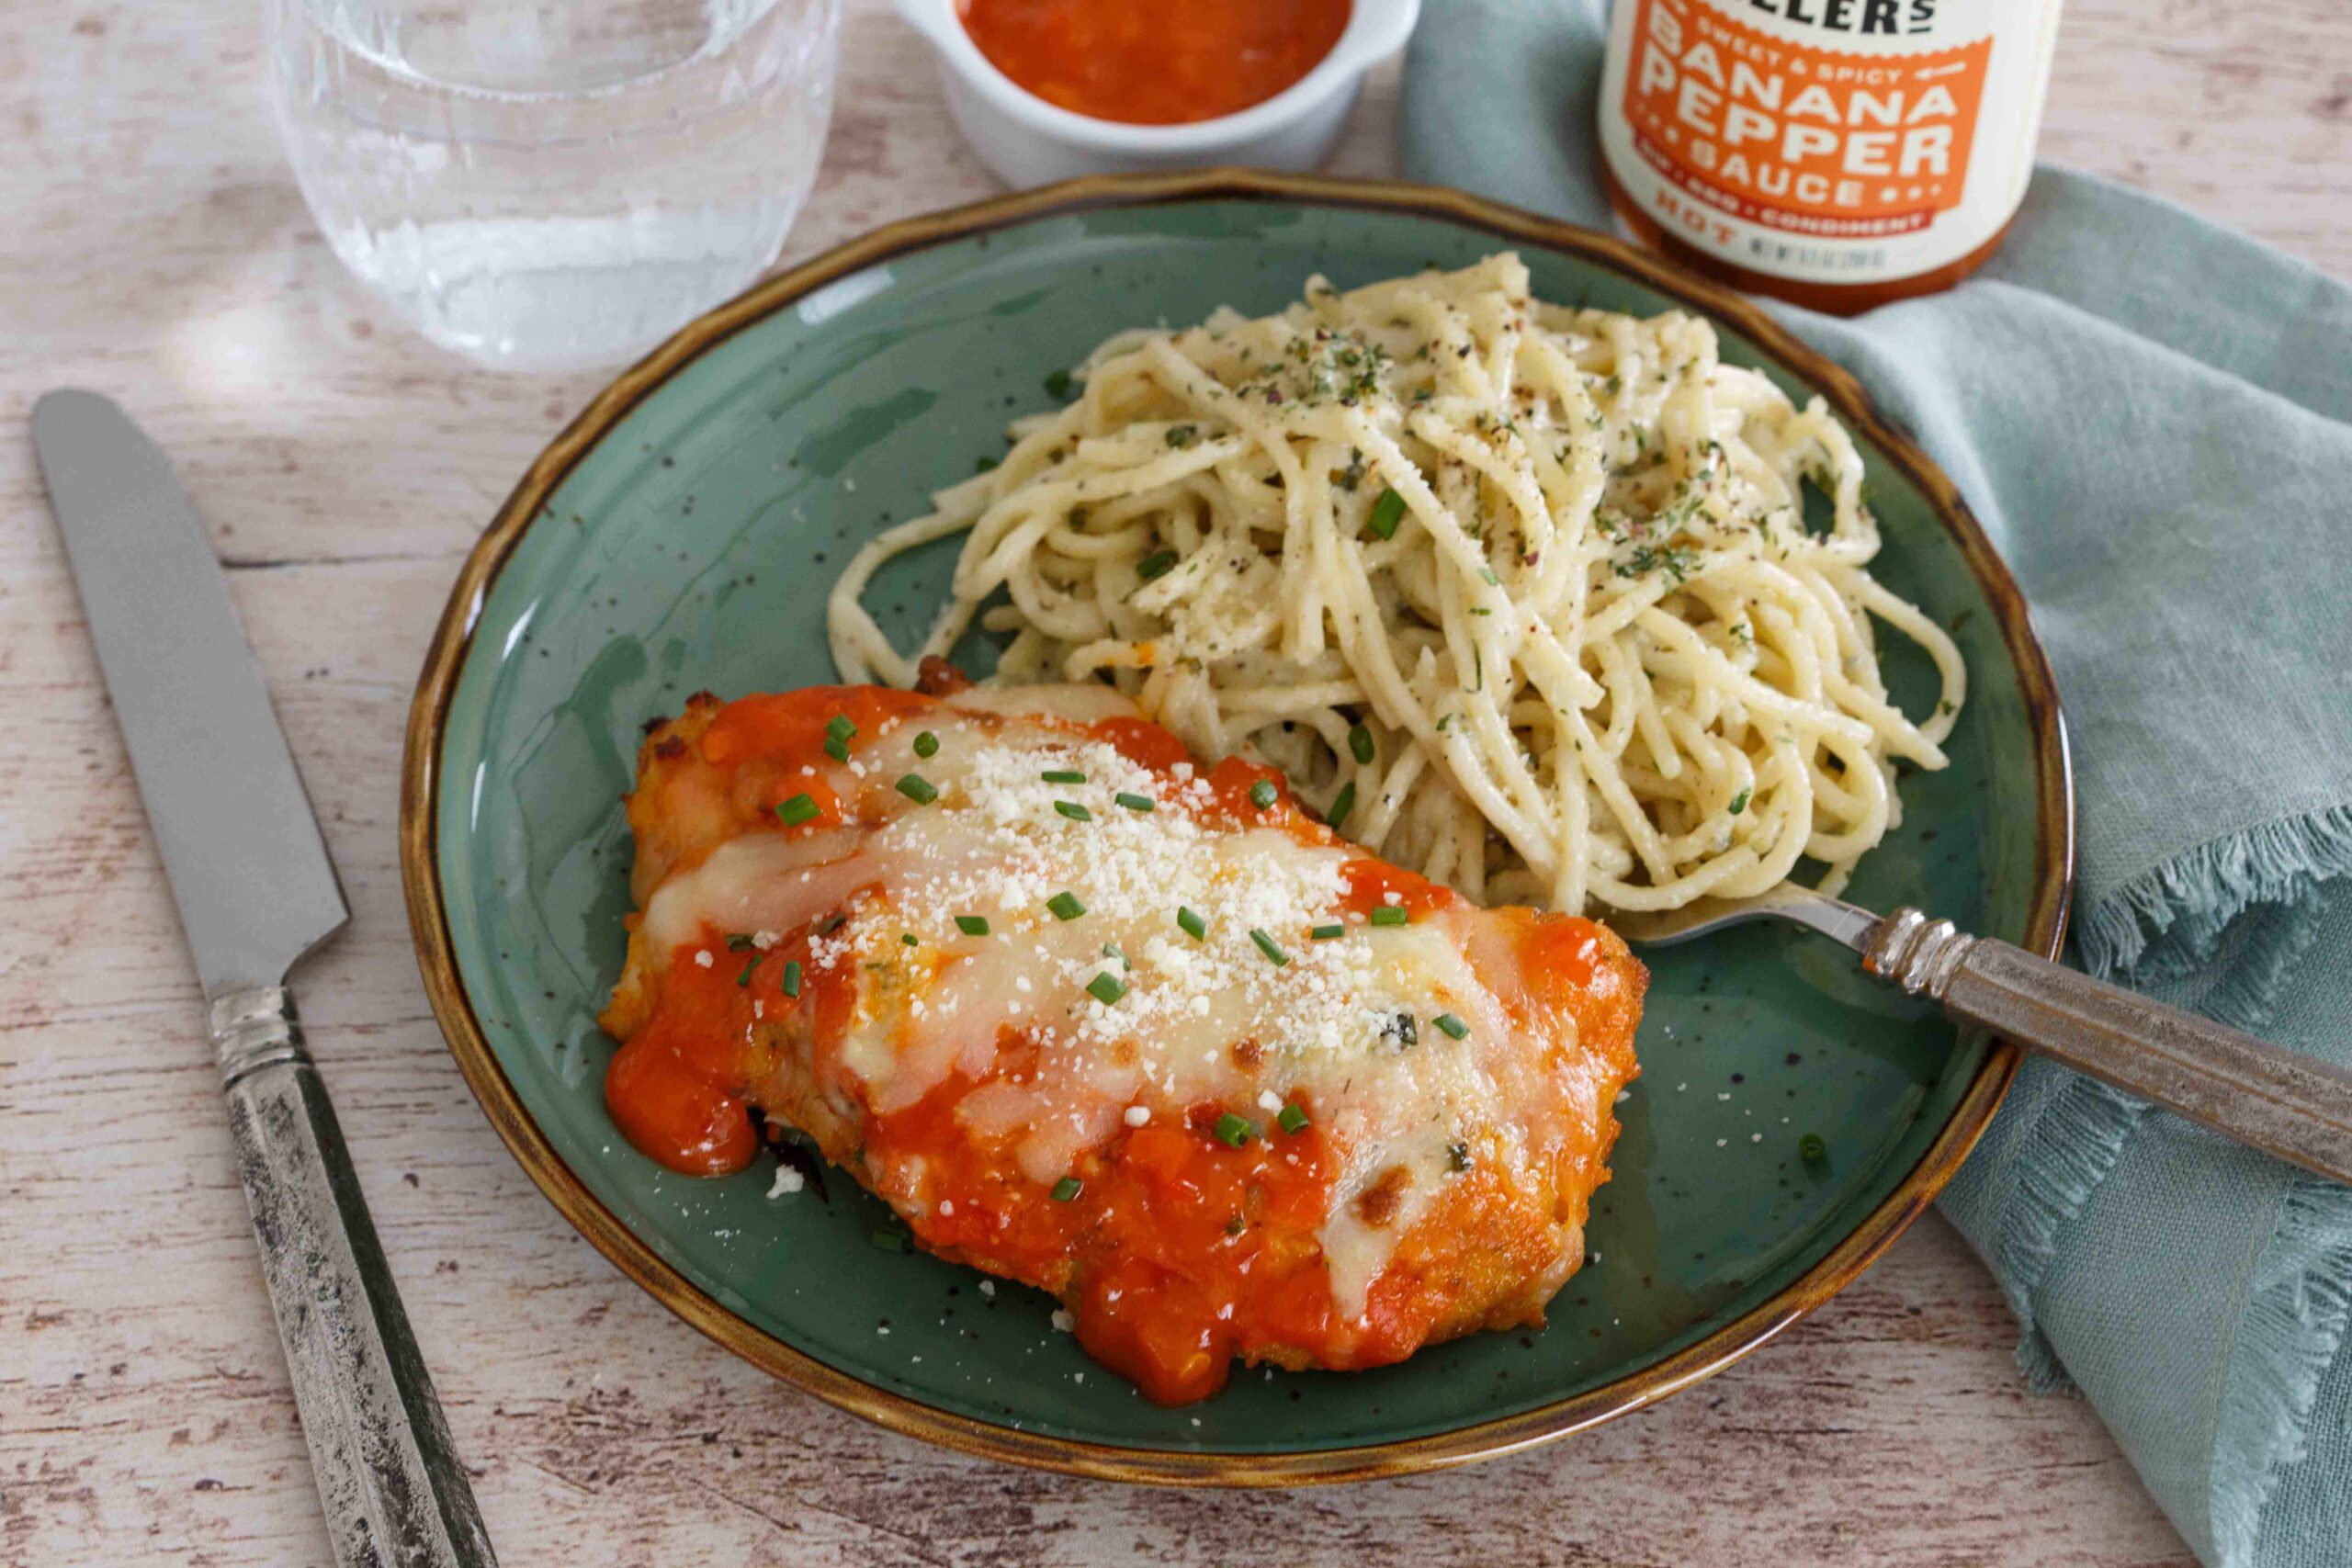
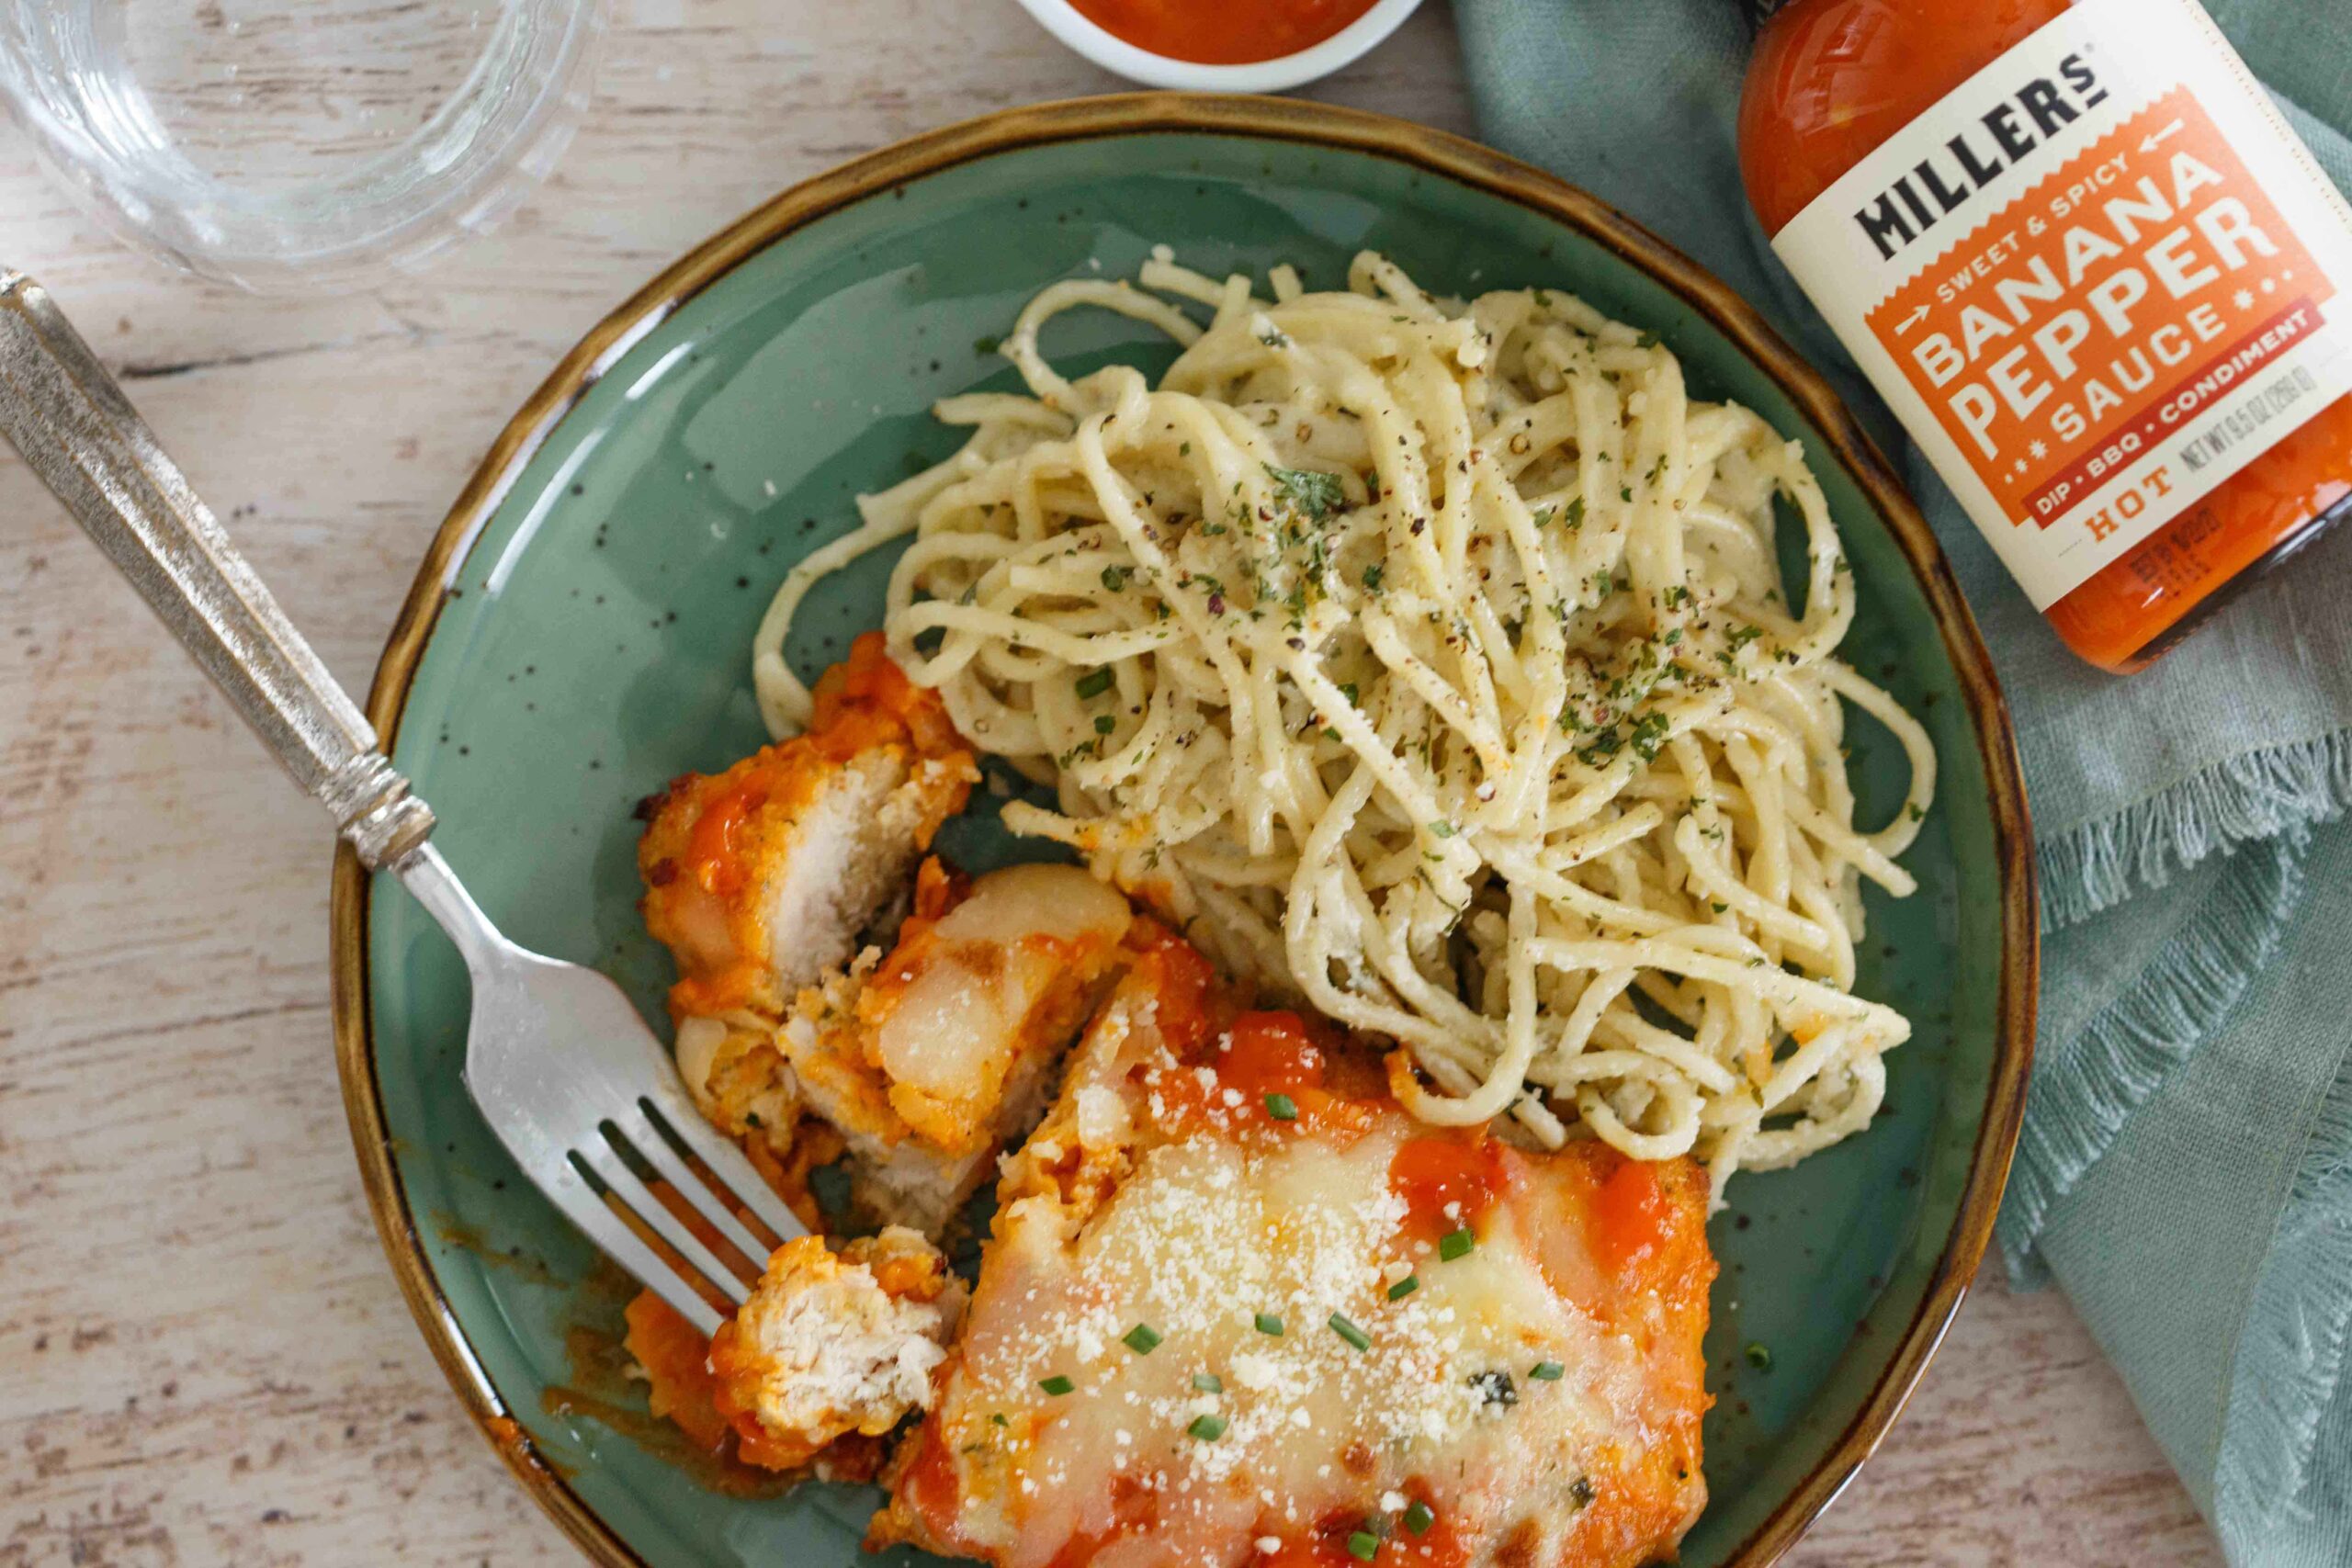
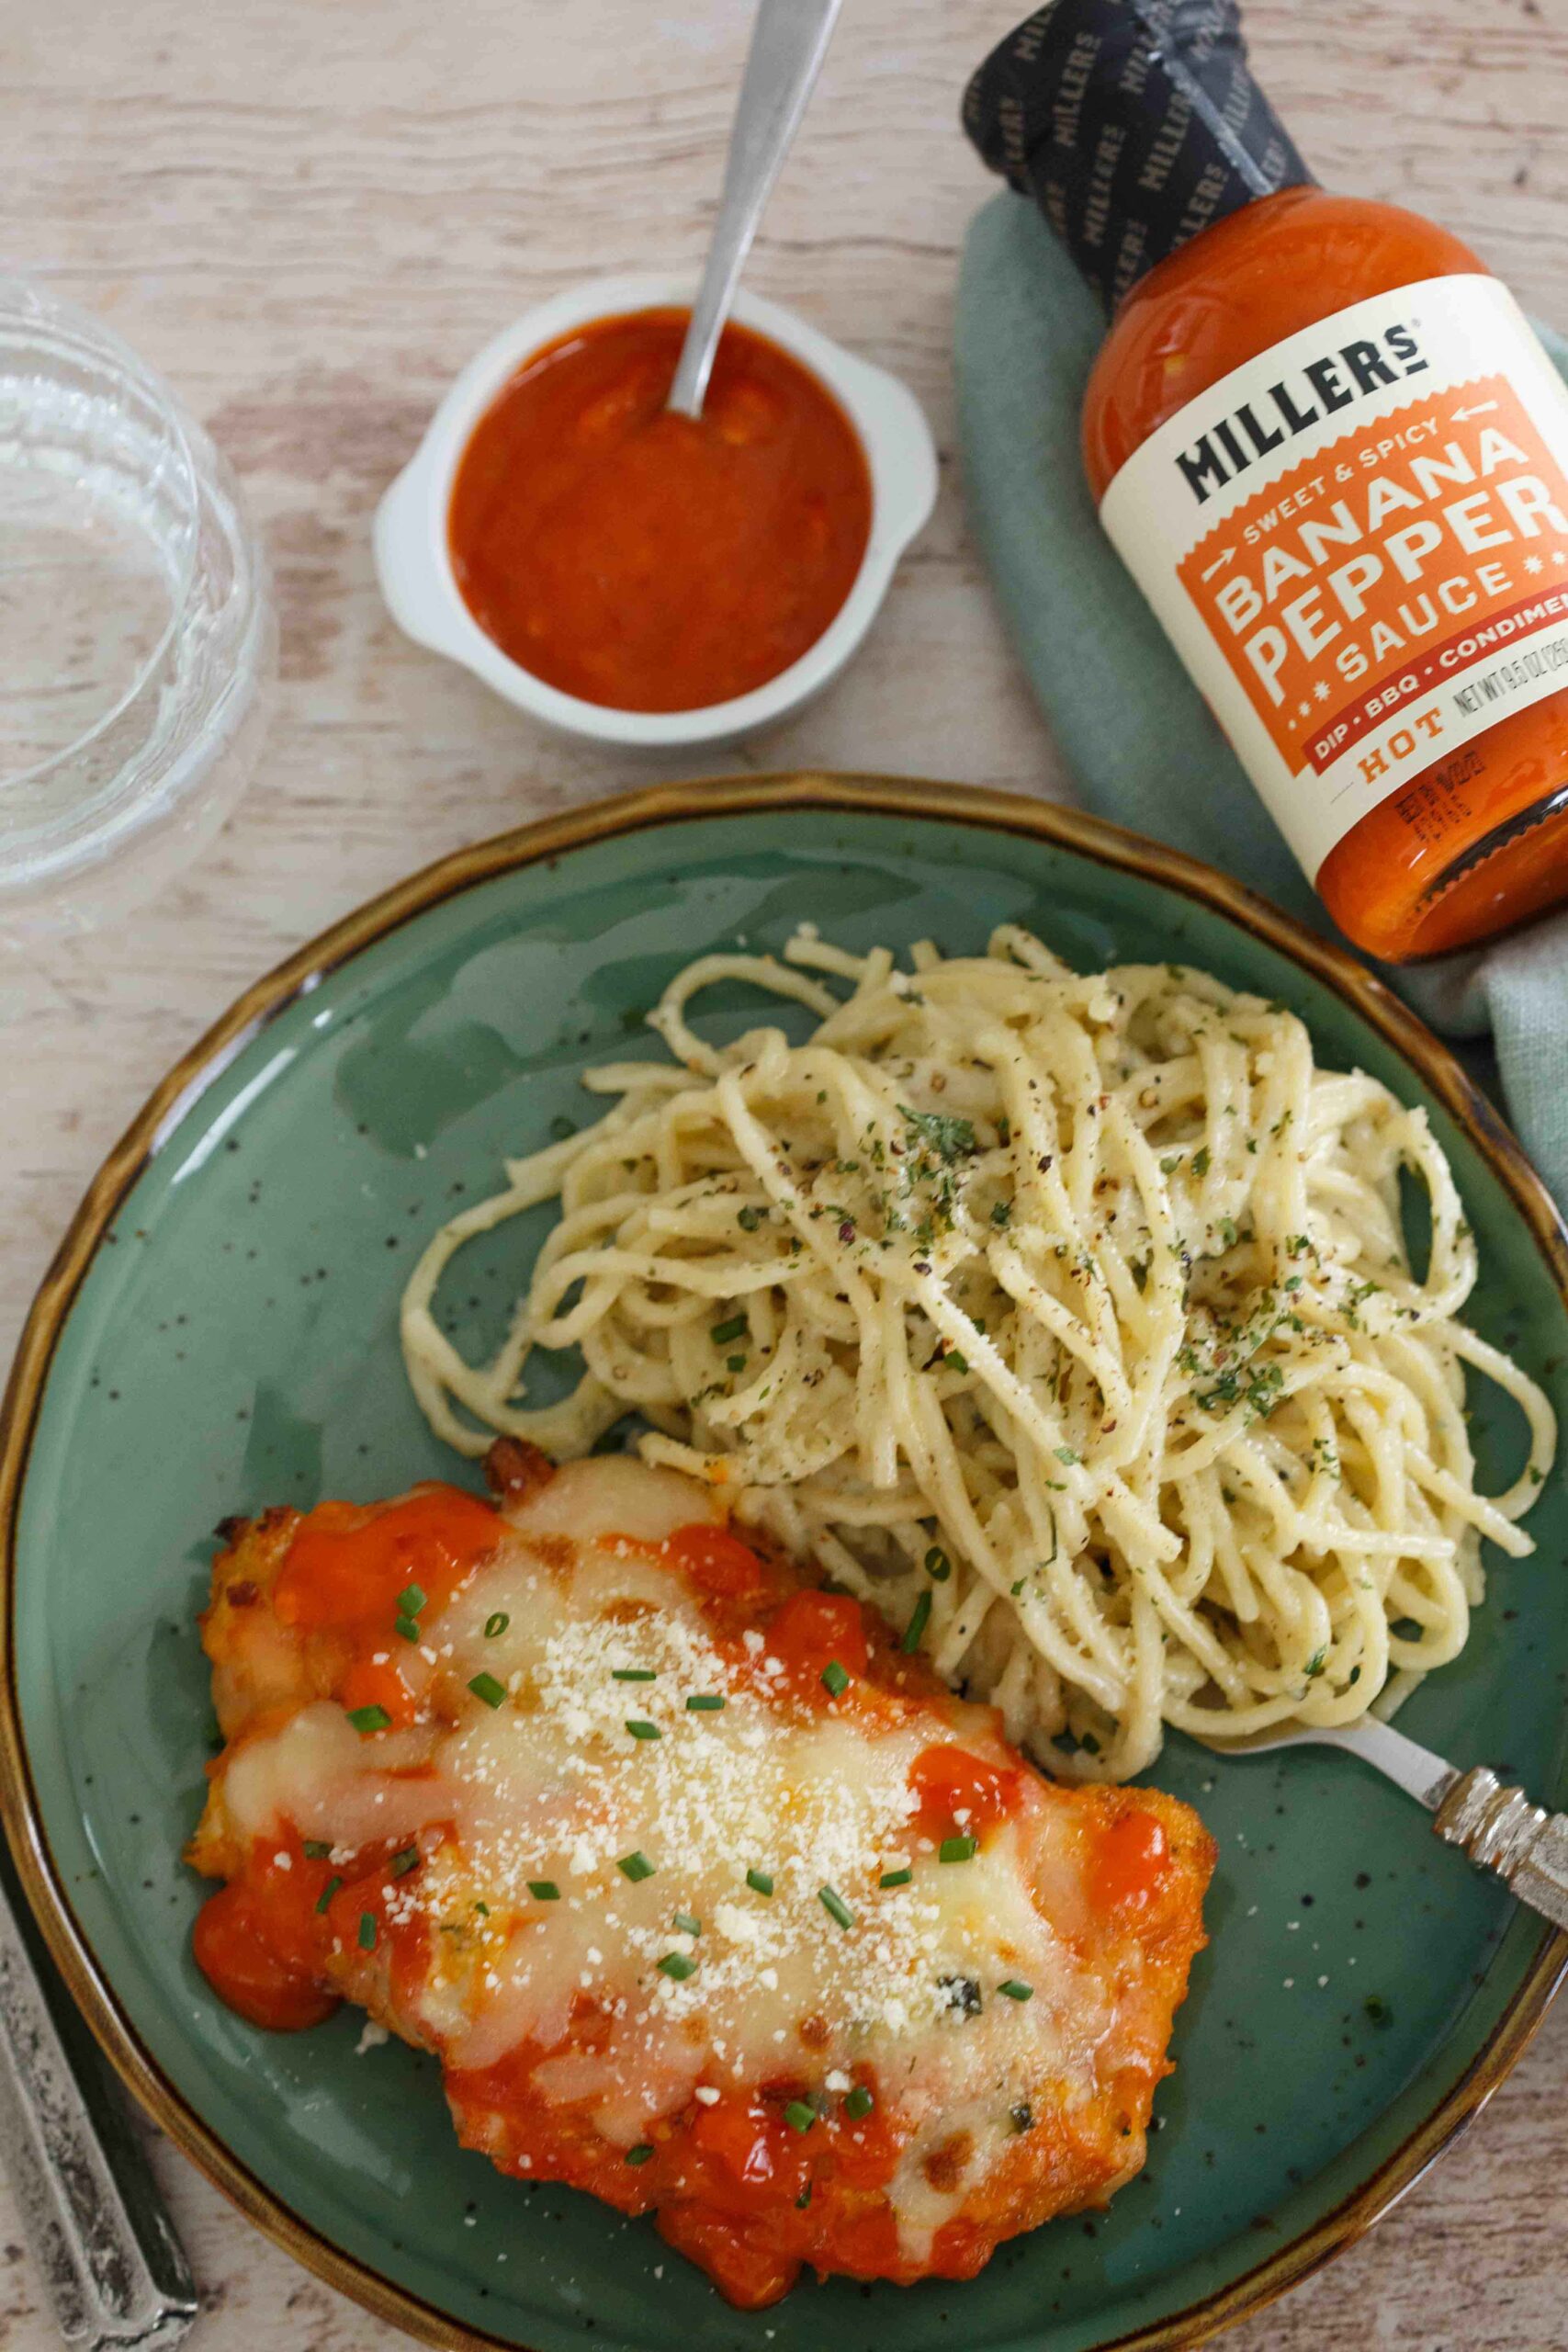
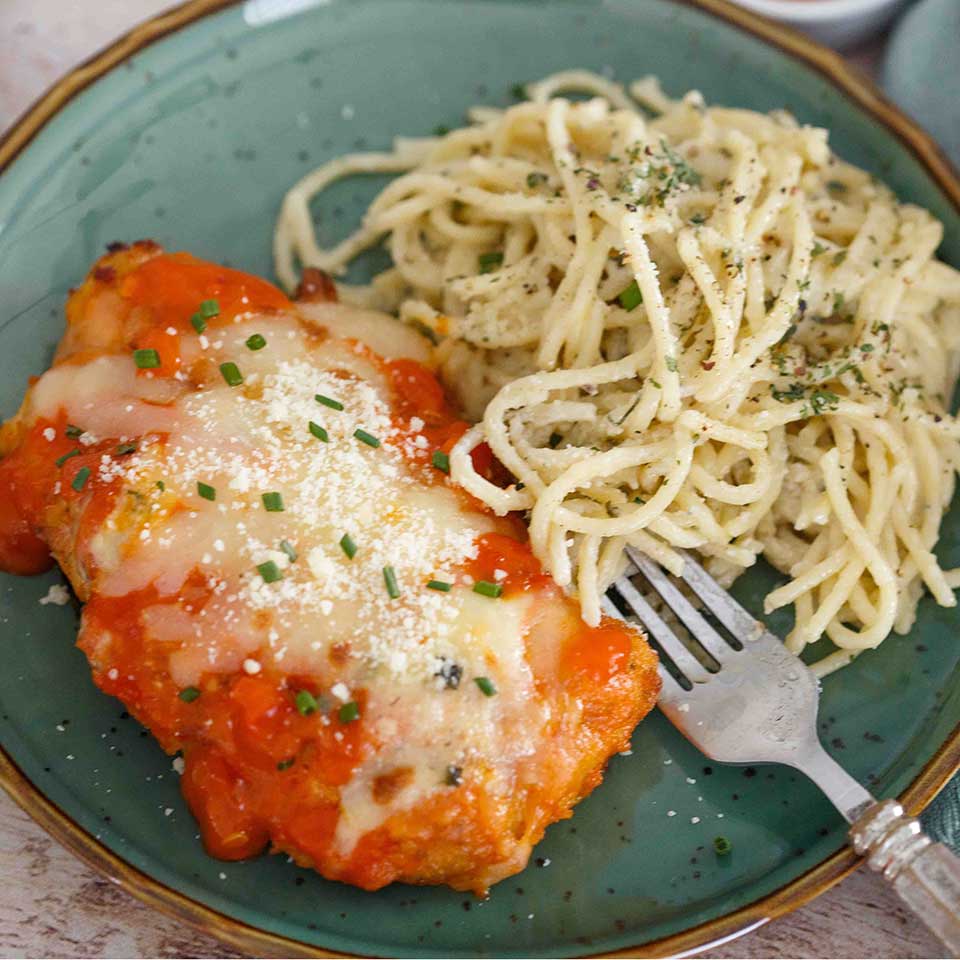
Pour the sauce over the baked crunchy chicken to let the coating soak up the buttery hot sauce. Then top the chicken with shredded mozzarella and grated Parmesan and broil on high for a few minutes until the cheese melts and gets all bubbly and browned.
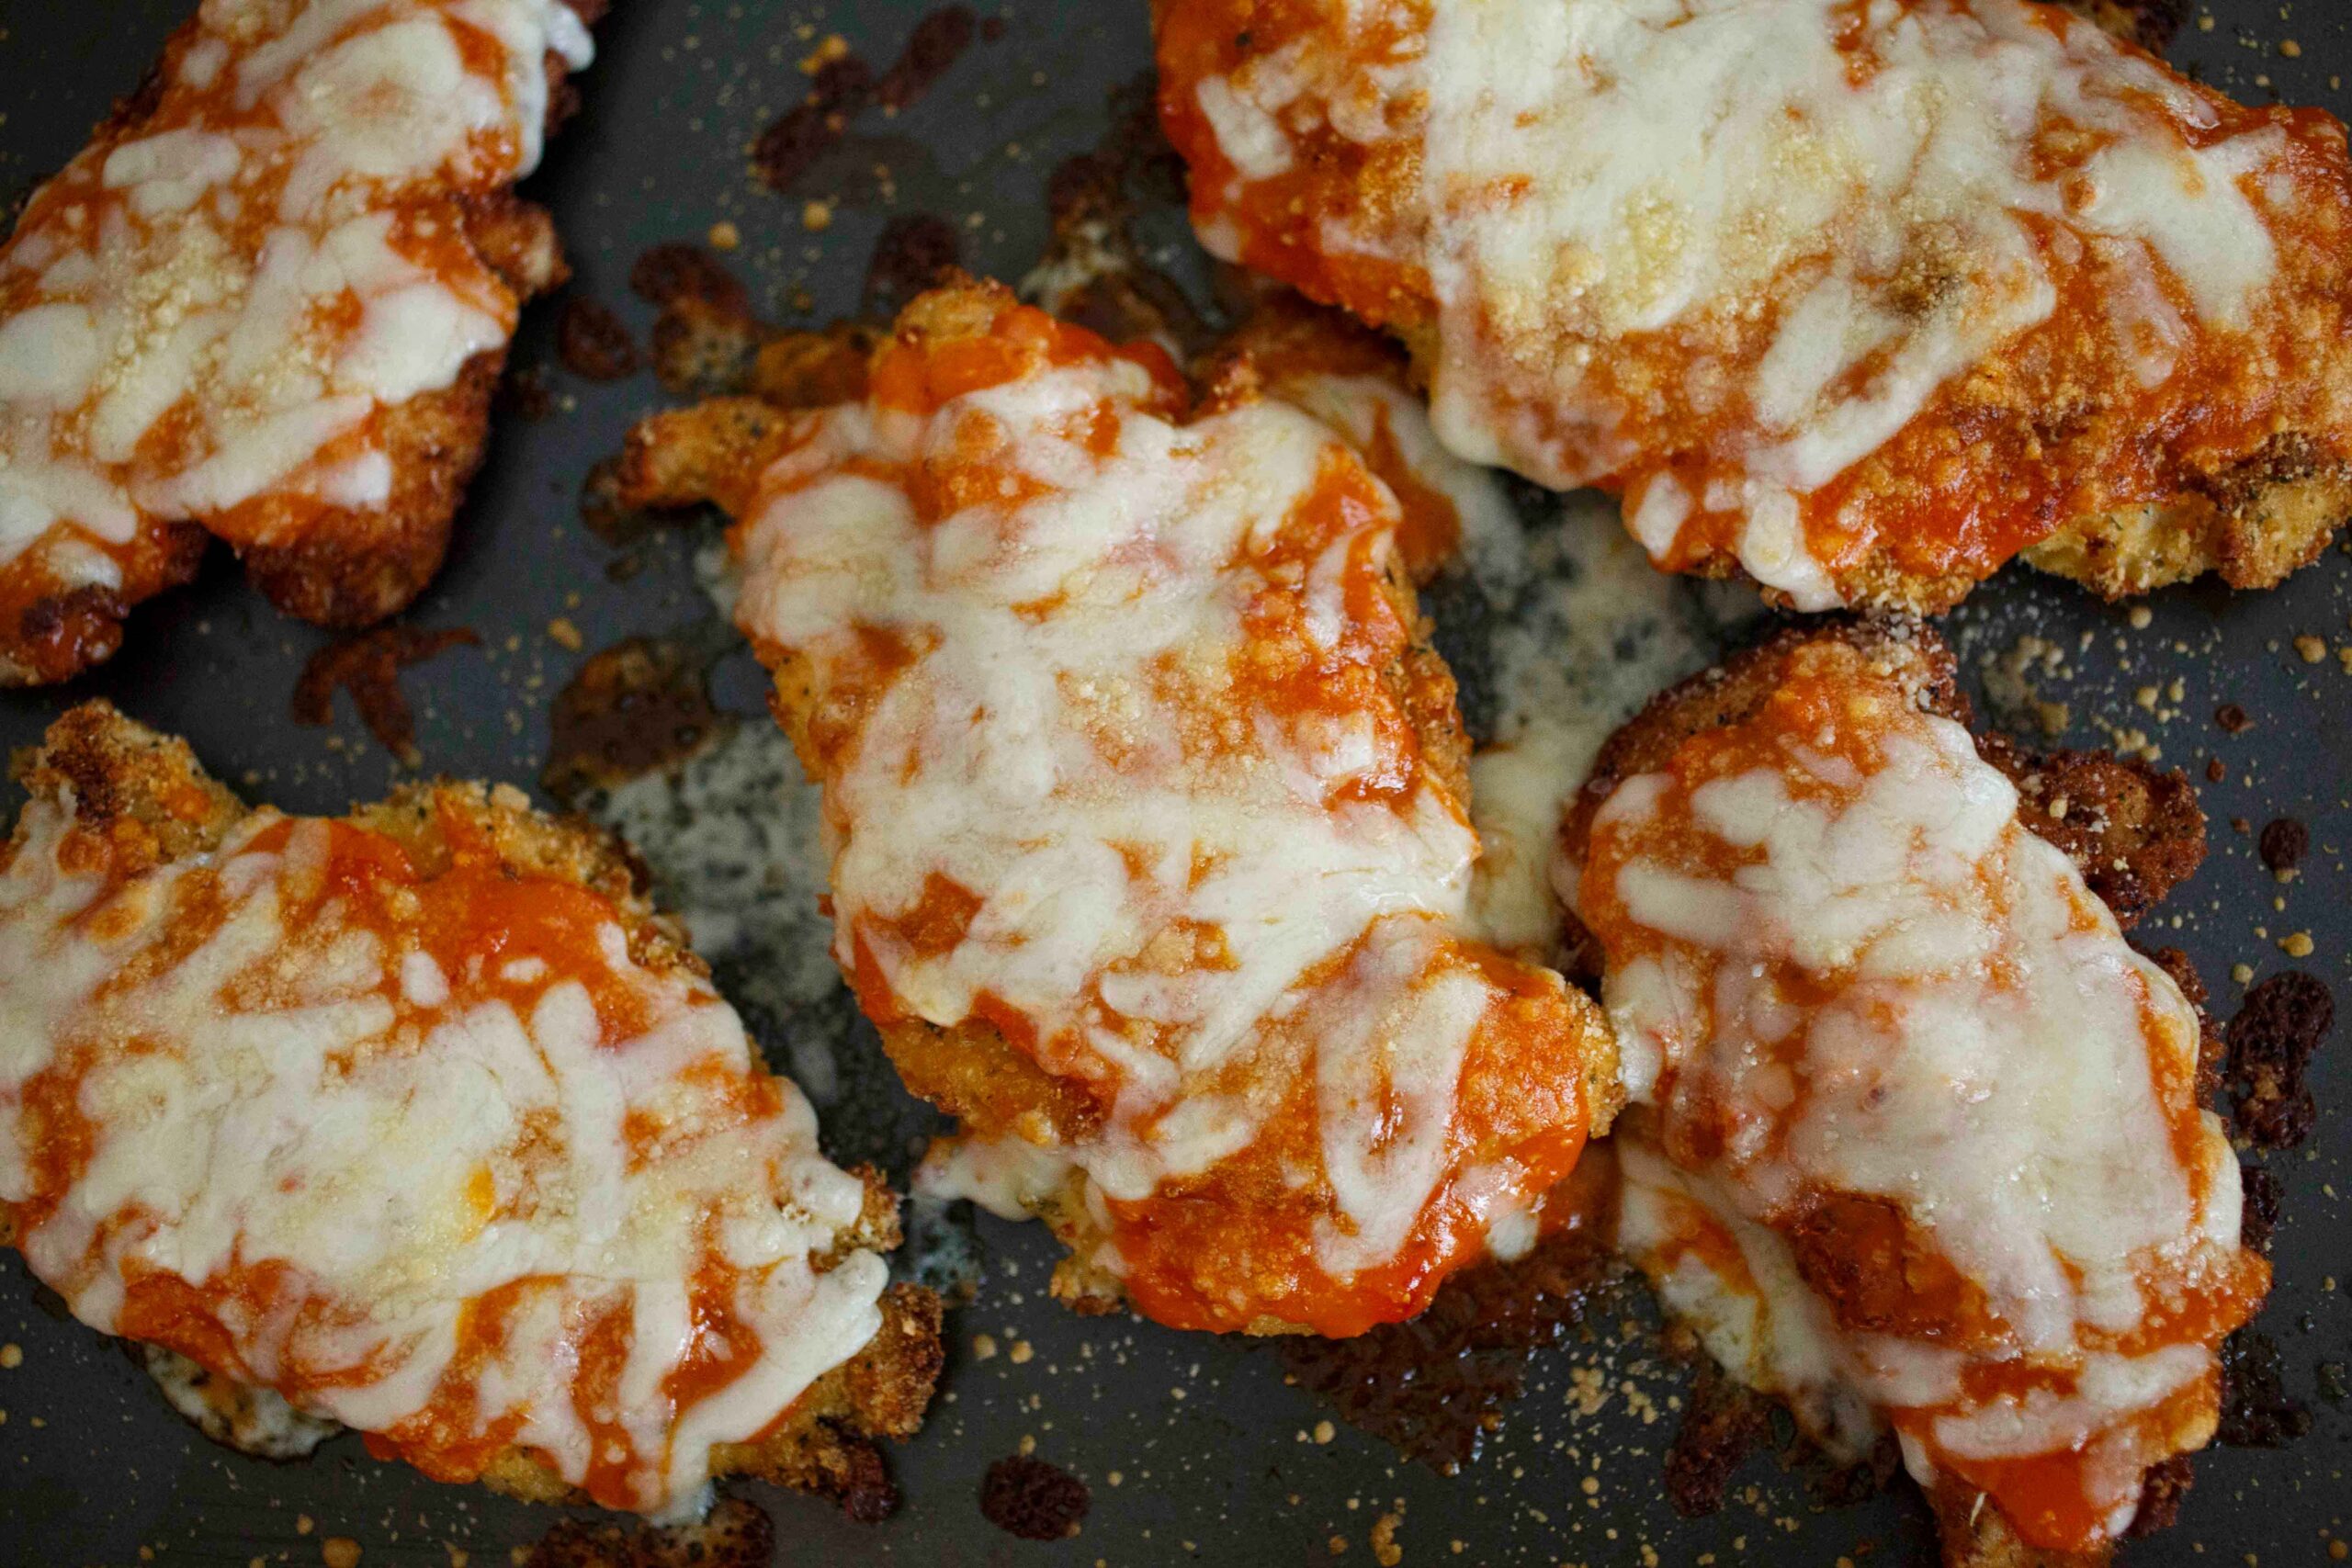
For serving, top the baked Chicken Parmesan with extra drizzles of blue cheese dressing (or ranch, if you prefer) and sprinkle the Spicy Chicken Parmesan with sliced chives for garnish. Delish!!!
Step 3: Make the Gorgonzola Pasta
First you’ll need to cook your pasta, drain and set aside for mixing in the sauce later (I used spaghetti but any pasta shape will work here!)
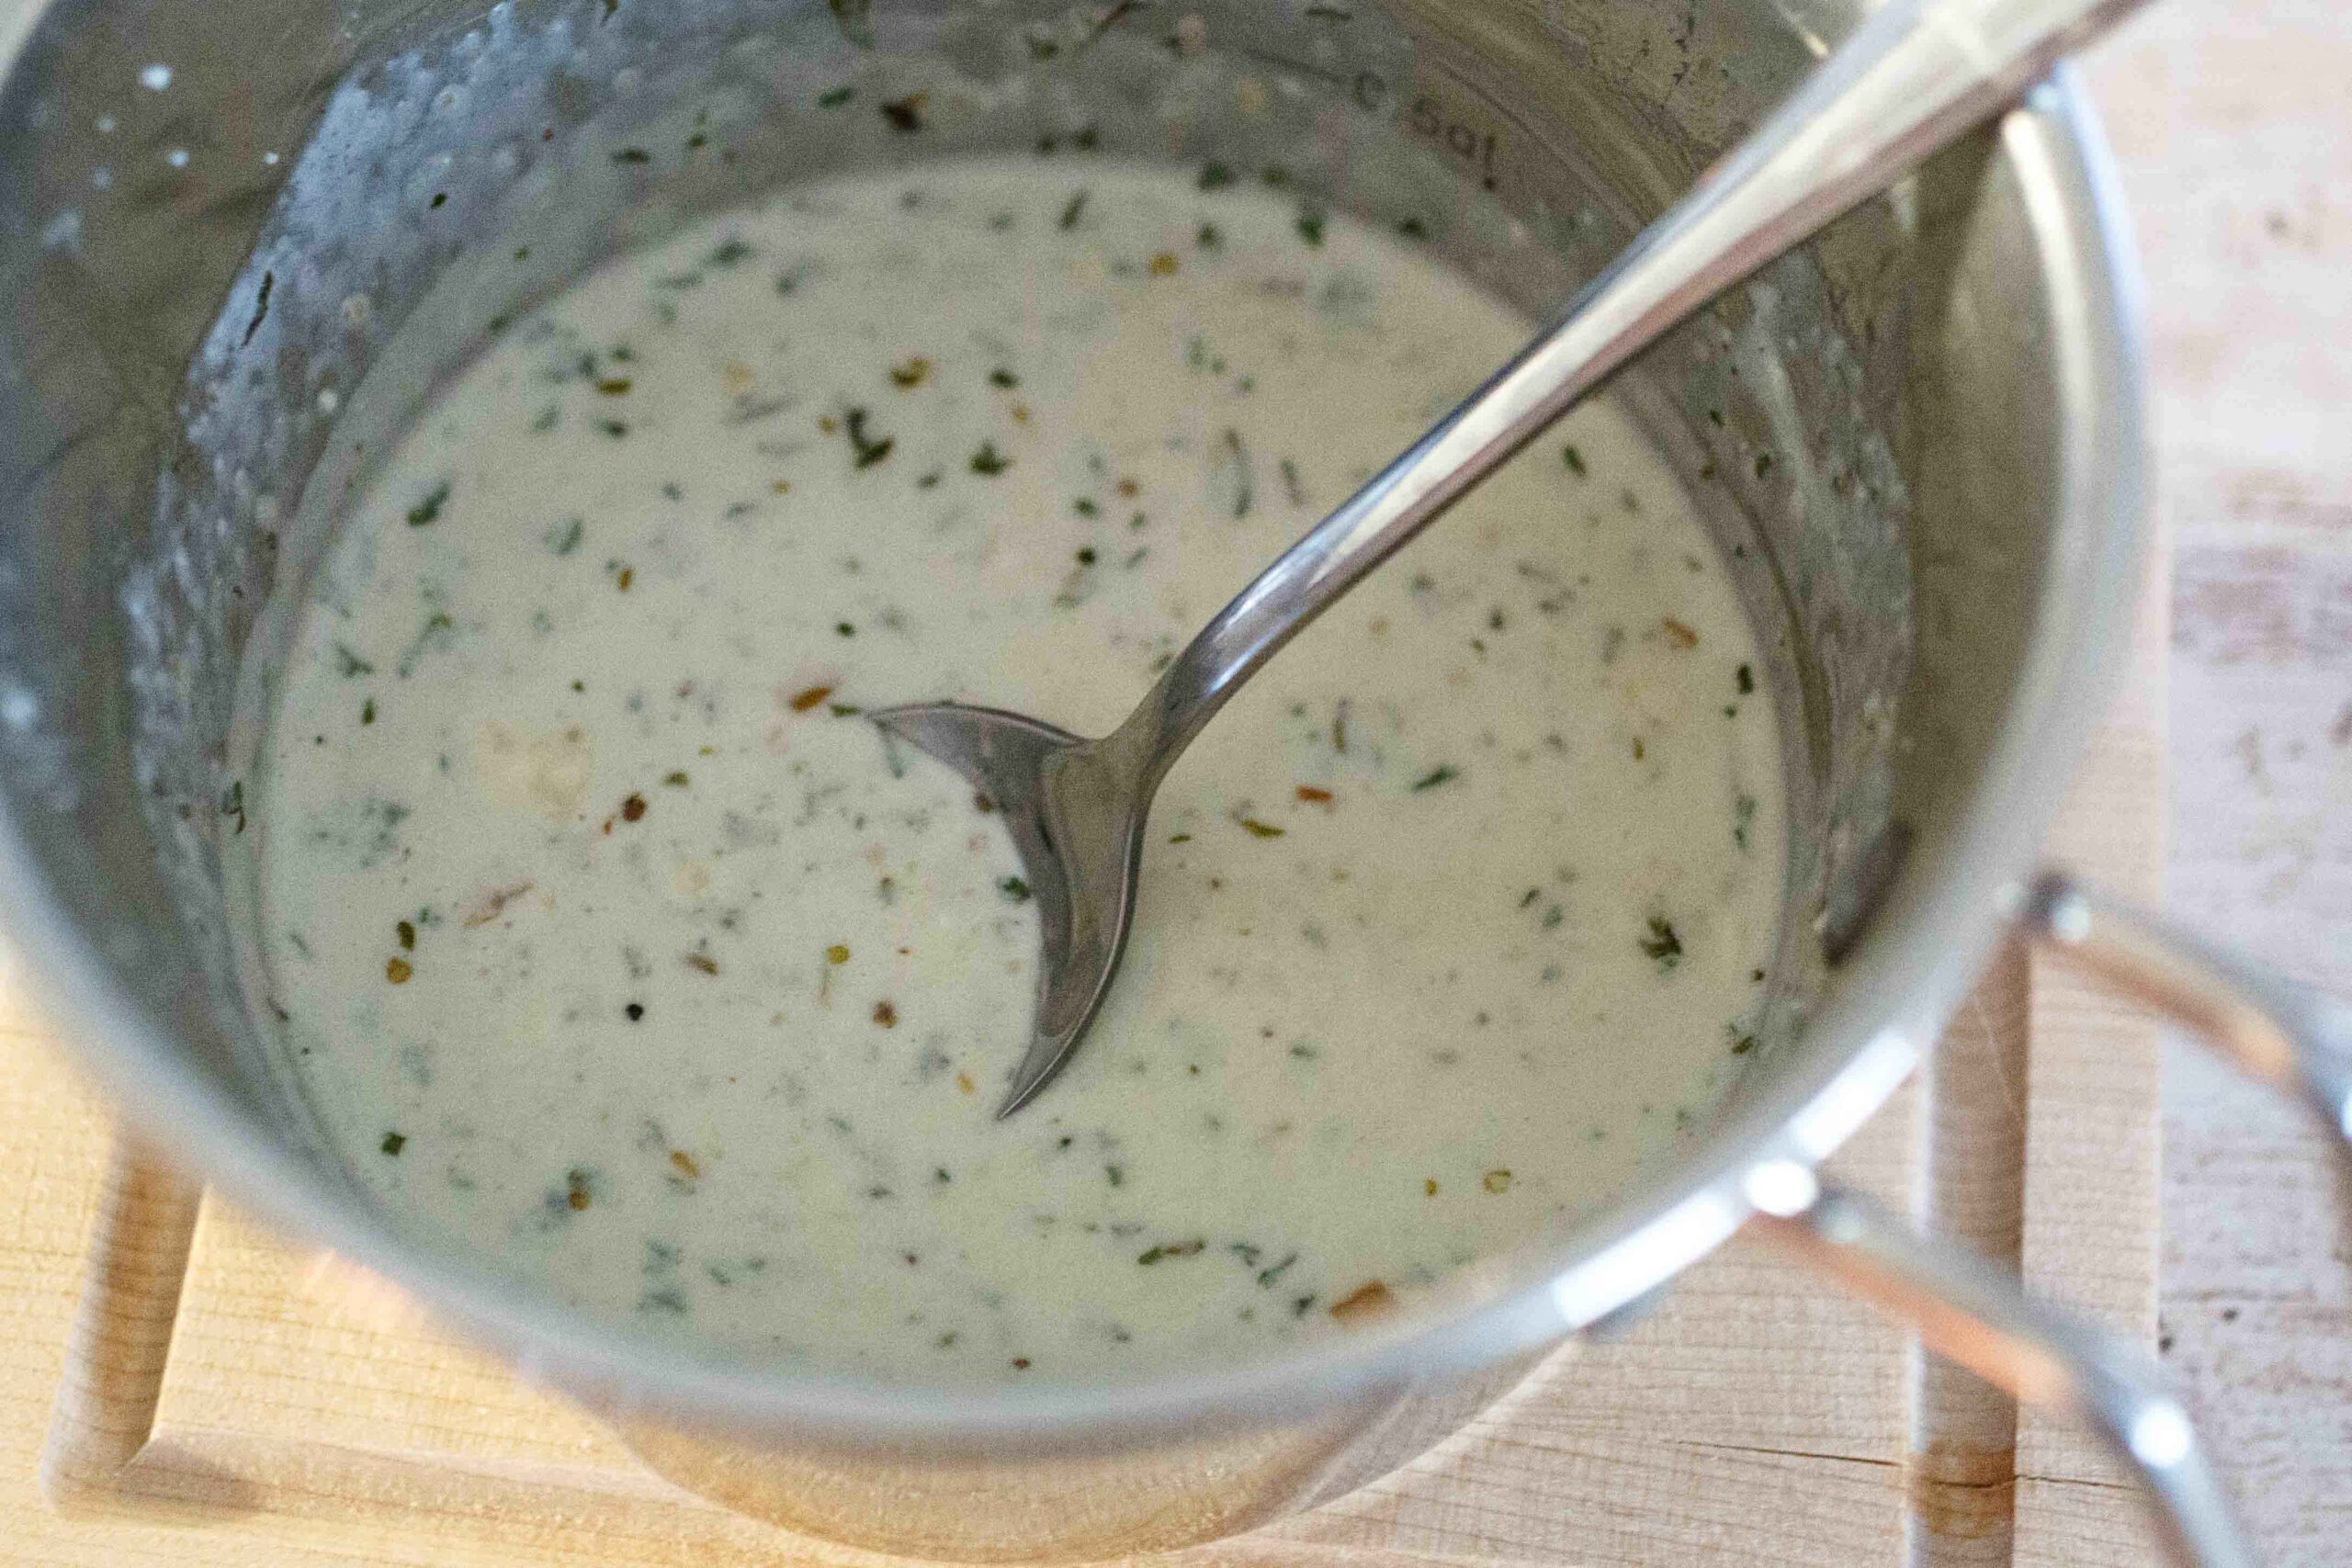
While your pasta is boiling, make the luscious cheesy sauce in a medium saucepan by melting the butter and sautéing the shallots (or minced onion) until soft for a couple of minutes. Add the minced garlic and cook for another minute. Pour in the milk and half and half and stir together to warm it up then add the crumbled Gorgonzola cheese, Parmesan cheese and parsley, stirring together until it gets creamy and emulsified.
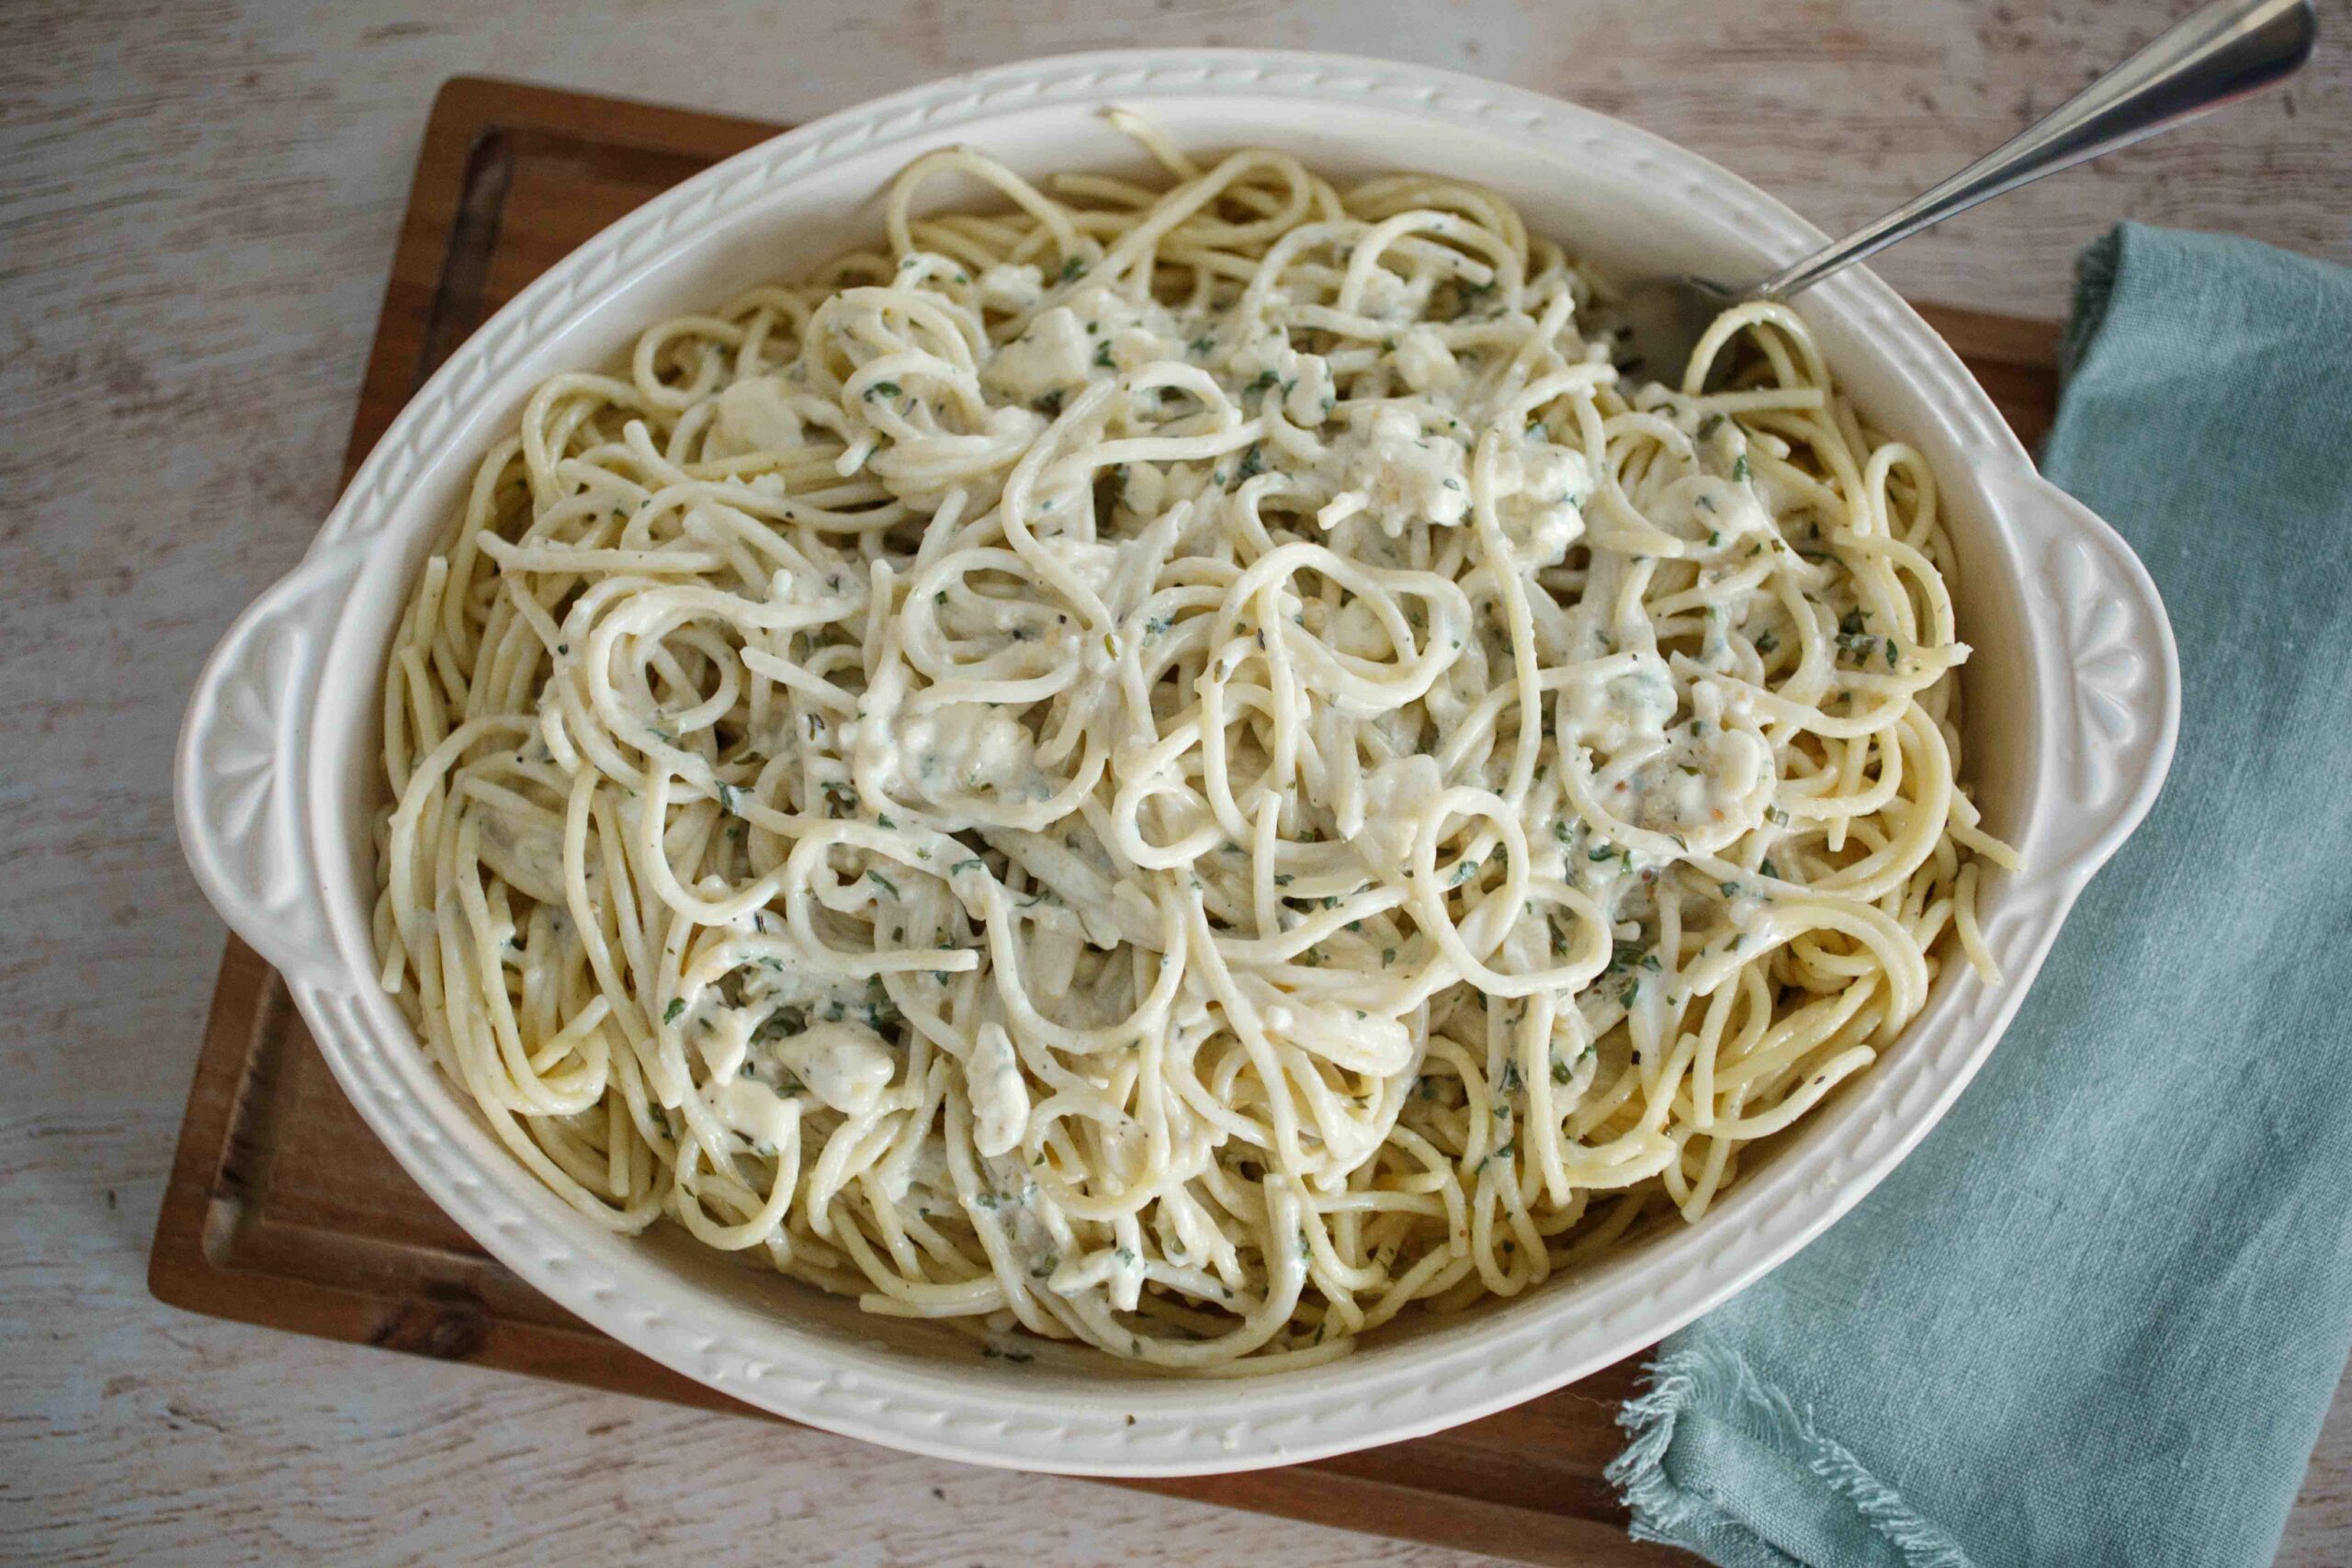
Pour the sauce over the pasta in a large pot and toss together, adding the reserved pasta water to loosen the sauce up into your desired consistency (it should be smooth and creamy but not too thick or thin). Top with freshly cracked black pepper, extra Parmesan cheese and some chopped parsley and serve with the Spicy Buffalo Chicken Parmesan and some crusty bread or a salad.
I hope you enjoy this fun twist on Chicken Parmesan and Buffalo Chicken! I know it’s gonna be one of my fav go-to recipes from now on..and I can’t wait to experiment with the other Miller’s hot sauces to create more delish recipes! Enjoy 🙂
Spicy Buffalo Chicken Parmesan + Gorgonzola Pasta
Ingredients
Equipment
Method
- Preheat oven to 425 degrees F. Cut the chicken breasts in half lengthwise to make thin halves. Place under a piece of plastic wrap and pound with a tenderizer or heavy pan until chicken is 1/4" thick. Repeat with remaining pieces to make thin cutlets, pat dry and season both sides with salt.
- Place the flour in a large shallow dish or bowl. Beat the eggs with a few drops of Miller's Banana Hot Sauce and place in another shallow bowl. Toss the Panko breadcrumbs with the Italian breadcrumbs, Parmesan cheese, paprika, garlic powder, onion powder and dried oregano and place in a third bowl.
- Dredge the chicken through the flour, then the eggs beaten together with hot sauce and then dredge through the breadcrumbs mixture. For a thicker coating, you can dip each piece of chicken back through the eggs and the crumbs a second time.
- Line a large baking sheet with parchment paper and set a wire rack on top. Place the cutlets on top of the wire rack and bake until golden brown and crispy, about 20-25 minutes, turning over halfway through. Set aside.
- While the chicken cutlets are baking, heat a small saucepan over medium heat. Add the Miller's Banana Pepper Sauce and butter, stirring occasionally, until the butter is melted and sauce comes together. Spoon sauce over the tops of the chicken cutlets, reserve remaining sauce for serving.
- Heat the oven broiler to high and place a rack in the top third of oven. Sprinkle the chicken with shredded mozzarella and grated Parmesan on the same pan you baked them on.
- Broil for 2-4 minutes until the cheese is melted and bubbling and light golden brown (watching closely so it doesn't burn).
- Transfer chicken to a platter and drizzle with ranch or blue cheese dressing and additional Miller's Hot Banana Pepper sauce. Top the Chicken Parmesan with sliced chives. Serve the chicken with creamy Gorgonzola pasta (recipe follows) on the side, or sliced over an Italian green salad with some crusty garlic bread, if desired.
- Cook the pasta according to package instructions until al dente. Drain, reserving 1/2 cup of salted cooking water, and set aside.
- Melt the butter in a large frying pan over medium heat, and add chopped shallots or onions. Cook for 3-4 minutes until softened. Add the minced garlic and cook for another minute.
- Add the milk and half and half (or heavy cream), Gorgonzola cheese, Parmesan, parsley, salt and pepper. Stir together until the Gorgonzola thickens and melts into a creamy consistency.
- Add the cooked pasta to the pan with the Gorgonzola sauce and stir together, adding in the reserved pasta cooking water to loosen up the sauce to your desired consistency. It should be thick, creamy and saucy; coating the noodles well with small chunks of the blue cheese.
- Divide the pasta between serving plates. Top with additional grated Parmesan cheese, salt and pepper to taste, and chopped parsley. Serve with Spicy Buffalo Chicken Parmesan and an Italian green salad and crusty garlic bread, if desired.
Notes
Also, if you make this Spicy Buffalo Chicken Parmesan and Gorgonzola Pasta, be sure to leave a comment and/or give this recipe a rating! I love to hear from all my followers and always do my best to respond to each and every comment or email. And, of course, if you do make this recipe, don’t forget to share this post and tag me on Instagram! I love looking through the photos of recipes you all have made!
To learn more about Miller’s Banana Pepper Sauces, visit them online at https://www.eatmillers.com AND check out their social media pages below for more info and fun recipe ideas!
You can find Millers Banana Pepper sauce at Whole Foods, Wegmans and on Amazon. Use can also use Miller’s store finder to find a store carrying their products near you.
@eatmillersofficial #millersrecipechallenge #betterwithmillers #anythingbutbland
Looking for more spicy chicken recipes? Here are a few to try:
Keto Nashville Chicken Sliders


