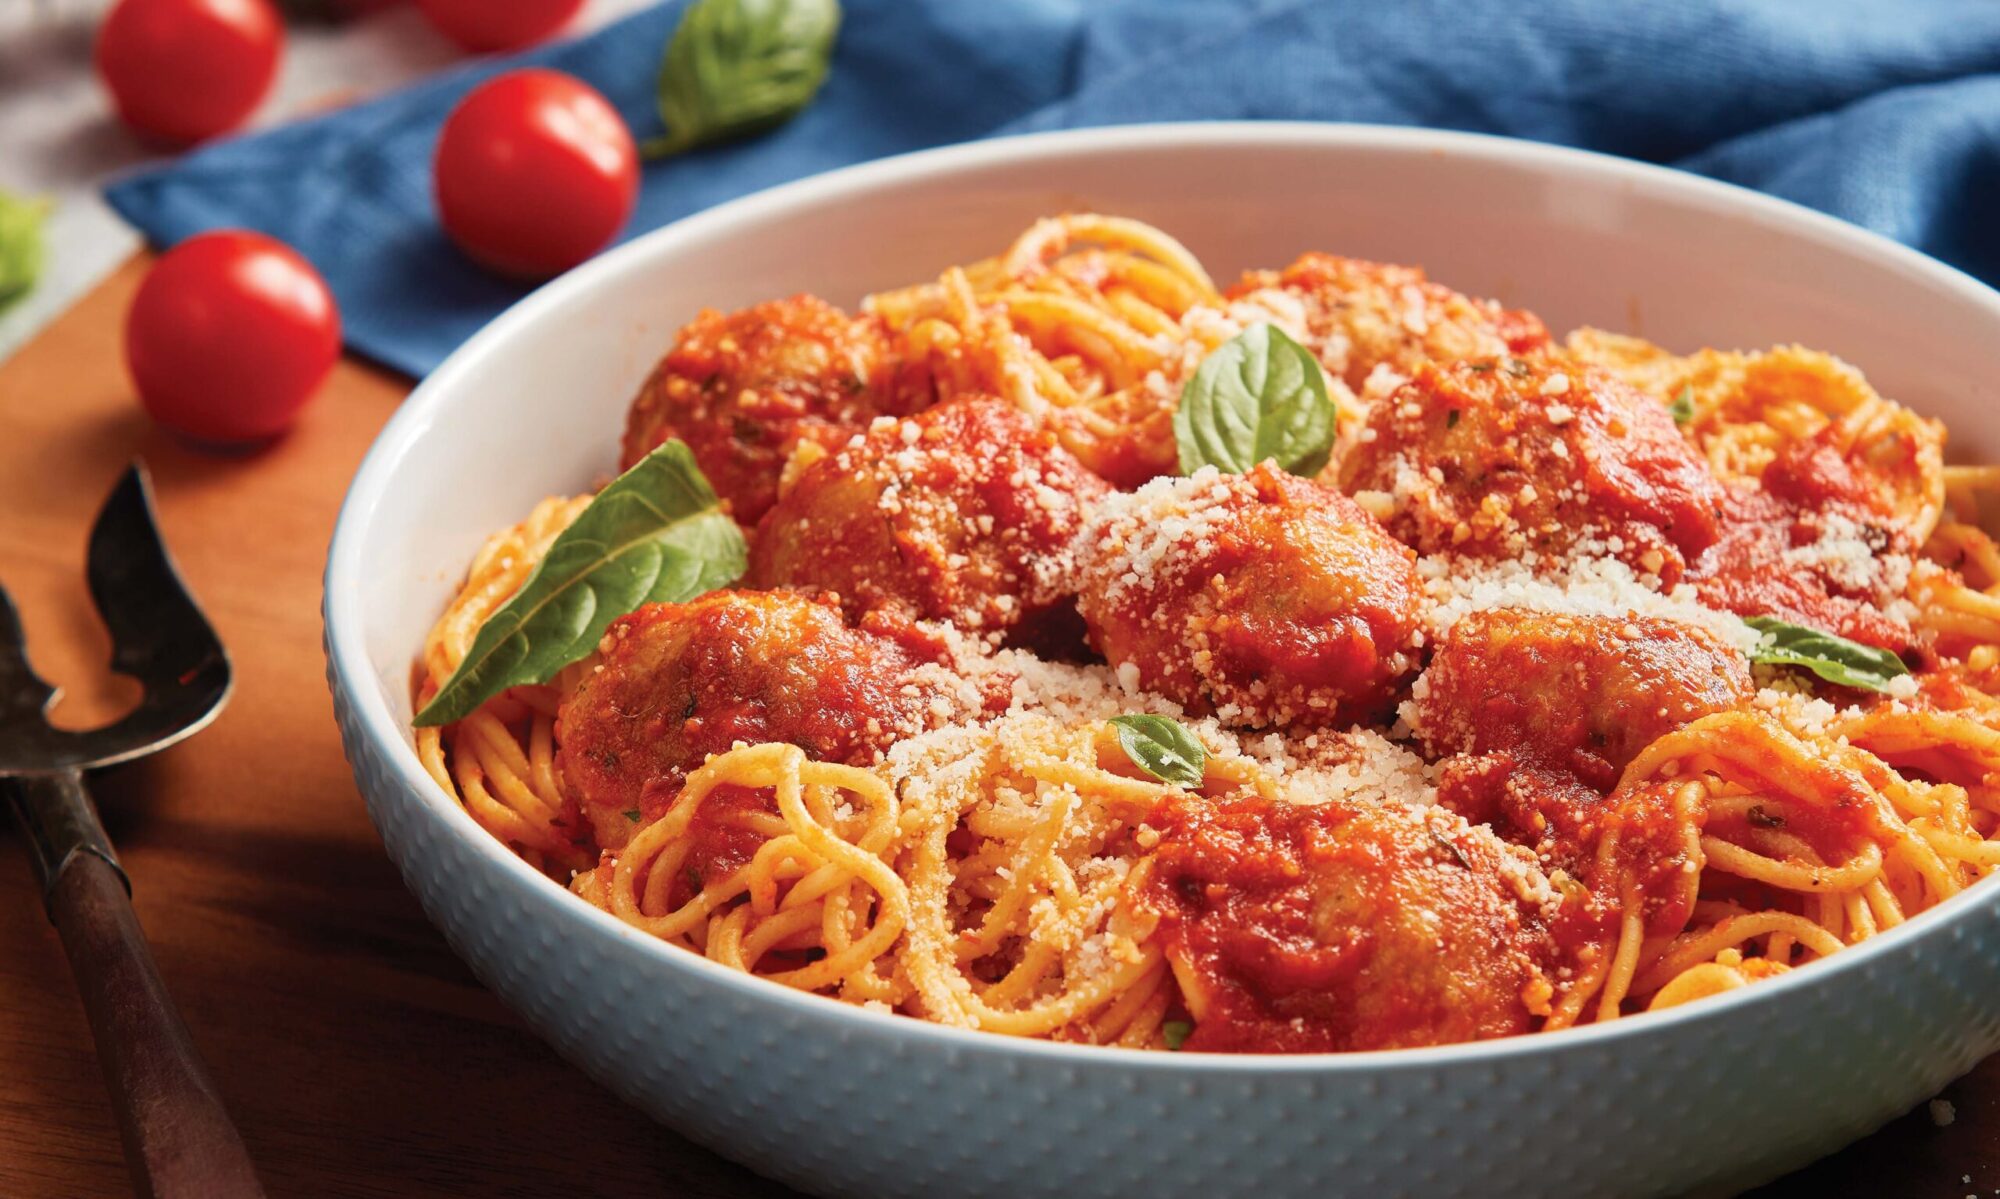
Golden, Cheesy Chicken Sausage & Zucchini Pizza Pockets

Homemade Pizza pockets with Chicken Sausage + Zucchini

Flaky pastry filled with browned chicken sausage, sautéed zucchini, onions, garlic, four cheeses, fresh basil and Don Pepino Pizza Sauce—then baked until beautifully golden and served with more warm sauce for dipping.

Jump to Recipe |

Some appetizers are politely passed around the table.

Others barely survive the trip from the oven to the serving platter.

These Homemade Chicken Sausage & Zucchini Pizza Pockets definitely belong in the second category.

Homemade Pizza Pockets wtih Chicken Sausage + Zucchini

Break through the crisp, golden pastry and you’ll find tender pieces of chicken sausage, sautéed zucchini, caramelized onions and garlic coated in a delicious savory tomato pizza sauce—followed by creamy ricotta, mozzarella, provolone, then topped with Parmesan cheese.

Then comes the final flourish: additional grated Parmesan and torn fresh basil over the top, and a warm bowl of Don Pepino Pizza Sauce waiting for every flaky bite.

They’re part pizza, part calzone, part savory hand pie—and completely irresistible.

Pizza Night Meets the Garden

I love taking familiar comfort food and finding a way to make it feel fresh again.

Pizza pockets already have nostalgia working in their favor. They remind us of after-school snacks, college apartments, movie nights and those freezer-aisle foods we loved back in the 80s and 90s, long before we started discussing artisanal cheese and vine-ripened tomatoes.

This homemade version keeps all the fun but gives the filling a garden-inspired upgrade.

Homemade Pizza Pockets w/ Chicken Sausage, Zucchini & Don Pepino's Pizza Sauce

The combination of zucchini, onion, garlic, pizza sauce and basil has the rustic spirit of ratatouille—without the eggplant. Adding browned chicken sausage makes the filling heartier, while four different cheeses bring the kind of creamy, gooey payoff every pizza pocket deserves.

Refrigerated pie crust keeps the recipe approachable and creates a delicate, buttery shell that becomes crisp and deeply golden in the oven.

The result is familiar enough to feel comforting but interesting enough to serve at a party.

Homemade Pizza Pockets w/ Chicken Sausage, Zucchini & Don Pepino's Pizza Sauce

The Secret to Using Zucchini in Pizza Pockets

Zucchini adds freshness, color and a lovely tender texture, but it also contains quite a bit of water.

Prep veggies + slice chicken sausage

The secret is to dice it relatively small and sauté it until its excess moisture has evaporated. You want the zucchini tender and lightly golden—not watery.

Cook zucchini + onions + sausage

After the sausage develops some browned edges, it’s removed temporarily from the skillet. The onions and zucchini then have room to cook properly before the garlic and sausage return to the pan.

Add Don Pepino pizza sauce

A little Don Pepino Pizza Sauce is added at the end, just enough to glaze the filling without making it too watery/wet.

Stir sauce into the sausage-zucchini mixture

That one step helps keep the bottom of the pastry flaky instead of soggy.

How to Make The Pizza Pockets

This slideshow requires JavaScript.

A Little About Don Pepino

Don Pepino Pizza Sauce brings bright tomato flavor to every layer of this recipe.

Made with 100% Jersey homegrown vine-ripened tomatoes, is certified kosher and gluten-free with no additives or artificial preservatives makes this sauce a winner! It has a delicious, savory tomato flavor and is the perfect base for my Homemade Pizza Pockets I’m entering into this recipe challenge.

Don-Pepino-Sauce

A small amount of the Don Pepino pizza sauce coats the sausage and vegetables, another spoonful can be tucked inside each pocket and then the remaining sauce is warmed for dipping.

Don Pepino Pizza Sauce

With savory chicken sausage, buttery pastry and four cheeses in the filling, the pizza sauce supplies the acidity that balances all that richness.

Homemade Pizza Pockets wtih Chicken Sausage + Zucchini

It also helps transform a skillet of zucchini, onion, garlic and sausage into something that immediately tastes like pizza night.

Homemade Pizza pockets with Chicken Sausage + Zucchini
theartfulgourmet

Homemade Chicken Sausage + Zucchini Pizza Pockets

Flaky homemade pizza pockets filled with chicken sausage, zucchini, onions, garlic, four cheeses, basil and Don Pepino Pizza Sauce.
Prep Time 25 minutes
Cook Time 15 minutes
Total Time 36 minutes
Servings: 4 people
Course: Appetizer, appetizers, Snack
Cuisine: Italian

Ingredients
  

  • 1 package refrigerated pie crusts 2 crusts, brought to room temp
  • 1 pound fully cooked chicken sausage cut into small slices, or bite-size pieces
  • 1 medium zucchini cut into small dice
  • ½ medium onion finely diced
  • 2 garlic cloves minced, or ½ teaspoon garlic powder
  • 1 teaspoon Trader Joe’s Aglio Olio seasoning
  • Sea salt and freshly ground black pepper to taste
  • Red pepper flakes optional
  • 1 cup Don Pepino Pizza Sauce divided, plus more for dipping
  • ½ cup shredded whole-milk mozzarella
  • ½ cup shredded or finely chopped provolone
  • ½ cup whole-milk ricotta
  • ¼ cup freshly grated Parmesan for finishing
  • 1 large egg lightly beaten w/ 1 tbsp water, or 3 tablespoons melted garlic butter
  • fresh basil torn or chiffonade

Method
 

Brown the Sausage
  1. Preheat the oven to 425°F and line a large baking sheet with parchment paper.
  2. Heat oil in a large skillet over medium-high heat.
  3. Add the chicken sausage and cook for approximately 3–5 minutes, stirring occasionally, until lightly browned around the edges.
  4. Transfer the sausage to a plate and set aside.
Cook the Vegetables
  1. Add the onion and zucchini to the same skillet.
  2. Season lightly with salt and black pepper and cook for approximately 6–8 minutes, stirring occasionally, until the onion is tender and the zucchini is lightly golden.
  3. Continue cooking until the moisture released by the zucchini has evaporated.
  4. Add the garlic, Aglio Olio seasoning and red pepper flakes, if using. Cook for approximately 30 seconds.
  5. Return the sausage to the skillet.
  6. Add approximately ¼ cup Don Pepino Pizza Sauce and toss until the sausage and vegetables are lightly glazed.
  7. Cook for another minute or two, remove from the heat and let the mixture cool slightly.
Roll, Layer & Fold
  1. Unroll the pie crusts onto a lightly floured work surface and cut each round in half to create four large semicircles.
  2. On one half of each piece, Add a small spoonful of pizza sauce and spread thinly on the pie dough, leaving approximately a 1-inch border.
  3. Spoon on the cooked and cooled chicken sausage and zucchini mixture.
  4. Layer on the mozzarella, provolone cheeses, and a dollop of ricotta. Throw a sprinkle of Parmesan on too, if you desire.
  5. There’s an art to filling a hand pie: Generosity tempered by restraint.
  6. You want enough filling to make cutting into one exciting—but not so much that you create a four-cheese volcano in your oven.
Prep the Pastry / Make the Pies
  1. Brush the exposed pastry edges with beaten egg.
  2. Fold the pastry over the filling, press firmly and crimp the edges with a fork or twist them into a rustic hand-pie seal.
  3. Cut a few small vents into the tops.
Bake Until Golden
  1. Brush the pockets with beaten egg for a glossy crust or melted garlic butter for an especially savory finish.
  2. Bake for 15–20 minutes, until crisp, flaky and deeply golden.
  3. Let the pockets rest for approximately 10 minutes.
Garnish + Serve
  1. Finish with freshly grated Parmesan and torn fresh basil.
  2. Bring them to the table with warm Don Pepino Pizza Sauce.
  3. Dip liberally. Devour. Repeat.

Notes

Recipe Notes:
Cut the zucchini small: Smaller pieces cook evenly, fit inside the pockets more easily and distribute the vegetable throughout the filling.
Cook off the moisture: Continue sautéing until the skillet looks relatively dry. Excess zucchini moisture can create soggy pastry.
Cool the filling: Let the sausage and vegetable mixture cool slightly before placing it on the refrigerated dough.
Don’t use too much sauce: The sauce should lightly glaze the filling rather than pool in the skillet.
Don’t overfill: Leaving a clean border around the dough helps create a strong seal.
Make ahead: Assemble the unbaked pizza pockets and freeze them in a single layer until solid. Transfer them to a freezer-safe container and freeze for up to 3 months.
Storage: Refrigerate baked pizza pockets in an airtight container for 3–4 days.
Reheating: Reheat in a 350°F oven for approximately 10–15 minutes for the crispiest pastry.

Make Them Your Own

Once you’ve mastered the basic formula, consider it a blank canvas.

Try roasted red peppers or sautéed mushrooms. Swap chicken sausage for hot Italian sausage. Add caramelized onions. Make a vegetarian version with mushrooms, spinach and four cheeses.

For a cocktail party, make smaller pockets and create a dipping station with warm Don Pepino Pizza Sauce, garlic butter, pesto and creamy Parmesan dressing.

The world is your pizza!

Homemade Pizza Pockets w/ Don Pepino's Pizza Sauce

Why Four Cheeses?

Because one cheese simply cannot do every job.

Mozzarella creates that glorious pizza-style cheese pull.

Provolone melts beautifully while contributing a deeper savory flavor.

Ricotta creates creamy pockets throughout the filling.

Parmesan provides salty, nutty intensity and finishes the baked pockets beautifully.

Together, the cheeses balance the chicken sausage, zucchini and tomato sauce without completely overwhelming the vegetables.

Want to Turn Up the Heat?

The official recipe stays crowd-friendly, but I love spicy food and would happily add crushed red pepper or Calabrian chiles to my own.

You could also serve the mild pizza pockets with hot pepper flakes, chile oil or chopped cherry peppers on the side. That lets everyone choose their preferred level of chaos.

Homemade Pizza pockets with Chicken Sausage + Zucchini

Recipe Notes

Cut the zucchini small: Smaller pieces cook evenly, fit inside the pockets more easily and distribute the vegetable throughout the filling.

Cook off the moisture: Continue sautéing until the skillet looks relatively dry. Excess zucchini moisture can create soggy pastry.

Cool the filling: Let the sausage and vegetable mixture cool slightly before placing it on the refrigerated dough.

Don’t use too much sauce: The sauce should lightly glaze the filling rather than pool in the skillet.

Don’t overfill: Leaving a clean border around the dough helps create a strong seal.

Make ahead: Assemble the unbaked pizza pockets and freeze them in a single layer until solid. Transfer them to a freezer-safe container and freeze for up to 3 months.

Storage: Refrigerate baked pizza pockets in an airtight container for 3–4 days.

Reheating: Reheat in a 350°F oven for approximately 10–15 minutes for the crispiest pastry.

Homemade Pizza pockets with Chicken Sausage + Zucchini

A Little Bit Pizza, a Little Bit Ratatouille

There’s something wonderful about food that doesn’t take itself too seriously.

These pizza pockets are nostalgic and playful, but the zucchini, onions, garlic, basil and tomato sauce give them a fresh, rustic quality. The chicken sausage makes them satisfying, and the four cheeses just make them extra delicious.

Make them for game day, cocktail hour, pizza night, a casual gathering or an afternoon when you need something flaky, cheesy and deeply comforting.

Bring them to the table hot.

Scatter Parmesan and basil over the top.

Pour the warm pizza sauce into a bowl.

Then watch everyone migrate toward the kitchen.

And watch them disappear.

Homemade Pizza pockets with Chicken Sausage + Zucchini

Share Your Pizza Pockets Creations with Us

If you make this recipe, share your photos and tag @artfulgourmet and @realdonpepino on Instagram and Facebook. We’d love to see your creations and hear your comments on the recipe and the pizza sauce!

Follow Don Pepino on Instagram⁠, visit Don Pepino Sauce on Facebook⁠ and discover moreDon Pepino products atViolet Foods⁠.

Find Don Pepino Pizza Sauce at Amazon or Walmart

And tell me in the comments:

Which fillings would you add to your ultimate homemade pizza pocket?

Homemade Pizza Pockets w/ Chicken Sausage, Zucchini + Don Pepino's Pizza Sauce

#TheSauceBehindTheSlice #MadeWithDonPepino #DonPepinosRecipeChallenge #HomemadePizzaPockets #ChickenSausage #ZucchiniRecipes #PizzaPockets #FourCheese #PizzaRecipes #EasyAppetizers #PartyFood #ItalianAmericanFood #TheArtfulGourmet

Recipe, Food Styling & Photography © Kristen Hess | The Artful Gourmet

The Black Dog Tavern Quahog Chowder: A Taste of Martha’s Vineyard

There are some places you visit once and somehow carry with you forever.

For me, Martha’s Vineyard is one of them.

One Labor Day weekend in 2011, I stepped off the ferry and promptly fell in love —

with the salty air, weathered shingles, hydrangeas spilling over fences,

sailboats bobbing in the harbor and that wonderful feeling that life moves at a slightly different speed once you arrive on an island.

And then there was the chowder.

Not just any clam chowder, but a steaming bowl of Quahog Chowder from The Black Dog Tavern in Vineyard Haven — rich and creamy with potatoes, smoky salt pork, onion and celery and, of course, plenty of briny New England quahogs.

One spoonful and it tasted like New England.

Years later, it’s still one of those recipes that immediately transports me back to Martha’s Vineyard.


The New England Charm of Martha’s Vineyard

Martha’s Vineyard has a wonderful ability to feel both glamorous and wonderfully unpolished.

There are six distinctive towns across the island, each with its own personality — from the historic sea-captain houses and white clapboard architecture of Edgartown

to the colorful gingerbread cottages of Oak Bluffs, the fishing village of Menemsha and the rural lanes, farms and stone walls of West Tisbury.

Then there’s Vineyard Haven.

Part of the town of Tisbury, Vineyard Haven is a working harbor and the island’s primary year-round port.

Ferries glide in and out alongside sailboats and working vessels, while shops, galleries and restaurants line the streets beyond the waterfront.

And sitting right on that harbor is one of Martha’s Vineyard’s most recognizable landmarks: The Black Dog Tavern.


The Story Behind The Black Dog Tavern

Long before that familiar black-dog silhouette appeared on T-shirts across America, there was Captain Robert Douglas,

his sailing vessel Shenandoah and an actual black dog.

Douglas sailed Shenandoah to Martha’s Vineyard in 1964. A Black Lab–Boxer mix named Black Dog eventually became his almost constant companion.

The idea for The Black Dog Tavern began in 1969 when Douglas imagined a welcoming year-round restaurant where islanders and visitors could gather over good food and conversation.

The Tavern opened in Vineyard Haven in 1971, and chowder was part of the story from the beginning.

More than half a century later, The Black Dog has become synonymous with Martha’s Vineyard, but I still love the simplicity of its origin: a sailor, his dog, the sea and the desire to create a welcoming place to feed people.

Which brings us to that chowder.


What Is a Quahog?

If you didn’t grow up around coastal New England, you may be wondering:

What exactly is a quahog?

Pronounced roughly KO-hog, a quahog is the Northern hard clam (Mercenaria mercenaria), a thick-shelled clam native to the Atlantic coast.

Unlike the thin-shelled soft clams New Englanders commonly call steamers, quahogs have sturdy shells and firmer, flavorful meat.

Hard clams are often named according to size. Smaller specimens are commonly sold as littlenecks and cherrystones, while larger hard clams are often referred to as quahogs or chowder clams.

And there’s a reason for that name.

Their larger, firmer meat is perfect for chopping into chowder, where its distinctly briny flavor can stand up to potatoes, cream, herbs and smoky pork.

It’s difficult to imagine a more quintessentially New England ingredient.


The Black Dog Tavern’s Quahog Chowder Recipe

This recipe is from The Black Dog: Summer on the Vineyard Cookbook, which I bought during that memorable Martha’s Vineyard trip in 2011.

It’s creamy, comforting and wonderfully satisfying without requiring complicated technique. If you’re working with fresh quahogs, you’ll need a little extra prep time, but the fresh-from-the-sea flavor is absolutely worth it.

Prep Time: 30 minutes
Cook Time: 30 minutes
Total Time: 1 hour
Yield: 8–10 servings

Ingredients

2 ounces salt pork, diced, or 8–10 slices pancetta or thick-cut bacon, diced

2 cups diced yellow onion

1 cup diced celery

3 cups peeled and diced potatoes

1 teaspoon dried thyme

1 teaspoon freshly ground black pepper

4 cups shelled quahogs with reserved juice, roughly chopped, or minced clams

2 cups fresh or frozen sweet corn kernels

½ cup (1 stick) salted butter

½ cup all-purpose flour

1½ quarts light cream, or a combination of heavy cream and half-and-half

Paprika, for garnish

Garlic-Herb Butter Croutons, for serving (recipe follows)

How to Make Quahog Chowder

1. Cook the salt pork.

Add the diced salt pork or bacon to a large, heavy-bottomed soup pot and cook until the fat begins to render.

If using bacon, cook until done, drain off most of the fat and leave approximately 2 tablespoons in the pot.

Add the onions and celery and sauté for about 5 minutes, until softened and aromatic.

2. Add the potatoes.

Pour approximately 1½ cups of reserved clam juice into the pot.

Add the potatoes, thyme and black pepper. Bring to a gentle simmer and cook for approximately 10 minutes, or until the potatoes are just tender.

3. Make the roux.

Meanwhile, melt the butter in a small saucepan.

Once bubbling, whisk in the flour and cook for approximately 5 minutes, stirring frequently. You want to cook away the raw flour flavor without significantly browning the roux.

4. Add the quahogs.

Roughly chop the quahog meat, if necessary, reserving any additional liquid.

Add the quahogs and sweet corn to the chowder and gently simmer for about 2 minutes.

5. Thicken the chowder.

Stir the prepared roux into the chowder base and continue simmering for approximately 5 minutes, stirring frequently.

6. Heat the cream.

In a separate saucepan, heat the cream until small bubbles begin appearing around the edges.

Do not allow it to boil.

7. Finish the chowder.

Slowly stir the hot cream into the chowder base.

Warm everything through, taste and adjust the seasoning as necessary. Remember that the quahogs and salt pork already contribute plenty of salinity, so taste before adding additional salt.

Ladle into warm bowls and finish with paprika and a generous handful of homemade garlic-herb butter croutons.

If you’re feeling particularly indulgent, add a little pat of butter on top and let it melt right into the chowder.


Ways to Customize New England Clam Chowder

One of the wonderful things about chowder is that there’s plenty of room to make it your own.

For an extra-seafood New England chowder, add chunks of cod, haddock or another firm white fish during the final few minutes of cooking.

Scallops or shrimp would also be delicious.

Or take the Vineyard experience north to Maine and fold in generous pieces of lobster meat just before serving.

For a more vegetable-forward late-summer chowder, try adding:

  • Extra fresh sweet corn
  • Diced carrots
  • Leeks
  • Fresh chives
  • Parsley
  • Fresh thyme

If you prefer a lighter chowder, replace some of the cream with whole milk or half-and-half and reduce the amount of roux slightly for a thinner, more broth-forward consistency.

And although bacon is delicious, traditional salt pork gives the chowder a subtler, old-fashioned New England flavor.

Whatever you add, don’t overwhelm the clams.

A great New England chowder should still taste unmistakably of the sea.


Homemade Garlic-Herb Butter Croutons

These may just ruin ordinary oyster crackers for you.

They become golden and crunchy in the oven, then soak up just enough chowder around the edges while remaining crisp in the center.

Ingredients

4 cups rustic sourdough or country bread, cut into approximately ¾-inch cubes

4 tablespoons unsalted butter

1 tablespoon extra-virgin olive oil

2 garlic cloves, finely grated or minced

1 teaspoon chopped fresh thyme

1 tablespoon chopped fresh parsley

½ teaspoon flaky or kosher salt

Freshly ground black pepper

Pinch of paprika, optional

Instructions

Preheat the oven to 375°F.

Melt the butter with the olive oil over low heat.

Add the garlic and cook for approximately 30 seconds, just until fragrant. Don’t let the garlic brown.

Remove from the heat and stir in the thyme and parsley.

Place the bread cubes in a large bowl and toss with the garlic-herb butter, salt, pepper and paprika.

Spread the croutons in a single layer on a baking sheet.

Bake for 12–18 minutes, tossing halfway through, until crisp and deeply golden.

Fair warning: make extra. They’re dangerously snackable straight from the sheet pan.


What to Serve with Clam Chowder

Because creamy chowder is rich, I like pairing it with something cool, crunchy and acidic.

Simple Vineyard Summer Salad

Ingredients

5 ounces baby greens, butter lettuce or mixed tender lettuces

½ English cucumber, thinly sliced

4 radishes, thinly sliced

¼ small red onion or shallot, thinly sliced

2 tablespoons chopped fresh chives

Fresh dill or parsley

Lemon-Dijon Vinaigrette

3 tablespoons extra-virgin olive oil

1½ tablespoons fresh lemon juice

1 teaspoon Dijon mustard

½ teaspoon honey

Sea salt

Freshly ground black pepper

Whisk together the olive oil, lemon juice, Dijon and honey and season to taste.

Toss lightly with the greens and vegetables immediately before serving.

That’s it.

Keep the salad simple and bright and let the chowder remain the star of the show.


Best Wines to Pair with New England Clam Chowder

Rich, creamy clam chowder calls for a wine with enough acidity to refresh your palate between bites.

A few favorites:

Muscadet Sèvre et Maine — Crisp, mineral and wonderfully seafood-friendly. This would probably be my first choice.

Sancerre or Sauvignon Blanc — Citrus, herbs and bright acidity make this especially good with briny shellfish.

Unoaked Chardonnay — A softer pairing whose restrained richness complements the creamy chowder without becoming too heavy.

Albariño — Saline, citrusy and practically begging to be served with shellfish.

Brut sparkling wine — Because bubbles + butter + bacon + seafood + crunchy croutons is a combination I’m never going to argue with.

Serve any of them well chilled and preferably somewhere with a harbor view.

Or at least an open window.


Martha’s Vineyard Beer Pairings

If you’re more of a beer-with-chowder person, keep things refreshing rather than overly heavy.

Offshore Ale Company in Oak Bluffs is Martha’s Vineyard’s year-round brewpub. A crisp golden ale or approachable pale ale is a natural match for creamy seafood chowder.

Bad Martha Farmer’s Brewery in Edgartown is another fun island stop, with a brewery and beer garden tucked into a nursery setting that feels particularly Vineyard-ish on a summer afternoon.

Beyond the island, a crisp New England lager, Kölsch-style ale, blonde ale, wheat beer or balanced pale ale would all work beautifully.

Save the monster double IPA for another night. This dinner is about the quahogs.


More New England Chowder Recipes to Try

Once you’ve gone down the chowder rabbit hole, there’s really no reason to stop at one bowl.

Try Ina Garten’s East Hampton Clam Chowder, which incorporates carrots along with onions, celery, potatoes and thyme.

Chef Jasper White, one of the chefs most closely associated with modern New England seafood cooking, offers a traditional New England Fish Chowder using salt pork, potatoes, herbs and fish stock.

For a more contemporary interpretation, chef Michael Anthony’s New England Clam Chowder adds leeks, fennel, shrimp and dashi.

You can also try a classic Food Network New England Clam Chowder made with littleneck clams, bacon, fresh thyme, potatoes and half-and-half.


A Little Martha’s Vineyard Magic at Home

I first shared this recipe back in 2011 after returning from that Labor Day weekend with my Black Dog cookbook,

plenty of photographs and what apparently became a permanent affection for Martha’s Vineyard.

Read the Original post on artful gourmet blog

View my Slideshow of photos from Martha’s Vineyard

Slideshow of photos from Boston

All these years later, I think that’s what I still love about recipes collected while traveling.

They’re souvenirs you can cook.

So make this chowder on one of those late-summer evenings when the sunlight begins changing ever so slightly.

Open the windows.

Put a bottle of white wine on ice.

Toss together the salad.

Toast the croutons until your kitchen smells like garlic and butter.

Then ladle the chowder into big bowls and imagine Vineyard Haven harbor just outside — sailboat masts against the evening sky, ferry horns in the distance, salt in the air and nowhere particularly urgent to be.

Maybe that’s the real taste of Martha’s Vineyard.

Not simply clams, cream and potatoes.

It’s summer slowing down before it slips away.

And if you can’t make it to the island this year, a really good bowl of chowder isn’t a bad place to start.


Want the story behind the story?

I revisited my original Martha’s Vineyard trip in a more personal essay over on The Artful Gourmet Substack, with even more island inspiration and late-summer food storytelling.

Read the Substack essay

And if you’d like to make your own little piece of Martha’s Vineyard at home, look for The Black Dog: Summer on the Vineyard Cookbook, the cookbook that inspired this recipe.

Get the cookbook on Amazon

As an Amazon Associate, I earn from qualifying purchases. Purchasing through my affiliate link helps support The Artful Gourmet at no additional cost to you.

Until next time — cook something delicious, pour something cold and savor what’s left of summer.

Enjoy!

xo, Kristen


Other recipes you might enjoy:

Autumn Harvest Chicken & Veggies

Amazing Macaroni and Cheese

Irish Stout Beef Stew

Alsace Tarte Flambée


#MarthasVineyard #TheBlackDogTavern #QuahogChowder #NewEnglandClamChowder #ClamChowder #NewEnglandFood #SeafoodRecipes #MarthasVineyardEats #VineyardHaven #NewEnglandRecipes #CoastalCooking #FoodTravel #SummerRecipes #TheArtfulGourmet

Slow Summer Spaghetti with Zucchini Ribbons, Sweet Corn and Roasted Cherry Tomatoes

An easy farmers market spaghetti with roasted summer vegetables, a nostalgic ’70s soundtrack, and a reminder that the best moments in life are often the simplest.

An Easy Summer Pasta made for Slowing Down

Summer cooking should feel different.

It should be lighter, looser, and a little less concerned with perfection. It should leave time for sitting outside, chasing sunsets, listening to music, and spending long evenings with the people we love.

“Summer isn’t asking us to do more. It’s inviting us to notice more.”

This easy summer spaghetti is designed for exactly that kind of night.

Fresh cherry tomatoes, sweet white corn, and garlic roast together on one sheet pan until the tomatoes burst,

the corn begins to caramelize, and the garlic becomes tender and fragrant.

Paper-thin zucchini ribbons join the pan during the final few minutes so they soften gently without becoming heavy or watery.

The roasted vegetables are then tossed with al dente spaghetti, fresh basil, parsley, a small drizzle of extra-virgin olive oil, and enough pasta water to bring everything together.

There is no cream sauce, no complicated preparation, and no long list of ingredients.

The vegetables create their own light sauce as they roast. Their juices mingle with the garlic and olive oil, coating the spaghetti with fresh summer flavor.

It is simple, colorful, and satisfying without feeling heavy—the perfect pasta for warm evenings on the patio, at the lake, or around a table filled with friends.

“Summer teaches us that slowing down isn’t falling behind—it’s finally catching up with life.”


Why You’ll Love This Summer Pasta Recipe

  • Everything comes together with one pot and one sheet pan.
  • It highlights fresh farmers market vegetables.
  • The pasta is light and flavorful without a heavy sauce.
  • It can be served hot, warm, or at room temperature.
  • The recipe is easy to customize with seafood, chicken, beans, or cheese.
  • It leaves more time for enjoying summer and less time washing dishes.

Slow Summer Spaghetti with Zucchini Ribbons, Sweet Corn and Roasted Tomatoes

Prep Time 15 minutes

Cook Time 25 minutes

Total Time 40 minutes

Yield 4 to 6 servings

Ingredients

  • 12 ounces high-quality spaghetti
  • 2 cups cherry or grape tomatoes
  • 2 ears fresh sweet white corn, husked
  • 6 garlic cloves, peeled and lightly smashed
  • 2 medium zucchini
  • 2 tablespoons extra-virgin olive oil, divided
  • ¾ teaspoon kosher salt, divided
  • Freshly ground black pepper, to taste
  • ¼ teaspoon crushed red pepper flakes, optional
  • ½ cup loosely packed fresh basil leaves, torn
  • ¼ cup chopped fresh Italian parsley
  • ½ to 1 cup reserved pasta water
  • Zest of ½ lemon, optional
  • Freshly grated Parmesan or Pecorino Romano, optional

Instructions

1. Prepare the sheet pan

Preheat the oven to 425°F. Line a large rimmed sheet pan with parchment paper for easier cleanup.

2. Roast the tomatoes, corn, and garlic

Cut the corn kernels from the cobs and add them to the prepared sheet pan with the cherry tomatoes and garlic cloves.

Drizzle the vegetables with approximately 1½ tablespoons of the olive oil. Season with ½ teaspoon kosher salt, freshly ground black pepper, and crushed red pepper flakes, if using.

Toss gently and spread the vegetables into an even layer.

Roast for 15 minutes.

3. Make the zucchini ribbons

While the vegetables are roasting, trim the zucchini. Use a vegetable peeler or mandoline to slice each zucchini lengthwise into long, paper-thin ribbons.

Rotate the zucchini as you work, stopping when you reach the soft, seedy center.

4. Add the zucchini to the sheet pan

Remove the sheet pan from the oven and add the zucchini ribbons.

Gently toss the zucchini with the tomatoes, corn, garlic, and roasting juices. Return the pan to the oven and roast for an additional 6 to 8 minutes.

The zucchini should be tender but still hold its shape.

5. Cook the spaghetti

While the zucchini finishes roasting, bring a large pot of generously salted water to a boil.

Cook the spaghetti until al dente according to the package directions.

Before draining the pasta, reserve at least 1 cup of the starchy cooking water.

6. Toss the pasta

Drain the spaghetti and return it to the pot.

Add the roasted vegetables and all the juices from the sheet pan. Add the remaining olive oil, torn basil, chopped parsley, and approximately ½ cup of reserved pasta water.

Toss the pasta over low heat until the vegetables are evenly distributed and the spaghetti is lightly coated and glossy.

Add additional pasta water, a few tablespoons at a time, if needed.

7. Finish and serve

Taste and adjust the seasoning with additional salt and black pepper.

Add fresh lemon zest for brightness or grated Parmesan or Pecorino Romano for a richer finish, if desired.

Serve immediately, or allow the pasta to cool slightly and enjoy it warm or at room temperature.


Tips for the Best Summer Vegetable Pasta

Choose ripe cherry tomatoes

Look for tomatoes that feel heavy for their size and have a rich color. Mixed-color heirloom cherry tomatoes also make the finished dish especially beautiful.

Use fresh corn when possible

Fresh market corn provides a crisp texture and natural sweetness. Frozen corn can be substituted, but thaw and pat it dry before roasting.

Do not overcook the zucchini

Because the zucchini is sliced into delicate ribbons, it only needs a few minutes in the oven. Add it after the other vegetables have already begun roasting.

Save the pasta water

Starchy pasta water helps the roasted vegetable juices and olive oil cling to the spaghetti. It creates a silky finish without adding cream or butter.

Use a flavorful extra-virgin olive oil

Because this recipe uses so few ingredients, the quality of the olive oil matters. Choose one with a fresh, fruity flavor rather than an overly bitter or aggressive finish.


Recipe Variations

Add grilled shrimp or scallops for a light seafood pasta.

Top each bowl with burrata, ricotta, feta, or goat cheese.

Add cannellini beans or chickpeas for a vegetarian protein boost.

Substitute linguine, bucatini, angel hair, or your favorite short pasta.

Add arugula or baby spinach when tossing the hot pasta so the greens wilt slightly.

Finish with toasted pine nuts, pistachios, walnuts, or breadcrumbs for texture.

“The sweetest moments are rarely planned. They happen somewhere between the last rays of sunlight and the first stars.”


What to Serve with Summer Spaghetti

Serve this pasta with grilled bread, a simple green salad, marinated olives, or a platter of sliced melon and prosciutto.

For dessert, keep things equally relaxed with fresh peaches, cheesecake or lemon sorbet, berries and whipped cream, or a rustic summer fruit galette.


Summer Cocktail Pairings

Elderflower Gin and Tonic

Ingredients

  • 1½ ounces gin
  • ½ ounce elderflower liqueur
  • 4 ounces chilled tonic water
  • Fresh lemon
  • Cucumber ribbon or basil, for garnish

Instructions

Fill a large wine glass with ice. Add the gin and elderflower liqueur. Top with tonic water and a squeeze of lemon.

Stir gently and garnish with cucumber, basil, or a lemon wheel.

Limoncello Spritz

Ingredients

  • 2 ounces limoncello
  • 3 ounces chilled Prosecco
  • 1 ounce sparkling water
  • Lemon wheel and basil, for garnish

Instructions

Fill a wine glass with ice. Add the limoncello, Prosecco, and sparkling water. Stir gently and garnish with lemon and basil.

Aperol Spritz

Ingredients

  • 3 ounces Prosecco
  • 2 ounces Aperol
  • 1 ounce sparkling water
  • Orange slice, for garnish

Instructions

Fill a wine glass with ice. Add the Prosecco, Aperol, and sparkling water. Stir briefly and garnish with an orange slice.

Wine Pairings for Summer Vegetable Pasta

Choose a wine with crisp acidity, fresh citrus notes, and enough brightness to complement the tomatoes, corn, zucchini, and herbs.

Recommended options include:

  • Vermentino
  • Pinot Grigio
  • Sauvignon Blanc
  • Dry rosé
  • Soave
  • Gavi
  • Prosecco

Serve white and rosé wines well chilled, preferably outside as the sun begins to set.


A ’70s Slow Summer Playlist

Complete the experience with a playlist filled with smooth, easygoing ’70s soft rock and yacht-rock favorites.

Spotify playlist

  • “Summer Breeze” — Seals & Crofts
  • “Right Down the Line” — Gerry Rafferty
  • “Reminiscing” — Little River Band
  • “How Long” — Ace
  • “Baby Come Back” — Player
  • “Dreams” — Fleetwood Mac
  • “Lovely Day” — Bill Withers
  • “What a Fool Believes” — The Doobie Brothers
  • “Moonlight Feels Right” — Starbuck
  • “Brandy (You’re a Fine Girl)” — Looking Glass
  • “Cool Change” — Little River Band
  • “Sailing” — Christopher Cross

Turn up the music, pour something cold, and bring the pasta outside.

Summer is too short to spend the whole evening standing over the stove.

“Maybe reminiscing isn’t about wishing we could go back. Maybe it’s about remembering what mattered most, so we can choose it again today.”


Savor the Slow Summer Moments

This recipe is less about doing something elaborate and more about paying attention to what is already good.

Fresh corn. Warm tomatoes. Fragrant basil. Music playing through an open door. A chilled glass in your hand. People you love gathered around the table.

Take it easy.

Savor each bite.

Laugh more. Live more.

Chill out more.

Watch the sunset instead of watching the clock.

Save this easy summer spaghetti recipe for your next farmers market haul, backyard dinner, lake weekend, or relaxed evening with friends.

“You don’t have to travel far to find paradise. Sometimes it’s waiting on the back patio with spaghetti, basil, good friends, and a July sunset.”

Leave a comment and tell me: What song would you add to the ultimate slow-summer playlist?

Subscribe to The Artful Gourmet for more seasonal recipes, nostalgic food stories, cocktails, curated playlists, and inspiration for living—and eating—a little more deliciously.

“The older I get, the more I realize that luxury isn’t found in extravagance—it’s found in time. Time to cook, time to laugh, time to linger, and time to simply be.”


About the Author

Kristen Hess – Host, Author, Photographer and Creator of The Artful Gourmet

Kristen Hess is a Food Stylist, Photographer, Food Writer, Recipe Developer and the Creator of The Artful Gourmet Blog, Substack and Social Media — a food + lifestyle media brand rooted in fresh comfort food, visual artistry, and the stories we tell around the table. Find her on Substack, The Artful Gourmet Podcast and YouTube Channel and food blog at theartfulgourmet.com.

© 2026 Kristen Hess, The Artful Gourmet | New York | NYC | Remote | Worldwide

kristen@kristen-hess.com | 727-256-7162 |

Podcast | YouTube | Blog | Portfolio | Social | Substack

Summer Stone Fruit Salad with Feta, Mint & Toasted Hazelnuts

The Sweetest Part of Summer Is the One You Don’t Rush

There are only a few weeks each year when stone fruit tastes exactly the way it’s supposed to.

Peaches drip down your wrist after the first bite. Nectarines are floral and fragrant without needing anything added. Plums are sweet with just enough tartness to keep you reaching for another slice. It’s the kind of fruit that reminds you why eating seasonally is always worth the wait.

This is the season for farmers markets overflowing with baskets of colorful fruit, picnic blankets spread beneath shady trees, and dinners that begin a little later because no one is in a hurry.

Windows stay open. The evenings linger. Dessert often starts with whatever looks best in the fruit bowl.

That’s exactly where this salad was born.

Instead of baking the fruit into a pie or crisp, I wanted to let every juicy slice shine on its own. A handful of ripe peaches, nectarines, and plums become something unexpectedly elegant with just a few fresh ingredients.

Creamy feta adds a salty contrast, mint brings a burst of cool freshness, and toasted hazelnuts provide just enough crunch to make every bite interesting.

A light honey-citrus vinaigrette ties everything together without masking the natural sweetness of the fruit. It’s simple, vibrant, and feels like sunshine on a plate.

This is one of those recipes that works for almost any summer occasion. Serve it alongside grilled chicken or salmon, add it to a brunch spread, bring it to a backyard barbecue, or enjoy it as a light lunch with a crisp glass of rosé or sparkling water infused with citrus.

What I love most is how effortless it feels. No oven. Very little prep. Just beautiful ingredients at their seasonal peak doing what they do best.

Summer has a way of reminding us that the simplest meals are often the most memorable.

A bowl of ripe fruit shared outdoors, conversations that stretch into twilight,

and recipes that don’t ask for much beyond fresh ingredients and good company.

So while the peaches are perfectly ripe and the nectarines are overflowing at the market, savor every bite. Before long, autumn apples will take their place—but for now, this is the flavor of summer.


Summer Stone Fruit Salad with Feta, Mint & Toasted Hazelnuts

Prep Time: 15 minutes
Cook Time: 5 minutes
Total Time: 20 minutes
Serves: 6

Ingredients

For the Salad

2 ripe peaches, sliced

2 ripe nectarines, sliced

2 ripe plums, sliced

4 ounces crumbled feta cheese

¼ cup toasted hazelnuts, roughly chopped

¼ cup fresh mint leaves, torn

2 cups baby arugula or mixed spring greens (optional)

Freshly cracked black pepper

Honey Citrus Dressing

3 tablespoons extra virgin olive oil

1 tablespoon fresh lemon juice

1 tablespoon fresh orange juice

1 teaspoon honey

½ teaspoon Dijon mustard

Pinch of flaky sea salt

Freshly ground black pepper

Instructions

Toast the hazelnuts in a dry skillet over medium heat for 3–5 minutes until fragrant. Let cool, then roughly chop.

Whisk together the olive oil, lemon juice, orange juice, honey, Dijon mustard, salt, and pepper until smooth.

Arrange the sliced peaches, nectarines, and plums on a large serving platter or shallow bowl.

If using greens, scatter them underneath the fruit.

Sprinkle with crumbled feta, toasted hazelnuts, and fresh mint.

Drizzle lightly with the honey-citrus dressing just before serving.

Finish with freshly cracked black pepper and a few extra mint leaves.

Serve immediately while the fruit is at its freshest.

Tips for the Best Stone Fruit Salad

Choose fruit that’s ripe but still slightly firm so the slices hold their shape.

Toasting the hazelnuts deepens their flavor and adds wonderful crunch.

Substitute pistachios, almonds, or pecans if preferred.

Try creamy burrata or fresh mozzarella instead of feta for a richer version.

Add fresh basil or tarragon for another layer of summer flavor.


Serving Ideas

This salad pairs beautifully with:

Grilled chicken or shrimp

Cedar plank salmon

Prosciutto and crusty artisan bread

Quinoa or farro bowls

Sparkling rosé, Sauvignon Blanc, or a peach spritz

It’s equally at home on a casual weeknight table or as the centerpiece of a beautiful summer brunch.


More Summer Recipes You’ll Love

Strawberry Jam Galette

Grilled Corn & Zucchini Salad

Mediterranean Chickpea Power Bowls

Lemon Herb Roasted Chicken

Butter Garlic Linguine with Clams


I’d Love to Hear From You

What fruit says summer to you?

Are you reaching for peaches, nectarines, plums, cherries, or something else that’s only perfect for a few fleeting weeks each year? Let me know in the comments—I’d love to hear about your favorite seasonal traditions.

If you make this recipe…

Tag @ArtfulGourmet on social media so I can see your beautiful creations! Your photos always inspire me, and I love sharing your seasonal dishes with our community.

Happy cooking—and here’s to savoring every delicious bite of summer before the season slips away.


About the Author

Kristen Hess is a food stylist, photographer, recipe developer, and food writer behind The Artful Gourmet. Find more recipes, food stories, and culinary inspiration on her Substack.

You can find more inspiring food stories and cooking videos on The Artful Gourmet Podcast and YouTube channel.

Tags:

#SummerStoneFruitSalad #StoneFruit #PeachSeason #Nectarines #Plums #SummerSalad #FarmersMarket #EatSeasonal #FreshRecipes #HealthyEating #FetaCheese #Mint #Hazelnuts #SummerEntertaining #TheArtfulGourmet

Better to Fail Gloriously ✨

What Anthony Bourdain Taught Me About Taking Chances, Starting Over, and Trusting the Journey

“Sometimes the bravest thing you can do is simply try. — Anthony Bourdain

Chef Anthony Bourdain

There’s something about June that feels hopeful.

Maybe it’s the longer days, the farmers markets bursting with color, or the smell of freshly cut grass drifting through an open window.

Or maybe it’s because summer always feels like a fresh start.

A new season.

A chance to begin again.

Lately, I’ve been thinking a lot about Anthony Bourdain and one of my favorite quotes from him:

“It’s better to try and fail gloriously than to not try at all.”

Every time I hear those words, they stop me in my tracks.

Because if I’m being honest, there have been plenty of times in my life when I almost didn’t try.

Times when I questioned myself.

Times when I wondered if I was too old, too late, too inexperienced, or simply not good enough.

Moving to New York City.

Starting The Artful Gourmet.

Launching a podcast.

Creating YouTube videos.

Applying for dream jobs.

Pitching magazines.

Putting myself out there creatively.

None of it came with a guarantee.

And that’s exactly why it mattered.


Anthony Bourdain Wasn’t an Overnight Success

One of the things I admire most about Bourdain is that his success story wasn’t neat and tidy.

For years he worked in restaurant kitchens, often struggling, often wondering what was next.

Before he became a bestselling author, television host, and one of the most respected storytellers in the world, he was simply a chef trying to make a living.

Then, at age 44, everything changed.

His book Kitchen Confidential became a phenomenon and launched a second act that nobody could have predicted.

Imagine if he had talked himself out of writing it.

Imagine if he thought it was too late.

Imagine if he never took the chance.

The world would have missed out on one of its greatest voices.

And that’s a lesson worth remembering.

Just because something hasn’t happened yet doesn’t mean it never will.


Curiosity Is Greater Than Fear

One of Bourdain’s most famous quotes was:

“Travel isn’t always pretty. It isn’t always comfortable. Sometimes it hurts. It even breaks your heart. But that’s okay.”

I think that quote applies to life just as much as travel.

Life isn’t always comfortable.

Building a business isn’t comfortable.

Changing careers isn’t comfortable.

Starting over certainly isn’t comfortable.

But growth rarely happens inside our comfort zone.

The most meaningful things in my life have happened because I was willing to get uncomfortable.

Not because I knew exactly what would happen.

But because I was curious enough to find out.

Bourdain approached the world with curiosity.

He sat down with strangers.

He tried unfamiliar foods.

He visited places most tourists would never go.

He listened.

He learned.

He stayed open.

What if we approached our own lives the same way?

What if instead of focusing on what could go wrong, we focused on what we might discover?

Progress Isn’t Always Visible

One of the hardest things about pursuing a dream is that progress often happens quietly.

You put in the work.

You show up.

You keep creating.

And sometimes it feels like nothing is happening.

I’ve felt that way more times than I can count.

But then I look back and realize something important:

The growth was happening all along.

The connections.

The skills.

The experience.

The confidence.

The opportunities.

They were all building beneath the surface.

Much like a garden in spring.

The seeds don’t bloom overnight.

But they’re growing.

Even when you can’t see it.

That’s why I think summer is such a beautiful reminder to keep going.

Everything around us is proof that growth takes time.

Spring Vegetable Soup

A Bowl of Soup and a Fresh Start

Whenever the seasons change, I find myself drawn back to simple recipes.

Food has always been my way of slowing down and reconnecting with myself.

This Spring Minestrone Soup is exactly that.

Fresh peas.

Tender zucchini.

Green beans.

Herbs from the garden.

Bright lemon.

A little Parmesan.

Simple ingredients that come together to create something nourishing and comforting.

And honestly?

It feels like a metaphor for life.

A handful of small things can become something beautiful when given enough time.

The same is true for dreams.

Spring Vegetable Soup

Serving Size:
6
Time:
45 mins
Difficulty:
intermediate
  • 2 small carrots, diced
  • 2 celery stalks, diced
  • 1 yellow onion, chopped
  • 2 small zucchini, diced
  • 1 small butternut squash, diced
  • 1 bunch escarole, chopped
  • ½ cup peas, frozen
  • 1 tablespoon basil leaves, chopped
  • 1 tablespoon parsley, chopped ¼ cup Parmigiano Reggiano, grated
  • 6 tablespoons extra virgin olive oil, plus extra for bread and for drizzling on soup
  • 4 quarts chicken stock
  • 1 small ciabatta bread
  • Sea salt to taste
  • Pepper to taste

Directions

  1. Sauté carrots, celery and onions in a large stock pot over medium heat, for approximately 5 minutes, making sure that you stir the vegetables while they cook
  2. Add chicken stock to the pan. Increase the heat to high, cover the pan, bring to a boil and then reduce the heat to medium-low. Cook for 10-15 minutes.
  3. Slice bread into 1” thick slices. Brush slices with the additional olive oil on both sides and place in a sauté pan over low heat. Turn bread slices once and cook until they are golden brown. Place bread in a tray and lightly sprinkle with sea salt. Set aside.
  4. Add butternut squash to the stockpot and cook for 3 minutes.
  5. Add zucchini and peas to the stockpot and cook for 3 more minutes.
  6. Add escarole, basil, parsley, salt and pepper and cook for 4 additional minutes.
  7. Remove two ladles of soup from the stockpot and puree in a blender, then return the pureed soup to the pot (the puree will thicken the soup). Stir and cook for 1 minute, then turn off the heat.
  8. Add some grated cheese into the soup and stir. Ladle soup in individual bowls, drizzle oil and sprinkle additional cheese.

The same is true for healing.

The same is true for starting over.

Serve it on a warm June evening and make a toast to whatever new chapter you’re stepping into.

So Here’s Your Reminder

If you’ve been waiting for a sign to start something…

This is it.

Apply for the job. Launch the business. Write the article.

Start the podcast. Take the trip. Learn the skill.

Make the call. Send the email. Try.

Dreams take time.

Because as Anthony Bourdain reminded us:

“Your body is not a temple. It’s an amusement park. Enjoy the ride.”

Life is messy.

The path rarely unfolds exactly as planned.

But the alternative—never trying at all—is far worse.

Summer is here.

A new season is beginning.

And maybe your next chapter is waiting on the other side of one brave decision.

Here’s to fresh starts.

Here’s to curiosity.

Here’s to hope.

And here’s to failing gloriously.

Because sometimes that’s exactly how the best stories begin.

—

With gratitude,

Kristen

Continue the Journey

📖 Read the full companion essay on Substack

Subscribe for weekly stories about food, creativity, travel, mindset, entrepreneurship, and living a more artful life.

🎙️ Stay tuned for the companion podcast episode – coming soon

The Artful Gourmet Podcast is available on:

• Spotify
• Apple Podcasts
• Amazon Music
• iHeartRadio
• SoundCloud

Subscribe, leave a review, and share this episode with someone who might need a little encouragement today.

Because sometimes the biggest adventure starts with simply saying yes.

“The greatest risk isn’t failure. It’s never beginning.”

More recipes you might enjoy:

Gutsch’s Linguine & Clams

Rochester-Style Chicken French

Sweet & Spicy Shrimp Noodle Salad (Keto/Low carb)

Sign up for our Substack newsletter

Tune in to the Artful Gourmet Podcast

Subscribe to our YouTube channel

error

Enjoy this blog? Please spread the word :)

Verified by MonsterInsights